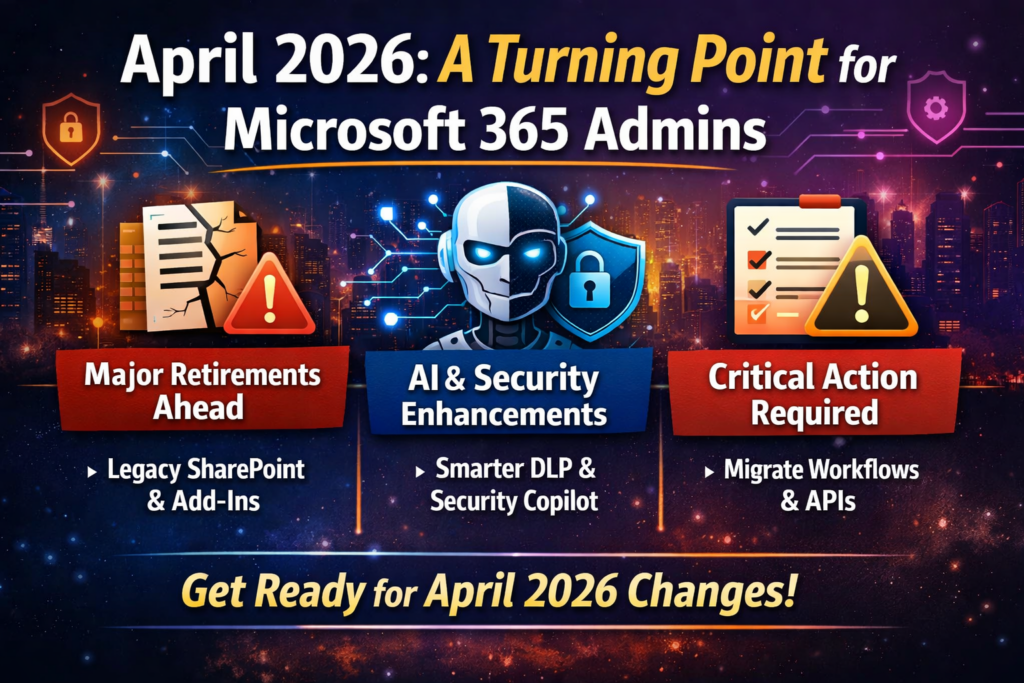
April 2026 is one of those months where Microsoft isn’t just shipping features—it’s forcing modernization.
We’re seeing a hard cutoff of legacy SharePoint components, deeper AI integration across security and compliance, and continued movement toward passwordless identity, cross-tenant collaboration, and centralized governance.
If you’re responsible for SharePoint, Teams, Purview, Entra ID, Defender, or Exchange, this is a month where ignoring Message Center updates will come back to bite you.
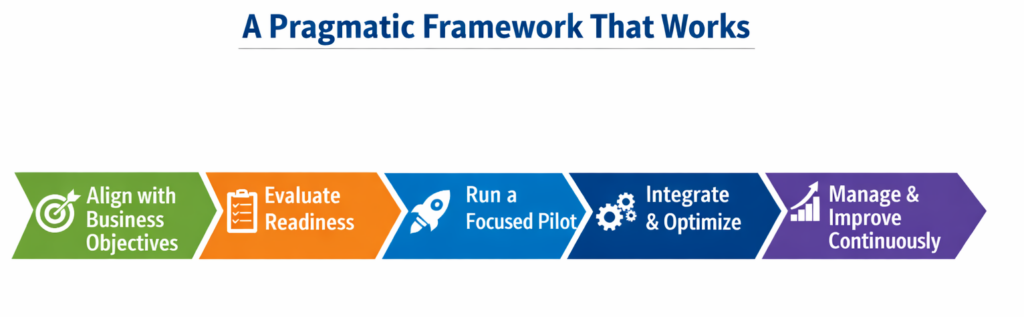
Let’s break it all down.
April 2026 at a Glance
| Category | Count |
|---|---|
| 🔻 Retirements | 7 |
| 🆕 New Features | 14 |
| 🔧 Enhancements | 6 |
| 🔄 Functionality Changes | 5 |
| ⚠️ Action Required | 4 |
Retirements: What’s Going Away
April is heavily focused on SharePoint legacy cleanup—this is Microsoft drawing a hard line between classic vs modern.
SharePoint Legacy Information Management Features
April 2026
Microsoft is retiring:
- Information Management Policies
- In-Place Records Management
- Deletion-only policies
These will no longer be accessible via UI or APIs.
What to do: Move to Microsoft Purview Data Lifecycle Management & Records Management
🔗 https://admin.cloud.microsoft/?#/MessageCenter/:/messages/MC1211579
SharePoint 2013 Workflows
April 2, 2026
No extensions. No exceptions. Fully retired.
What to do: Migrate to Power Automate
🔗 https://admin.microsoft.com/?ref=MessageCenter/:/messages/MC542767
SharePoint Add-Ins
April 2, 2026
Add-ins will stop working entirely, even for existing tenants.
What to do:
- Scan using Microsoft 365 Assessment Tool
- Move to SharePoint Framework (SPFx)
- Coordinate with vendors
🔗 https://admin.microsoft.com/?ref=MessageCenter/:/messages/MC693865
Azure ACS (Access Control Service)
April 2, 2026
Any SharePoint app using ACS authentication will break.
What to do: Migrate to Microsoft Entra ID
🔗 https://learn.microsoft.com/en-us/sharepoint/dev/sp-add-ins/retirement-announcement-for-azure-acs
Domain-Isolated SPFx Web Parts
April 2, 2026
These will render errors post-retirement.
What to do: Convert to standard SPFx web parts
Semi-Annual Enterprise Channel (Unmanaged Devices)
April 6–11, 2026
- No longer selectable for new installs
- Existing devices continue—but can’t revert if changed
🔗 https://admin.cloud.microsoft/#/MessageCenter/:/messages/MC1249427
Viva Engage Live Events (Teams Live Events)
April 15, 2026
No new events can be scheduled.
What to do: Move to Teams Town Halls
🔗 https://admin.cloud.microsoft/?#/MessageCenter/:/messages/MC1227085
New Features: Worth the Hype
April isn’t just cleanup—it’s also serious capability expansion, especially around AI, identity, and cross-tenant scenarios.
Rule-Based App Management in Teams
Control third-party apps using:
- Publisher metadata
- Permission scopes
- Org-wide rules
🔗 https://admin.cloud.microsoft/?#/MessageCenter/:/messages/MC1085133
Teams Express Voice Enrollment
Users can register voice profiles during meetings.
Enables:
- Voice isolation
- Speaker recognition
- Copilot meeting insights
🔗 https://admin.cloud.microsoft/?#/MessageCenter/:/messages/MC1197146
Multiple Phone Numbers per User (Teams Phone)
Up to 10 numbers per user.
Huge for:
- Contact centers
- Multi-region users
- Exec assistants
🔗 https://admin.cloud.microsoft/#/MessageCenter/:/messages/MC1253752
Passkeys in Entra Registration Campaigns
Admins can now push passkey enrollment instead of Authenticator.
Microsoft may auto-switch tenants to passkeys when ready.
🔗 https://admin.cloud.microsoft/?#/MessageCenter/:/messages/MC1253746
Cross-Tenant Intune MAM in Edge
Protect corporate data without device enrollment.
Perfect for:
- Contractors
- Mergers
- Partner access
🔗 https://admin.cloud.microsoft/#/MessageCenter/:/messages/MC1255405
AI-Powered DLP Alert Summaries (Defender XDR)
Purview Triage Agent now:
- Summarizes alerts
- Categorizes risk
- Speeds investigations
🔗 https://www.microsoft.com/en-US/microsoft-365/roadmap?searchterms=558860
Endpoint DLP Device Health Dashboard
Monitor:
- Device connectivity
- Policy readiness
- Compliance gaps
🔗 https://www.microsoft.com/en-in/microsoft-365/roadmap?id=559267
Teams Protection Reports
Admins can review:
- Suspicious messages
- Suspicious calls
- User-reported threats
🔗 https://admin.cloud.microsoft/?#/MessageCenter/:/messages/MC1227625
Advanced Auto-Labeling in Purview
New capabilities:
- Override manual labels
- Automatically remove outdated labels
🔗 https://admin.cloud.microsoft/#/MessageCenter/:/messages/MC1249431
Security Copilot Included in M365 E5
Big one.
- 400 SCUs per 1,000 users
- Integrated across Defender, Entra, Purview
- Supports custom agents
🔗 https://admin.cloud.microsoft/?#/MessageCenter/:/messages/MC1261596
OneDrive Offboarding Improvements
Admins now get:
- Better visibility
- Bulk transfer tools
- “Move and keep sharing”
🔗 https://admin.cloud.microsoft/?#/MessageCenter/:/messages/MC1164381
New SharePoint Experience (AI-Powered)
Includes:
- Discover / Publish / Build navigation
- Copilot integration
- Improved UX
🔗 https://admin.cloud.microsoft/?#/MessageCenter/:/messages/MC1240699
Enhancements
Teams & Places Licensing Expansion
More features now included in core licenses:
- Town halls (up to 3,000 attendees)
- Places Finder
- Space analytics
PAYG for AI Risk Detection (Purview)
AI-related IRM indicators now billed via Azure subscription (PAYG).
🔗 https://admin.cloud.microsoft/#/MessageCenter/:/messages/MC1242784
Authenticator Jailbreak Detection
Credentials wiped automatically on compromised devices.
🔗 https://admin.cloud.microsoft/?#/MessageCenter/:/messages/MC1179154
Triage Agent Enhancements
Now supports:
- Metadata-based rules
- Non-content alerts
- Dedicated agent identity
🔗 https://www.microsoft.com/en-in/microsoft-365/roadmap?id=557552
Advanced Label Targeting
Supports:
- Dynamic groups
- Non-mail-enabled groups
- Exclusions
🔗 https://www.microsoft.com/en-in/microsoft-365/roadmap?id=558685
Cross-Tenant Group Sync
Security groups can now sync across tenants.
🔗 https://admin.cloud.microsoft/?#/MessageCenter/:/messages/MC1198077
Existing Functionality Changes
Teams Device Management → Pro Management Portal
Device management is moving out of TAC.
🔗 https://admin.cloud.microsoft/?#/MessageCenter/:/messages/MC1227622
Custom OneDrive Sync Folder Names
Admins can shorten folder names to avoid path limits.
🔗 https://www.microsoft.com/en-in/microsoft-365/roadmap?id=557562
Always-On Endpoint DLP Diagnostics
Enabled by default.
Improves troubleshooting but increases visibility requirements.
🔗 https://admin.cloud.microsoft/#/MessageCenter/:/messages/MC1246001
eDiscovery Review Sets Increased
From 20 → 100 per case
🔗 https://www.microsoft.com/en-in/microsoft-365/roadmap?id=558858
DLP Policy Tips & Email Notifications Decoupled
Finally—independent control.
🔗 https://admin.cloud.microsoft/?#/MessageCenter/:/messages/MC791114
Viva Engage Domain Migration
Final move from:
- @yammer.com → @engage.mail.microsoft
🔗 https://admin.cloud.microsoft/#/MessageCenter/:/messages/MC1251200
Action Required
These are the ones you cannot ignore.
Message Trace API Retirement
April 8, 2026
👉 Move to Microsoft Graph API
🔗 https://admin.cloud.microsoft/?#/MessageCenter/:/messages/MC1221939
Outlook Usage Report Removed (EAC)
April 14, 2026
Use Microsoft 365 Admin Center reports instead
🔗 https://admin.cloud.microsoft/?#/MessageCenter/:/messages/MC1230889
Teams Office 365 Connectors Retirement
April 30, 2026
Move to Workflows (webhooks)
Defender iOS 16 Support Ends
April 30, 2026
Upgrade devices to iOS 17+
🔗 https://admin.cloud.microsoft/#/MessageCenter/:/messages/MC1245219
Final Thoughts
April 2026 sends a very clear message:
Legacy is no longer tolerated. AI + Security + Governance is the future.
Your priorities this month:
✔ Migrate SharePoint legacy components
✔ Review authentication (passkeys, ACS removal)
✔ Update automation (Graph API shift)
✔ Prepare for AI-driven security workflows
✔ Clean up Teams integrations (connectors, devices)
Because in Microsoft 365 today…
If you don’t modernize proactively, Microsoft will do it for you—on their timeline.
Thank you for stopping by. ✌️