Microsoft 365 Admins: July 2025 Brings Major Retirements, Game-Changing Features & Critical Actions – Here’s Your Definitive Guide

Alright admins, deep breath. July is rolling in hot with some of the biggest Microsoft 365 updates, retirements, and must-do tasks of the year. Whether you’re wrangling SharePoint, securing sensitive data, or prepping Teams for your org, this month has something that will definitely land on your radar and maybe on your weekend schedule if you don’t plan ahead.

Consider this your field guide to navigate July 2025 without missing a beat.

July at a Glance

CategoryCount
🔻 Retirements7
🆕 New Features11
🔧 Enhancements8
🔄 Changes in Functionality5
⚠️ Action Needed7

Retirements: Say Goodbye to These

  1. Microsoft 365 Business Premium & Office 365 E1 Grants for Non-Profits
    Retiring July 1, 2025 — Non-profits must move to Microsoft 365 Business Basic grants or discounted plans.
    ➡️ Learn more
  2. Viva Engage Private Content Mode
    Retiring June 30, 2025 — All tenants will lose access to Private Content Mode across Viva Engage, Teams, and Outlook.
    ➡️ Details
  3. Monitor Action in Defender Safe Attachments Policies
    Gone Early-July 2025 — Monitor mode will be switched to Block; evaluate Safe Attachments settings now.
    ➡️ More info
  4. SharePoint Alerts
    Phased retirement starts July 2025 — Power Automate or SharePoint Rules recommended as replacements.
    ➡️ Guidance
  5. OneNote .DOC Export Option
    Ending July 28, 2025 — Shift to modern formats like .docx now.
    ➡️ Message Center
  6. Organization Data Type in Excel
    Retiring July 31, 2025 — Switch to Get Data > From Power BI or custom data types via add-ins.
    ➡️ Learn more
  7. TLS 1.1 & Older on Fabric Platform
    Deprecated July 31, 2025 — Update systems to TLS 1.2+ to avoid data connectivity issues.
    ➡️ Blog post

New Features: Hot Off the Press

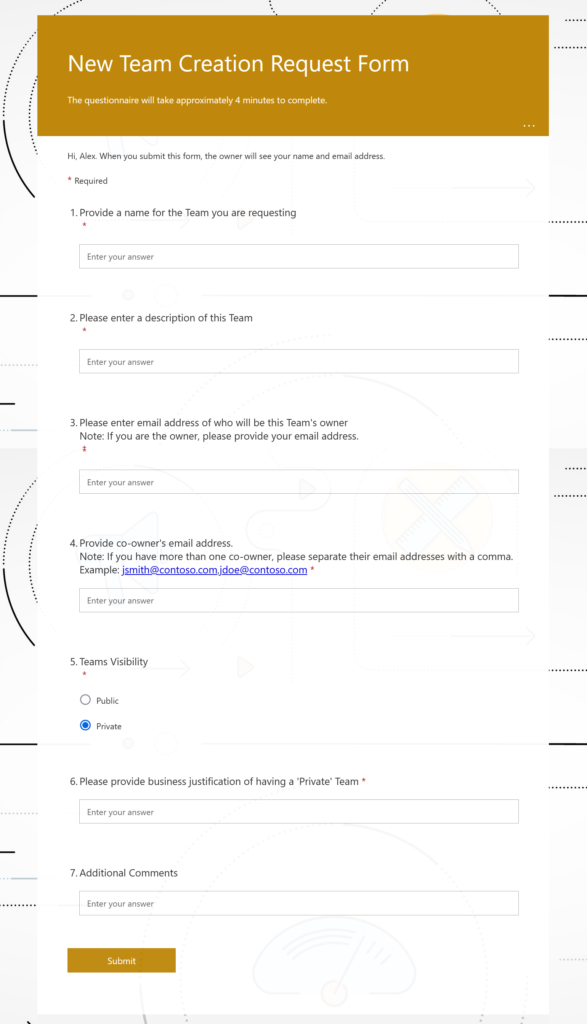
  • Native Forms in SharePoint Libraries — Build forms directly inside document libraries for smoother file uploads.
    ➡️ Roadmap
  • Cold File Scanning for Sensitive Info — Microsoft Purview now scans old, untouched files in SharePoint/OneDrive.
    ➡️ Details
  • Unit-Level Backup Deletion in Microsoft 365 Backup — Delete backups for specific OneDrive, SharePoint, or Exchange units.
    ➡️ Roadmap
  • External Chat File Attachments in Teams — Finally attach files in 1:1 and group chats with external users.
    ➡️ Message Center
  • Detailed Audit Logs for Screen Sharing in Teams — Gain full transparency over Give/Take Control and sharing events.
    ➡️ Read more
  • Facilitator Agent in Teams — Automated meeting summaries and real-time note collaboration (Copilot license required).
    ➡️ Details
  • Multi-Admin Notifications for M365 Backup — Configure centralized alerts for backup events.
    ➡️ Roadmap
  • AI Posture Management in Purview — Manage security of AI activity across Copilot and other AI apps.
    ➡️ Message Center
  • Drag & Drop Between Accounts in New Outlook — Attach emails/files across accounts or shared mailboxes seamlessly.
    ➡️ Details
  • Network-Level Detection of AI Activity in Insider Risk Management — Identify sensitive data shared with cloud/AI apps.
    ➡️ Message Center
  • Scoped AD Domain Access in Defender for Identity — Apply RBAC at the AD domain level for tighter security.
    ➡️ Details

Enhancements: Small Changes, Big Impact

  • Attachment Previews in Purview Content Explorer — View flagged attachments directly in the console.
    ➡️ Details
  • Recording & Transcription by Default in Teams Calls — Enabled by default for new tenants and global policies.
    ➡️ More info
  • New Outlook: S/MIME Signature Inheritance Setting — Control signature behavior in replies via NoSignOnReply.
    ➡️ Message Center
  • User Activity Timeline in Purview Compliance Portal — See flagged user interactions on a single timeline.
    ➡️ Details
  • IRM + Data Security Investigation Integration — Launch investigations faster with combined tools.
    ➡️ Message Center
  • Secure by Default Settings in Microsoft 365 — Block legacy auth and enforce admin consent by default.
    ➡️ Details
  • Best Practice Dashboard Expansion in Teams Admin Center — Monitor new meeting-related issues.
    ➡️ Read more
  • On-Demand File Classification — Discover/classify old files in SharePoint/OneDrive (pay-as-you-go).
    ➡️ Details

Existing Functionality Changes: Adjust Your Ops

  • Teams Live Event Assistance Becomes Paid — LEAP moves under Unified as a paid service on July 1, 2025.
    ➡️ More info
  • Insider Risk Policy Limits Increased — Up to 100 total active policies across templates.
    ➡️ Roadmap
  • Outlook Blocks More File Types — .library-ms and .search-ms added to the blocked list.
    ➡️ Details
  • Improved B2B Guest Sign-In — Guests redirected to their home org’s sign-in page for clarity.
    ➡️ Message Center
  • Unified Teams App Management Paused — Rollout delay with updates expected by late July.
    ➡️ Details

Action Needed: Don’t Procrastinate

  • Azure AD PowerShell Retirement After July 1 — Migrate scripts to Microsoft Graph or Entra PowerShell ASAP.
    ➡️ Details
  • DNS Provision Change — Update automation scripts to retrieve MX records via Graph API to avoid mail flow issues.
    ➡️ Message Center
  • Classic Teams App Retirement — All users must move to New Teams or web app by July 1, 2025.
    ➡️ Details
  • Reshare SharePoint Content Post-Entra B2B — External users lose access to pre-integration OTP shares. Reshare content now.
    ➡️ Message Center
  • Teams Android Devices Must Update Apps — Move to supported versions by Dec 31, 2025, to enable modern auth.
    ➡️ Details
  • Graph Beta API Permissions Update — Adjust apps to use new permissions for device management by July 31, 2025.
    ➡️ Message Center

Final Thoughts

July 2025 is a make-or-break month for Microsoft 365 admins. There’s a mountain of changes, but staying ahead means no late-night incidents, no broken workflows, and definitely no panicked calls from leadership.

Bookmark this guide, share it with your team, and start planning now. Because in IT, the only thing worse than unexpected downtime is knowing you could’ve avoided it.

Thank you for stopping by. ✌️

Teams – How to mask phone numbers in meetings

The default setting for all organizations using Teams is the phone numbers are masked from the participants outside of the organization. The phone numbers are fully displayed to internal participants.

Based on certain uses cases and added privacy, Teams administrators have the ability to choose how the participants’ phone numbers appear in meetings. Options available,

  • Phone numbers are not masked, which makes it visible to everyone in the meeting
  • Phone numbers are masked for everyone except the organizer
  • Phone numbers are masked only from external participants

Using PowerShell to define phone-number masking

Use the MaskPstnNumbersType parameter of the Set-CsOnlineDialInConferencingTenantSettings cmdlet to change PSTN masking setting,

To disable phone masking,

Set-CsOnlineDialInConferencingTenantSettings -MaskPstnNumbersType "NoMasking"

To mask phone numbers from all participants in the meeting, except the organizer,

Set-CsOnlineDialInConferencingTenantSettings -MaskPstnNumbersType "MaskedForAllUsers"

To mask phone numbers from external participants only, will be visible to all internal participants,

Set-CsOnlineDialInConferencingTenantSettings -MaskPstnNumbersType "MaskedForExternalUsers"

Thank you for stopping by. ✌

Power Automate – Provision Teams with an Approval Workflow – Part II

Please checkout Part I if you landed directly on this page.

This post is a continuation how to Forms and Power Automate can be used to create an approval workflow to automatically provision a Team. We will see the user’s experience here.

When user submits the Microsoft Form, the approver gets an email.

User’s responses

In my scenario, I’m using a service account called ‘Teams admin’ and I can see the email as below,

Email received by approver

In the Outlook.office.com, the approver can directly click on ‘Approve’ or ‘Reject’ and also add comments if they wish to.

Approver submitting approval in email

Once approved, the rest of the flow runs and at the end the user gets an email confirming the Team creation.

User receiving confirmation email

User can also launch Teams and check that he is part of the new Team that was created.

Created Team shows up in user’s Teams
Requested owners

As you can see the ‘Teams admin’ service account is also a owner in the Team it created. This might become an issue during compliance audits and this can be fixed by adding a step in Power Automate with a HTTP request.

The HTTP request option is a premium feature and hence no screenshot here.

DELETE https://graph.microsoft.com/v1.0/groups/{id}/owners/{id}/$ref

This is a short post as most of the inner workings of this process was covered in the earlier one.

Thank you for stopping by. ✌

Power Automate – Provision Teams with an Approval Workflow – Part I

Teams has become more popular in the recent work from home era and the list of features it offers are great and no doubt about it. Microsoft keeps adding more appealing features for remote and users working from office locations. As more companies adopt Teams for its collaboration features which help increase productivity, no one wants to lose control of the M365 environment because of what is bein allowed to be created or provisioned by the users.

In this post, I’ll go over a on a high-level of what is a Team and what happens when Team is created. Also I’ll go over steps which I recently used to implement a Teams provisioning with an approval workflow process using Microsoft Forms and Power Automate.

What is a Team?

In Microsoft Teams, Teams are groups of people brought together for work, projects, or common interests.
Teams are made up of two types of channels,

  • Standard
    • Is open for all members and anything posted is searchable by others
  • Private
    • Focused, private conversations with a specific audience. Example: Specific audience for a particular subject
    • Files shared are only viewable by the members of the channel and are stored in a separate SharePoint site from the rest of the team’s files
  • Shared channels
    • For collaborating with people inside and outside your team or organization
    • Only team owners can create shared channels
      • Only shared channel owners can add members or share the channel with a team
    • Can’t be changed to standard or private channel and vice versa

What happens when a Team is created?

When a Team is created, the following also gets provisioned,

  • A corresponding O365 group
    • Owner of the O365 Group is the Owner of the team
    • The members of the Group are the Members of the team, as added by the person who created the Team
  • An Exchange mailbox with a Group email address
    • Will appear in everyone’s Outlook client
  • A new SharePoint site is created
    • Sharing files via Teams leads to data being stored either in SharePoint or OneDrive
      • Files uploaded to a Teams channel are automatically saved to the Team’s SharePoint folder
      • Files uploaded in a 1:1 or group chat are stored in the OneDrive folder and shared only with colleagues in that conversation
  • A connection to OneNote

Team Creation Options

As I put together above, it is easy to see that adding a Team might seem like a simple task and it is but from a data security and governance point of view, it can easily get out of hands if controls are not put it place. When you role out Microsoft Teams, you get a few options on how to handle Team creation.

  • Allow all users to create Teams
    • This will allow users to create their own Teams without any restrictions. This is the easiest option but easy to lose control and will eventually add more burden on the IT admins
  • Block all users from creating Teams
    • This is the most restrictive option and users have to reach out to IT to create Teams. There is also a risk of users moving onto more accessible solutions that don’t take compliance and security policies seriously and ending up shadow IT in the process
  • Limit to a certain security group
    • With this option, we can limit a certain group of users to be able to create groups/Teams. I like this idea and to add to it, I’ll have someone from the compliance team in charge of this if that was an option. I’ve covered how to limit a certain group in an earlier post

That being said, IMO it is best to have an approval workflow and a controlled provisioning process for Teams creation. This will help any organization to prevent sprawl, uncontrollable growth, help IT admins reduce some unnecessary work and more importantly allow a controlled adoption of Microsoft Teams while helpdesk and IT admins catchup.

Teams Provisioning and Approval Workflow with Power Automate

I’ll detail the steps needed to create a provisioning workflow with the native capabilities in Forms and Power Automate.

Components involved in creating this workflow,

  • Microsoft Forms
  • Power Automate
  • SharePoint (optional)

I’ve put together a flowchart of the thought process,

Some considerations to keep in mind,

  • It is better to create the Microsoft Forms and Power Automate Flow using a service account which has a mailbox enabled and permissions within Teams to create Team. This is usually a good idea because, if this was created under a specific Teams administrator account and if he or she wins a lottery and figures not to show up for work anymore, this process can go on without disruption and is one less thing for you to worry while disabling the administrator’s account.😊

In my scenario, I’m using a service account to setup the components needed.

Microsoft Forms

Microsoft Forms is a great product and I love the simplicity. With enough time and effort, I think organizations can leverage Forms to get rid of most of what their users are doing on paper forms.

I’ve created a simple form titled ‘New Team Creation Request Form’ to collect the information needed to create a Team. You can also use SharePoint instead of Forms but this approach is much easier.

I’ve added branching to the 6th question.

  • Logic behind 6th question: If private Team, provide justification. If not, go to question 8

If you’d like to get fancy, there is PowerApps which will require more effort and depends on your knowledge into it.

Power Automate

  1. Open Power Automate
  2. Click My Flows
  3. Click on New Flow and Select Automated cloud flow
  4. Click Skip on the Build an automated cloud flow pop-up window
automated cloud flow
  1. Search for ‘forms’ and select Microsoft Forms and then When a new response is submitted

Note: It is good practice to rename every step while you create it with the purpose of what that step does.

When a new response is submitted
  1. As I created the Form with the same account, it shows up in the drop-down
  1. Click New Step, Microsoft Forms –> Get response details
    • This action retrieves a form response
  2. Select the Form in Form Id and in Response Id, click Add dynamic content and select Response Id
  1. Add step, search for Azure AD and in actions select Get user
    • The next two steps are to get information about the requestor and the owner from Azure AD
    • This is useful while sending email to the approver, these values can be used
  1. User Id or Principal Name –> Add dynamic content and select Responder’s Email from the form
  2. Similarly in the second step, User Id or Principal Name –> Add dynamic content and select ‘Please enter email address of who will be this Team’s owner’ in under ‘Get response details’
  1. In the next step, I’m initializing a variable called varCoOwners. And in the step after, I’m using the compose action to do a split based on comma
    • The reason why we need these two steps is, in the Form we have an entry to input co-owners and if more than one co-owner email address is entered by the user comma-separated, the entire value is considered a string
    • Power Automate is looking for an array
    • The split function breaks down a string into an array of strings using a delimiter we define
      • We are going to use comma
split(variables('varCoOwners'),',')
Compose split
  1. Next step, add Start and wait for an approval
    • This starts an automated approval process and then waits for it to complete. The approval is cancelable
    • I’m choosing the Approval type as Approve/Reject – First to respond
Start and wait for an approval
  1. Optional Step. Updating a SharePoint list for tracking.
SharePoint list
SharePoint – Create item
Update SharePoint
  1. We add a condition to see if the request was approved
    • We add condition control which performs one or more tasks only if a condition is true or false
    • Outcome = Approve
Add control – Condition
Outcome = Approve
  1. Continuing from the previous condition step,
    • If yes –> We create a Team, add Team owner, add Team co-owner(s) and send an email to the requestor
      • Create a Team based on submitted Form
      • Add Team Owner
        • Team = New Team ID
        • A user AAD ID for the user to add to a team = UPN from ‘Get Team owner’s info’ Azure AD step
        • Should the newly added user be an owner of the team = Yes
      • Add Team Co-owners
        • Search Control -> Apply to each -> In Select an output from previous steps, select Output of compose step
        • Azure AD -> Get User ->In User Id or Principal Name, select Current item
        • Teams -> Add a member to a team
          • Team = New Team ID
          • A user AAD ID for the user to add to a team = UPN from ‘Get Co-Owners’ Azure AD step
          • Should the newly added user be an owner of the team = Yes
    • If no –> We send an email to the requestor with comments from the approver

See below on how the steps are done,

If yes and If no
  1. Continuation on ‘If yes’ after ‘Add co-owners to team’ step,
Send ‘request approved’ email to requestor

Final Automated Flow

This is how the final automated flow looks,

New Teams Request Workflow

I added a step to remove a member from group. This is for removing the service account which created the Team from being a member. As Teams are in turn Azure AD security groups, I used a remove member from group action to remove the service account. I noticed that this step failing often and the reason was the Azure AD group was not found and hence I added a delay of a 3 minutes and then run the action.

This might seem a little too overwhelming at first glance but once you understand the power of Microsoft Forms, Power Automate, SharePoint and the potential it brings to organizations, you’ll be complaining about what more features you’d like to have in this in no time.

I’ll cover the user experience of this process in a following post.

Thank you for stopping by.✌

Teams – Reports with PowerShell – Updated

It is important to know about the current state of your Teams rollout and this is one of those which can easily get out of control in a blink of an eye. I wanted to understand and determine the current Teams state in a tenant I manage and I had to create reports to present.

The portal does give a few options to export the data but I decided to take a look at the option the Teams PowerShell module offers. I spent some time on creating a script that will output these five reports,

  • All Teams data with Channel type, Channel count, Channel count with types, Teams member count and owners count
  • Teams users data with role information
  • Channel information for each Teams with Channel types
  • Channel user information with user information and role
  • Permissions on each Teams

This report can also be scheduled to run if you already use a mechanism to store your credentials securely and pass it on to your PS scripts.

I use the ImportExcel PowerShell module for this script,

Install-Module -Name ImportExcel

Before proceeding further, make sure you have the Teams PowerShell module installed. You’ll need to run this script with Teams Administrator role.

$TeamsCred = Get-Credential
Connect-MicrosoftTeams -credential $TeamsCred

$xlsxPath = ".\Teams-Report_$((Get-Date).ToString("MMddyyyy")).xlsx"

Get-Team | Select GroupId,DisplayName,MailNickName,Archived,Visibility,Description | foreach {
        $ID = $_.GroupId
        $TeamName = $_.DisplayName
        $NickName = $_.MailNickName
        $Archived = $_.Archived
        $visibility = $_.Visibility
        $Description = $_.Description
        $ch = Get-TeamChannel -GroupId $ID
        $ChannelCount = $ch.count
        $TeamUser = Get-TeamUser -GroupId $ID
        $TeamMemberCount = $TeamUser.Count
        $TeamOwnerCount = ($TeamUser | ?{$_.role -eq "owner"}).count
        $stdchannelCount = ($ch | ?{$_.MembershipType -eq "Standard"}).count
        $privchannelCount = ($ch | ?{$_.MembershipType -eq "Private"}).count

        [PSCustomObject]@{
                  'Teams Name'=$TeamName;
                  'Teams MailNickName'=$NickName;
                  'Teams Type'=$Visibility;
                  'Description'=$Description;
                  'Archived?'=$Archived;
                  'Channel Count'=$ChannelCount;
                  'Standard Channel Count'=$stdchannelCount;
                  'Private Channel Count'=$privchannelCount;
                  'Team Members Count'=$TeamMemberCount;
                  'Team Owners Count'=$TeamOwnerCount} | Export-Excel -Path $xlsxPath -WorksheetName "All Teams Report" -TableStyle Medium16 -AutoSize -Append
}

Get-Team | foreach {
    $ID = $_.GroupId;
    $TeamName = $_.DisplayName;
    $NickName = $_.MailNickName;
    Get-TeamUser -GroupId $ID | Select User,Name,Role |
    Foreach {
		[PSCustomObject]@{
			'Teams ID' = $ID;
			'Teams Name' = $TeamName;
			'Teams MailNickName' = $NickName;
                        'User UPN' = $_.User;
			'User DisplayName' = $_.Name;
			'Role' = $_.Role
		}
    }
} | Export-Excel -Path $xlsxPath -WorksheetName "Teams_users" -TableStyle Medium16 -AutoSize

Get-Team | Foreach {
    $ID = $_.GroupId;
    $TeamName = $_.DisplayName;
    $NickName = $_.MailNickName;
    Get-TeamChannel -GroupId $ID | Select Id, DisplayName, MembershipType |
    Foreach {
		[PSCustomObject]@{
			'Teams ID' = $ID;
			'Teams Name' = $TeamName;
			'Teams MailNickName' = $NickName;
			'Channel Name' = $_.DisplayName;
			'Channel Type' = $_.MembershipType
		}
	}
} | Export-Excel -Path $xlsxPath -WorksheetName "Channels" -TableStyle Medium16  -AutoSize

Get-Team | Foreach {
    $ID = $_.GroupId;
    $TeamName = $_.DisplayName;
    $NickName = $_.MailNickName;
    Get-TeamChannel -GroupId $ID | Select DisplayName | 
            Foreach {
            $chName = $_.DisplayName;
                Get-TeamChannelUser -GroupId $ID -DisplayName $chName | Select User,Name,Role |
                    Foreach {
		                [PSCustomObject]@{
			                'Teams Name' = $TeamName;
			                'Channel Name' = $chName;
                                        'User UPN' = $_.User;
                                        'User DisplayName' = $_.Name;
                                        'User Role' = $_.Role
		    }
        }
    }
} | Export-Excel -Path $xlsxPath -WorksheetName "Channel_Users" -TableStyle Medium16  -AutoSize

Get-Team | foreach {
   $nickName = $_.MailNickName
   Get-Team -MailNickName $nickName | Select -Property * |
	Foreach {
		[PSCustomObject]@{
			'Teams ID' = $_.GroupId;
			'Teams Display Name' = $_.DisplayName;
                        'Teams MailNickName' = $nickName;
                        'Giphy Allowed?' = $_.AllowGiphy;
                        'Giphy Content Rating' = $_.GiphyContentRating;
                        'Allow Stickers And Memes' = $_.AllowStickersAndMemes;
                        'Allow Custom Memes' = $_.AllowCustomMemes;
                        'Allow Guest to Create & Update Channels' = $_.AllowGuestCreateUpdateChannels;
                        'Allow Guest to Delete Channels' = $_.AllowGuestDeleteChannels;
                        'Allow Members to Create & Update Channels' = $_.AllowCreateUpdateChannels;
                        'Allow Members to Create Private Channels' = $_.AllowCreatePrivateChannels;
                        'Allow Members to Delete Channels' = $_.AllowDeleteChannels;
                        'Allow Members to Add & Remove Apps'= $_.AllowAddRemoveApps;
                        'Allow Members to Create Update Remove tabs' = $_.AllowCreateUpdateRemoveTabs;
                        'Allow Members to Create Update Remove Connectors' = $_.AllowCreateUpdateRemoveConnectors;
                        'Allow Members to Edit Messages' = $_.AllowUserEditMessages;
                        'Allow Members to Delete Messages' = $_.AllowUserDeleteMessages;
                        'Allow Owner to Delete Messages' = $_.AllowOwnerDeleteMessages;
                        'Allow Team Mentions' = $_.AllowTeamMentions;
                        'Allow Channel Mentions' = $_.AllowChannelMentions;
                        'Show In Teams Search & Suggestions' = $_.ShowInTeamsSearchAndSuggestions
		}
    }
} | Export-Excel -Path $xlsxPath -WorksheetName "Teams_permissions" -TableStyle Medium16 -AutoSize

Hope this script was helpful in determining the current state of your Teams deployment.

Thank you for stopping by. ✌