In this post I will go over the steps required to implement Azure AD SSO integration with Salesforce. With Salesforce and Azure AD SSO integration in place, it allows:
- Users to sign-in to Salesforce with their Azure AD account
- Administrators to control who can access Salesforce
- Administrators can also manage users in one location – Azure AD admin center
Salesforce supports,
- Service Provider-Initiated Login
- Just In Time user provisioning – If a user doesn’t already exist, a new one is created in Salesforce when a login is attempted
- Automated user provisioning and deprovisioning (This is covered in a later post)
- Configuring the mobile application with Azure AD SSO

Table of Contents
In Azure AD add Salesforce to Enterprise Applications
To configure this integration, first step is to add Salesforce from the gallery to your list of managed SaaS apps. Below are the steps,
- Login to Azure AD Admin Center(https://aad.portal.azure.com) and click on the Enterprise applications tab
- To add new application, Click New application
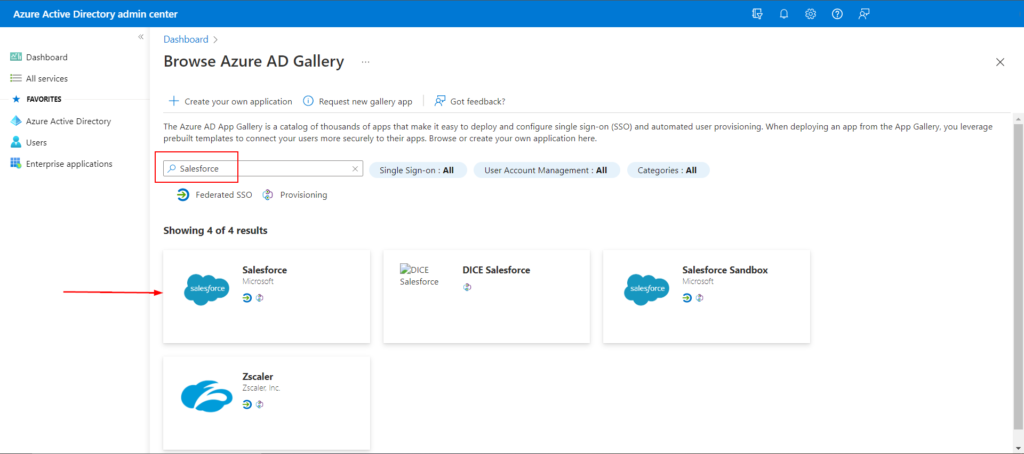
- In the Browse Azure AD gallery section, enter ‘Salesforce’ in the search box
- Select Salesforce and you can name it to differentiate from development to production instance with a prefix but in this scenario, I’ll leave it as default as in screenshot below. Click Create
- It can take a few seconds for the app to be added

Configure Azure AD SSO
Below steps details how to enable SSO in Azure AD portal for the Salesforce application,
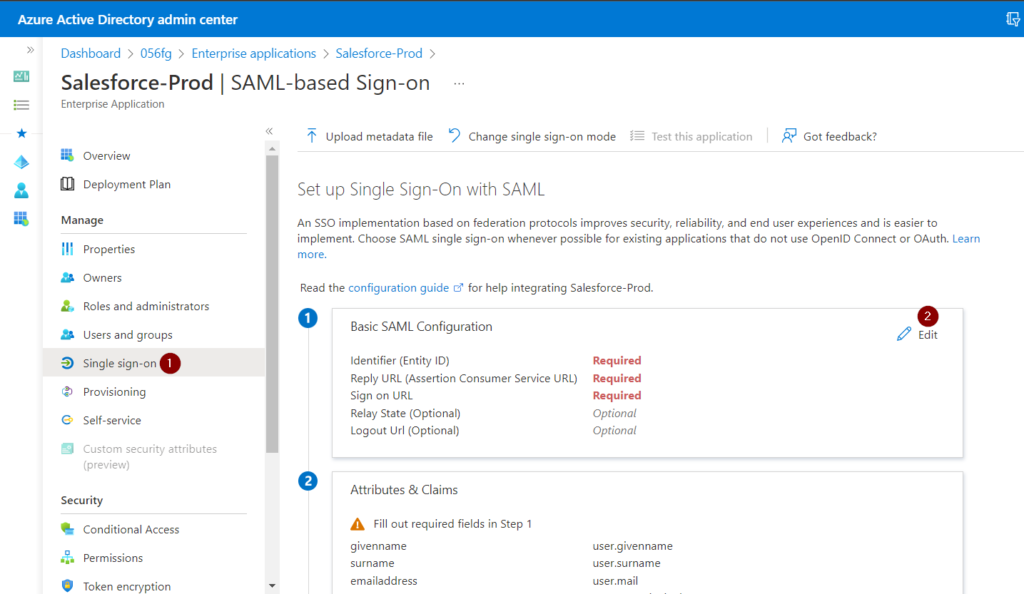
- On the Salesforce application page in Azure AD,
- Click on SAML-based Sign-on tab under the Manage section
- Select SAML
- Select the edit icon in the Basic SAML configuration section
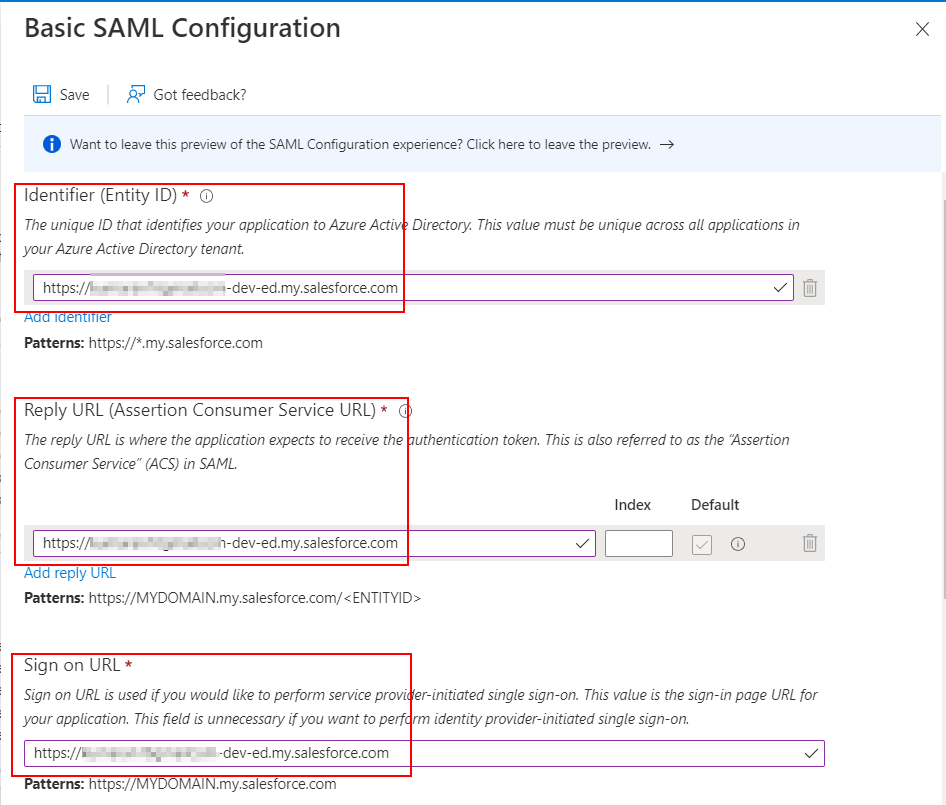
- Your Salesforce administrator should know this information and if not, you can contact Salesforce support. But in general, this information is easy to figure out. I’ve mentioned the format of these URLs below. and I have used my own instance’s URL in the screenshot.
| Enterprise account | Developer account | |
| Identifier (Entity ID) | https://{your-subdomain}.my.salesforce.com | https://{your-subdomain}-dev-ed.my.salesforce.com |
| Reply URL | https://{your-subdomain}.my.salesforce.com | https://{your-subdomain}-dev-ed.my.salesforce.com |
| Sign-on URL | https://{your-subdomain}.my.salesforce.com | https://{your-subdomain}-dev-ed.my.salesforce.com |
Note: Recently, Salesforce has started forcing the lightning experience for the salesforce orgs. The URL is redirected to .lightning.force.com once user is logged in but based my testing, .my.salesforce.com works for the SSO configuration. This can be clarified with Salesforce tech support if necessary.
In my scenario, I’m using a Salesforce developer instance and the values in the below screenshot represent my environment.
- Enter the values and click Save
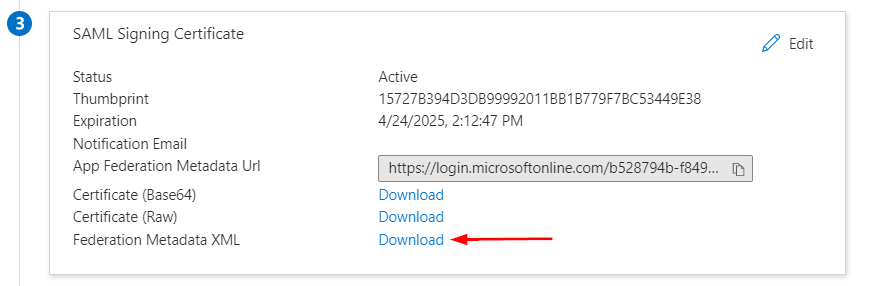
- On the Set up single sign-on with SAML page, in the SAML Signing Certificate section, find Federation Metadata XML and select Download to download the xml file and save it on your computer
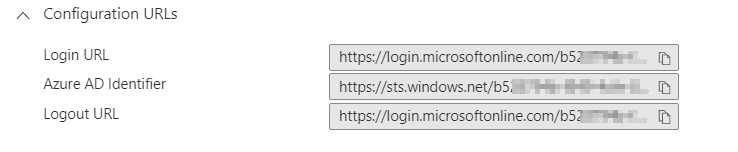
- The Set up section has the configuration URLs
Create Salesforce test user
If you are planning to do Just In Time(JIT) user provisioning which is enabled by default, no action is needed but if you don’t plan on using JIT user provisioning, you will have to work with your Salesforce administrator to create a user who already exists in your Azure AD.
Configure Salesforce
- Login to Salesforce portal with System Administrator privileges
- Click on the Setup under settings icon on the top right corner of the page

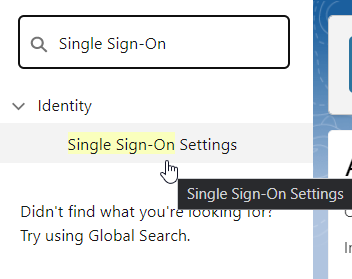
- In the quick find, type ‘Single Sign-on..’
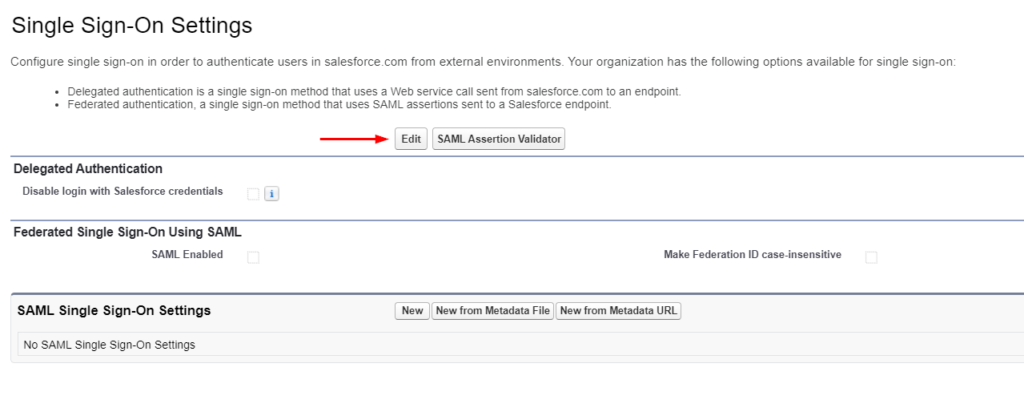
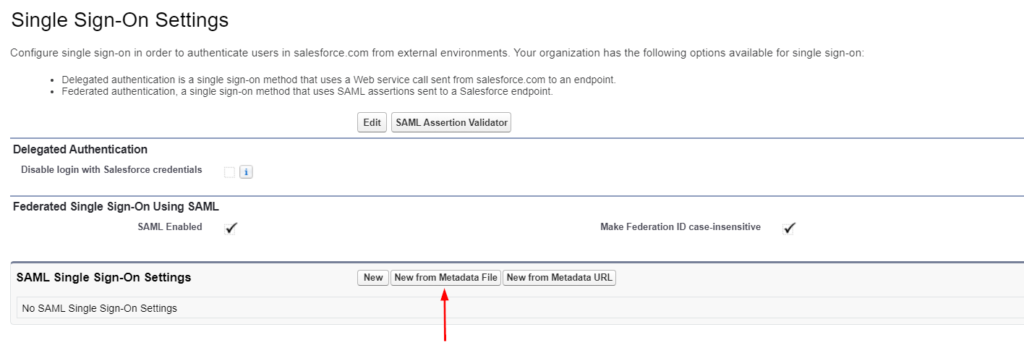
- On the Single Sign-On Settings page, click the Edit button
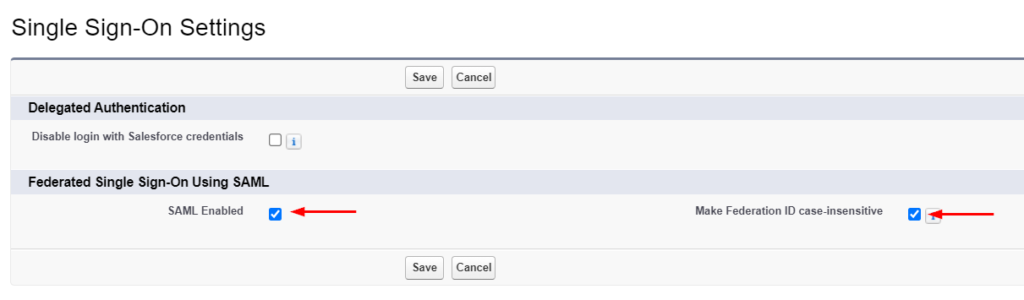
- Place checkmark next to the following options below and click Save
- SAML Enabled
- Make Federation ID case-insensitive
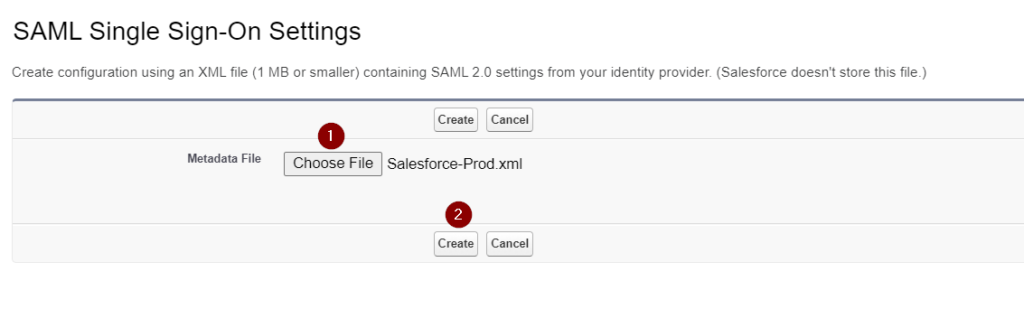
- Click New from Metadata File
- Click Choose File to upload the metadata XML file downloaded from the Azure AD admin center from step 5. in ‘Configure Azure AD SSO’ section and click Create
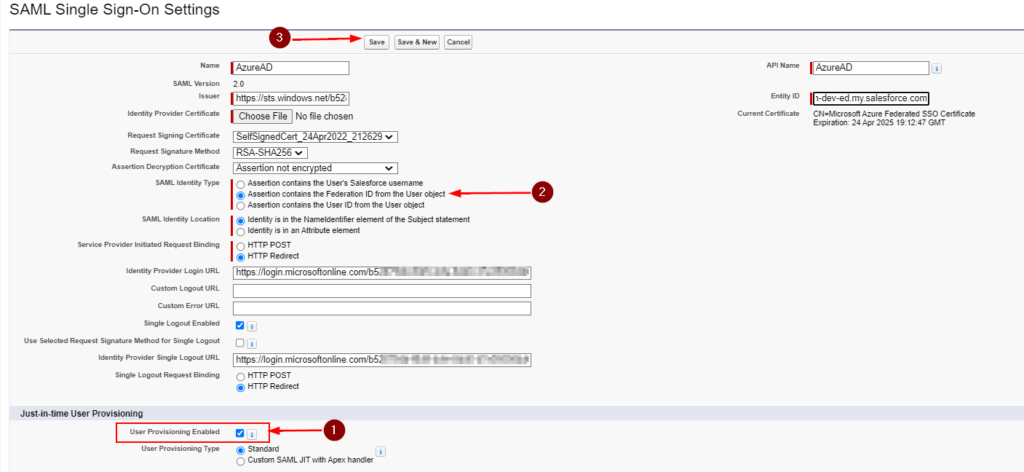
- In the SAML Single Sign-On Settings page, the fields are automatically populated using the information from the federation metadata xml file. Fill in values for below and to keep things simple, I named it ‘AzureAD’ but pick what makes sense or follows naming conventions in your organization,
- Name
- API Name

- Optional. In the Just-in-time User Provisioning section, I’m leaving the User Provisioning Enabled unchecked but if you want to use SAML JIT, place a checkmark next to User Provisioning Enabled and select SAML Identity Type as Assertion contains the Federation ID from the User object.
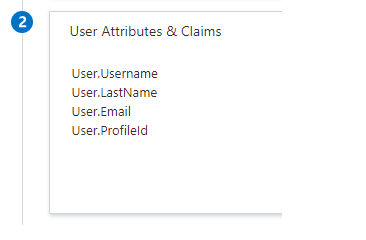
- Optional..Continued.. If you configured SAML JIT, you must complete an additional step in the Configure Azure AD SSO section. The Salesforce application expects specific SAML assertions, which requires you to have specific attributes in your SAML token attributes configuration. The following screenshot shows the list of required attributes by Salesforce.
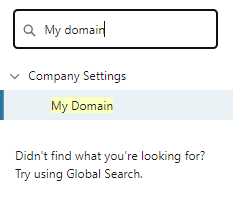
- On the left navigation pane in Salesforce, search for My Domain
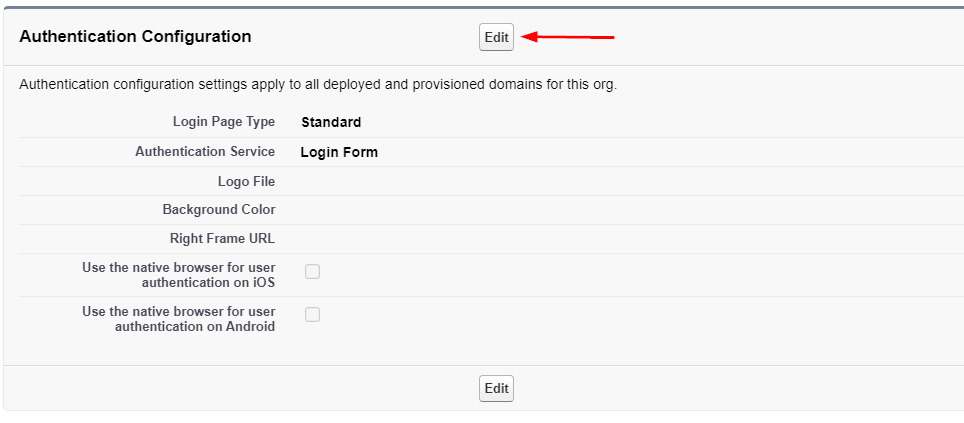
- In the Authentication Configuration section, and click the Edit button
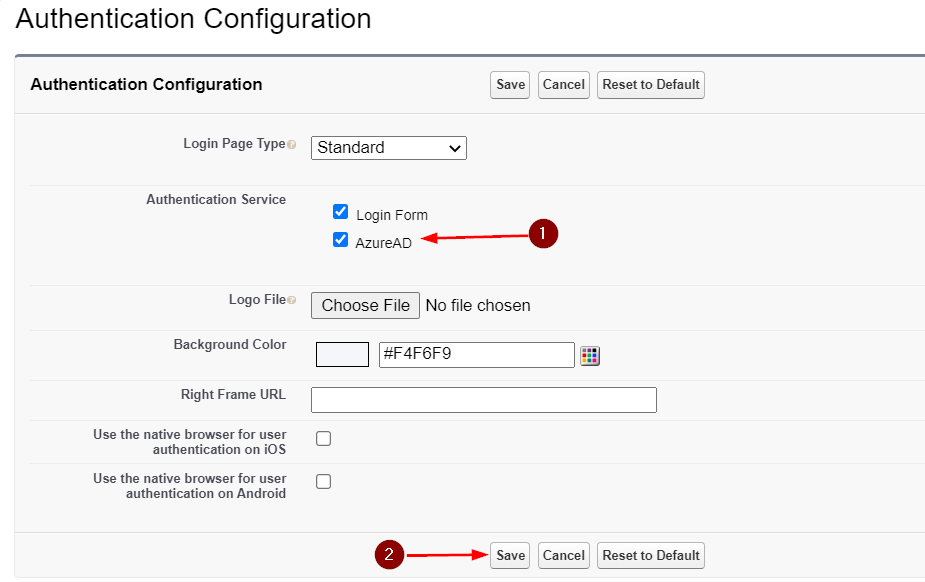
- In the Authentication Configuration section, under Authentication Service, place checkmark next to ‘Login Form‘ and ‘AzureAD‘ and click Save
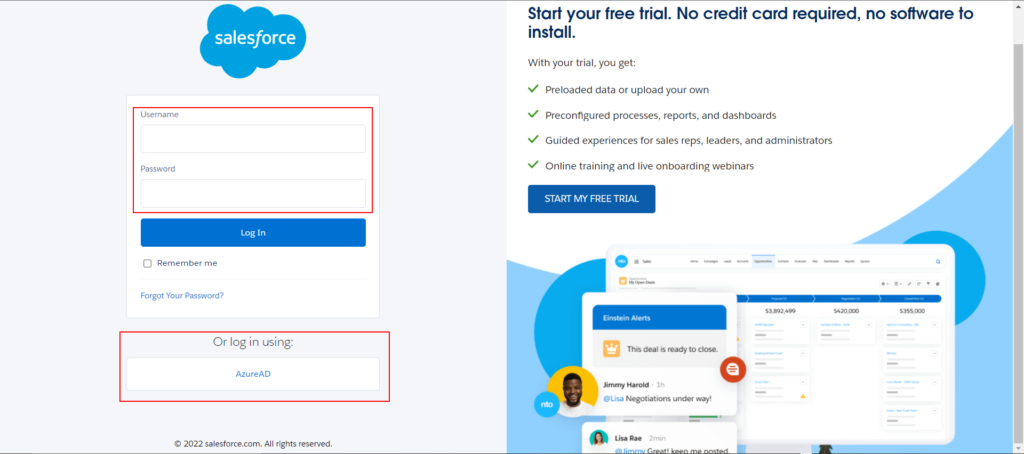
- If more than one authentication service is selected, users are prompted to select which authentication service they like to sign in with while initiating SSO to your Salesforce environment
- If you don’t want it to happen, then you should leave other authentication services unchecked
Enable Token Encryption (Optional)
Enabling encryption of SAML assertions adds another layer of security. The SAML assertions are encrypted such that the assertions can be decrypted only with the private keys held by the service provider.
Some organizations require encryption SAML assertions and this is fairly straight-forward to setup in Salesforce and Azure AD.
- In the SAML Single Sign-On Settings, select the ‘SelfSignedCert…’ and click save
- Your organization might require using a 3rd party certificate(Example: DigiCert, GeoTrust, etc) and in that scenario you will have to import the certificate into Salesforce using the Certificate and Key Management

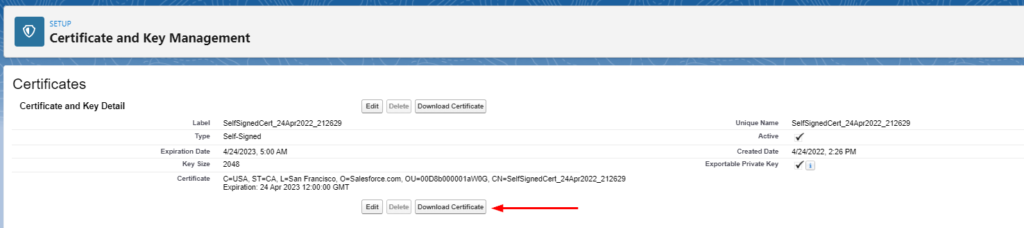
- In the navigation pane on the left, search for Certificate and Key Management
- Click on the certificate

- Click on Download Certificate and save the file to your machine
- This steps exports the public key of the certificate which will be used by Azure AD to encrypt the assertion which Salesforce can decrypt using the private key
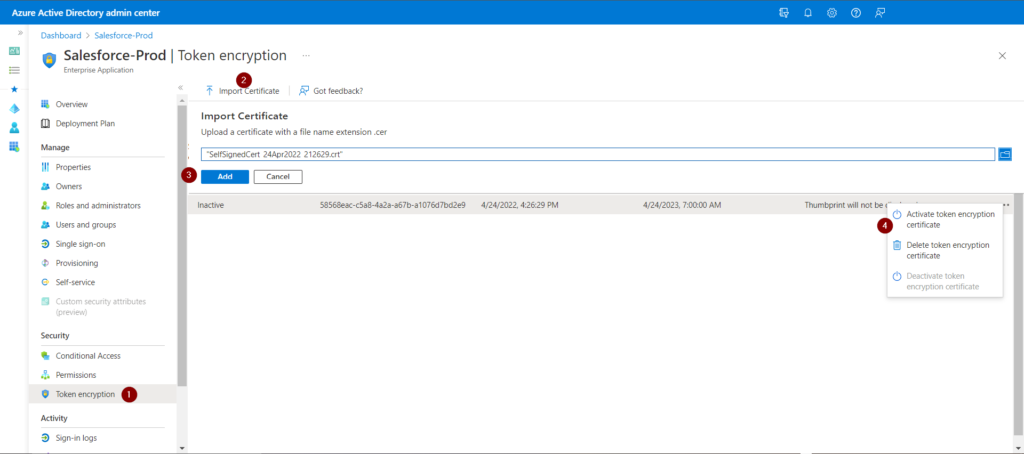
- In Azure AD admin center, open the Salesforce application and click on the Token encryption tab. Click Import certificate, browse to the download certificate from Salesforce and click Add. Click on Activate token encryption certificate to make the certificate status active.
- Test the Salesforce SSO to make sure everything works as expected
Test SSO
- Open your organization’s Salesforce Sign-On URL directly
- Use Incognito or InPrivate mode to avoid previously saved cookies
- The portal should auto-redirect to login.microsoftonline.com and prompt a sign-in
Issues you may encounter and tips on how to fix it
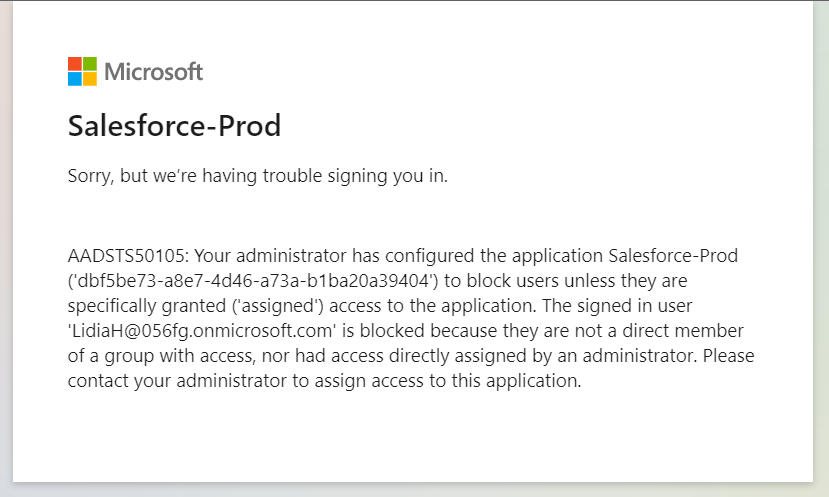
Error: Your administrator has configured the application to block access unless they are specifically granted (“assigned”) access to the application.
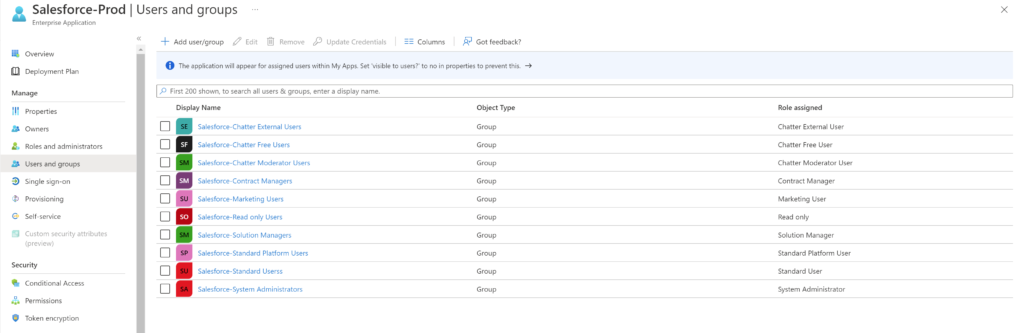
Fix: This can be fixed by adding users directly in Users and groups tab of the Salesforce application in Azure AD. It is also a better idea to create group for Salesforce roles and adding users to these groups. This also works better if you have an on-premise AD environment and syncing user to Azure AD.
Or you can set No to the Assignment required? option in the application properties. This way, the user access is managed in Salesforce. But managing user access in Azure AD is lot easier and along with Azure AD P2’s group reviews.
In my scenario, once I added my test user to ‘Salesforce-Standard Users’ Azure AD group I’ve created and assigned a role, the login worked.
I’ve detailed the steps to accomplish this in a different post.
Error: Single Sign-On Error. We can’t log you in because of an issue with single sign-on. Contact your Salesforce admin for help.
Fix: This is a generic error but depending on the issue, it will need more in-depth troubleshooting.
In my scenario, In the SAML Identity Type as Assertion contains the Federation ID from the User object when I was testing JIT, I left this option enabled which caused this error. I set SAML Identity Type as Assertion contains the User’s Salesforce username and it fixed it.
Depending on your scenario, you may have to determine the issue and I use SAML-tracer which is available as extensions for Chrome and Firefox.
Typically the issue is with not having the correct SAML Assertion Fields in the Azure AD application.
Hope these steps above in this guide helped you in setting up Azure AD SSO with Salesforce.
Thank you for stopping by. ✌