AWS – AppStream 2.0 Implementation Guide – Part I – Updated

Amazon AppStream 2.0 lets us easily add existing desktop applications to AWS and enable users to instantly stream them. AppStream 2.0 offers pay-as-you-go pricing, with no upfront investment and no infrastructure to maintain. Also allows us to scale instantly and given the scenario, globally to our users.

With the expanding global workforce for many organizations, AppStream provides some very useful features which are worth exploring. Windows users can easily connect to AppStream 2.0 applications using any HTML5-capable web browser or the AppStream client.

In the ever expanding work from home/anywhere model, user’s laptops may not connect to enterprise network very often and installing new applications or updating them can be an uphill battle. Updating applications and rolling out changes are easier with AppStream comparing the traditional model.

I’ll explore AppStream 2.0 implementation in the next couple blog posts. On a high level, a typical AppStream 2.0 implementation process goes like the process diagram below:

AppStream 2.0 Deployment steps

In this post, I’ll cover the what is involved in the Build AppStream 2.0 Image step,

AppStream Image creation process

Create an image builder

AppStream uses EC2 instances to stream applications to the users. To create a custom image, we need to connect to an image builder, install, configure and customize the applications for streaming and then create a image by creating a snapshot.

To create an image builder instance:

  1. Login to AppStream console (https://console.aws.amazon.com/appstream2)
  2. If this is the first time you are launching AppStream, ‘The AppStream 2.0 first experience page’ appears, Click Get Started and in the next screen choose skip
    • We’re just telling AWS, we’ll figure it out and we don’t need their handholding. 😉
  3. In the navigation pane on the left, choose Images, Image Builder, Launch Image Builder
Launch Image Builder
  1. In Step 1: Choose Image window, in the list of images, select the image builder with the name Base-Image-Builder-mm-dd-yyyy, where mm-dd-yyyy represents the most recent date
    • I’m choosing Windows 2016 and an instance in Graphics design. As I’m planning to publish applications that’ll require GPU. For a full list of instances, the sizes and pricing, refer this link – Amazon AppStream 2.0 Pricing
    • If you are simply trying out AppStream to get a feel of it, General purpose instances are more than enough
  1. In Step 2: Configure Image Builder, give the instance an unique name depending on your organizational naming conventions and standards, Pick a Instance Type, Streaming Endpoint as Internet and the IAM role need not be created.
    • The VPC endpoints allows users to stream from AppStream through your VPC. This can be helpful in scenarios where you want to keep the traffic within your VPC. But By default, AppStream uses a streaming endpoint that requires the user to have access to the internet
    • The IAM role part is a much more comprehensive topic and that’s why I’m leaving it with default value
Configure Image Builder
  1. In Step 3: Network access, I’m selecting Default Internet Access, my VPC, the subnet and the default security group
    • As this is purely for testing here, I’m going through with default options but when you are rolling out this in production, you’ll probably end up creating a separate VPC and if you have services like Direct connect to connect to your on-premise, your network administrator will carve up a segment which you can use to configure
    • It is not recommended to chose Default Internet Access, here is how you can decide. If your deployment must support,
      • More than 100 concurrent users, configure a VPC with private subnets and a NAT gateway
      • Fewer than 100 concurrent users, you can configure a new or existing VPC with a public subnet (the default option does this)
    • The AD domain configuration is optional
      • It comes into play when you have AWS Direct Connect and you have a line of sight with your AD domain.
      • Also is needed when your applications need to be authenticated to your AD domain and/or your application’s backend(file shares, etc) live on-premise. More on Authentication in a later post
Configure Image Builder – Network
  1. Click Review and Launch
    • It takes around 15-20 minutes for this process to complete and displays pending in the meantime
    • The image builder instance will accumulate charges even when no one is connected. It ain’t cheap, so please keep an eye on it
    • Pricing info in this link – Amazon AppStream 2.0 Pricing

Install Applications in image builder

  1. In the left navigation pane within AppStream 2.0, choose Images, Image Builder
  2. Select the image builder instance that you created earlier
    • If the status is Stopped, select the instance, and choose Actions, Start
  3. A new browser tab opens, displaying options for logging into the image builder instance. Choose Local User, Administrator
Login to Image Builder as Administrator
  1. Once connected to Image builder, I used Firefox to download the needed software files and installed them like I would do on a server connected via RDP
Applications I installed on Image Builder Instance
  1. Once the applications are installed, we are ready for the next steps

Configure applications

I’m including this section because as we all know, custom built applications which run on-premise or applications that your organization may have customized will need certain steps to be configured or worked on by your application administrators. This where you bring them in or even in the earlier step while you install the applications.

They’ll know what the customizations are, adding xml files in certain file path, IP addresses of DB servers and so on. Let them do their thing and as an AppStream administrator, we’ll take notes. 😁

Use Image Assistant to create an image

Now that we have installed and configured the applications, we are ready to create an image. The following steps will prepare the application for streaming, optimize it for performance, and create an image:

  1. On the image builder desktop, open Image Assistant
  2. On the Add Apps tab, choose Add App
    • To add Blender, I’m navigating to the installed path and selecting the exe
  3. Chose the exe and click Open
Image Assistant – ADD APPS
  1. In the next window,
    • Name = A unique identifier for the app
    • Display name = Name of the app that is displayed to end users
    • Launch Path = Location app’s executable (Change it only if your app requires it)
    • Icon Path = Location of your app’s icon (Your organization might have certain standard on app icons, this is where you pick your icon)
    • Launch Parameters = Command line arguments that need to be passed to your app (Check with your application’s admin)
    • Working Directory = Ok to leave blank (Check with your application’s admin)
  2. Click Save
App Launch Settings
  1. Repeat the above steps for other applications you’ll need on the image
  2. Once done adding, click Next
Image Assistant – Apps
  1. On Configure Apps tab, click on Switch user
Image Assistant – CONFIGURE APPS

and select Template User in the login screen

Login as Template User
  1. As Template User, launch Image Assistant and click on the applications to make sure they open as desired. Once done, click on Switch User and then choose Administrator to login
  2. In the Administrator login, you’ll be back in the Configure Apps tab, click Save settings
    • If you need to redo any of the saved settings, you can simply delete the user’s profile and do the steps again
    • To remove user profile, open Windows System properties(cmd –> sysdm.cpl), Advanced tab, Settings under User profiles and click to select the DefaultProfileUser and click Delete
Image Assistant – CONFIGURE APPS – Save Settings
  1. On the Test tab, Click Switch User and then choose Test User to login
    • Image builder includes a test user account that enables you to test your applications by using the same policies and permissions as your users
  2. As Test User, launch Image Assistant and click on the applications to make sure they open as desired. Once done, click on Switch User and then choose Administrator to login
  3. In the Administrator login, you’ll be back in the Test tab, click Next
  4. On the Optimize tab, clicking Launch will launch each application and after the application launches, verify that it functions as expected, choose Continue
Image Assistant – OPTIMIZE
  1. On the Configure Image tab, enter the following information and click Next
    • Name = Unique name
    • Display Name = A user friendly name
    • Description = What’s included in the image and notes that’ll make sense to you and the other admins
    • Always use latest agent version = I leave this check box selected so that streaming instances launched our image always include the latest AppStream 2.0 features, performance improvements, and security updates
Image Assistant – CONFIGURE IMAGE
  1. On the Review tab, make sure you got it all correct and then choose Disconnect and Create Image
    • The remote session disconnects within a few moments. When the Lost Connectivity message appears, it is safe to close the browser tab
Image Assistant – REVIEW
  1. Return to the Amazon AppStream 2.0 console and choose Images, Image Registry
    • I set the filter to Private and shared with others to make it easier to view the image I created
    • While the image is being created,
      • the image status in the image registry of the console appears as Pending
      • we cannot connect to it
Filter images by ‘Private and shared with others’

The image creation process takes 20-30 minutes to complete.

I’ll update this post with the next steps on I’ve completed them – Link to Part II

Thank you for stopping by. ✌

Office 365 – Convert User Mailbox to Shared Mailbox

Scenarios are plenty when O365 admins are requested to convert a user mailbox to a shared mailbox.

Here is one that comes up often,

  • User/Employee leaves the organization and others in the team need access to the user’s mailbox to keep track of the project they were working on

When we convert a user mailbox to a shared mailbox, the mailbox must have a license assigned and after the conversion is complete, we can remove the license.

One little caveat to the licensing part is, without license assigned to the shared mailbox, its size is limited to 50GB. So, before converting, make sure to check the mailbox’s size and to increase the shared mailbox’s size to 100GB, assign a Exchange Online Plan 2 license.

Note: If you are on Exchange hybrid environment, you’ll have to manage your mailboxes using on-premises Exchange management tools.

To convert a user mailbox to Shared mailbox using PowerShell

Before proceeding further make sure you are connected to Exchange Online,

$o365cred = Get-Credential
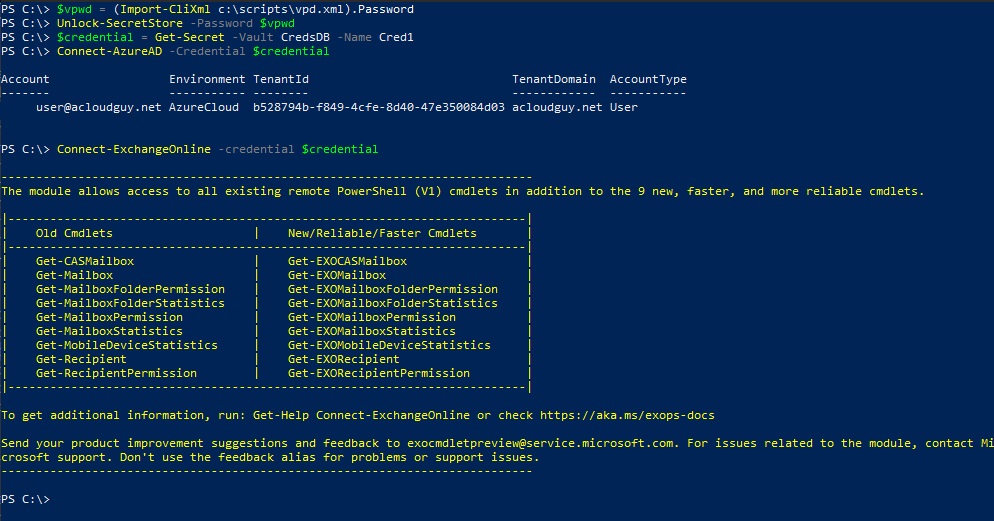
Connect-ExchangeOnline -credential $o365cred

To convert to shared mailbox:

$Mbx = Read-Host "Enter user's email address for Shared Mailbox conversion"
Set-Mailbox -Identity $Mbx -Type Shared
Set-Mailbox

The -Type parameter also supports the below values:

  • Equipment
  • Regular
  • Room
  • Workspace (cloud-only)

Determine if it worked

To make sure the mailbox has been successfully converted:

$sMbx = Read-Host "Enter email address"
Get-Mailbox -Identity $sMbx | fl DisplayName,RecipientTypeDetails
Get-Mailbox

To convert a user mailbox to Shared mailbox using EAC

Exchange admin center also allows converting a user’s mailbox to shared mailbox.

  1. Login to Exchange admin center, in the left navigation menu, click recipients
  2. Click Mailboxes
  3. Search for the mailbox and select it
  4. In the right side details window, Click Convert under Convert to Shared Mailbox
  5. Click Yes in the warning window
Convert to Shared Mailbox
successfully converted to shared mailbox

Determine if it worked

  1. Login to Exchange admin center, in the left navigation menu, click recipients
  2. Click shared
  3. Search for the mailbox
Shared tab in recipients

Hope this post helped you out.

Thank you for stopping by.✌

Enable Federation with Azure AD SSO and Amazon AppStream 2.0

We can enable users to sign in to AppStream 2.0 by using their existing Azure AD credentials, and start streaming applications. To accomplish this, we use an IAM role and a relay state URL to configure Azure AD and enable AWS to permit users to access an AppStream 2.0 stack. The IAM role grants users the permissions to access the stack. The relay state is the stack portal to which users are forwarded after successful authentication by AWS.

In this post, I’ll go over steps on how to configure federated user access for Amazon AppStream 2.0 using Azure AD SSO for Enterprise Apps.

The below diagram illustrates the authentication flow between AppStream 2.0 and Azure AD as identity provider (IdP).

Authentication Workflow

From a user’s perspective, this above process happens seamlessly. The user starts at myapps.microsoft.com and is automatically redirected to an AppStream 2.0 application portal without being required to enter AWS credentials.

The setup process goes like in this diagram below,

Create an Azure AD SSO application

  1. Login to Azure AD Admin Center (https://aad.portal.azure.com/)
  2. Click on the Enterprise applications tab
  3. To add new application, Click New application
Enterprise applications
  1. Click Create your own application
Azure AD – New Application
  1. Provide a name for your application
    • I’ve named my application AppStream-DesignUsers
  2. Select Integrate any other application you don’t find in the gallery (Non-gallery) and click Create
Create your own application
  1. Once the application is added, from the left navigation menu, Click on Single sign-on, and choose SAML
SSO method – SAML
  1. Click Edit in the Basic SAML Configuration
Basic SAML Configuration
  1. Provide the Identifier (Entity ID) and Reply URL (Assertion Consumer Service URL), then click Save
    • Identifier (Entity ID) = URN:AMAZON:WEBSERVICES
    • Reply URL (Assertion Consumer Service URL) = https://signin.aws.amazon.com/saml
    • Sign on URL (Optional) = <leave it blank>
    • Relay State (Optional) = <leave it blank>, We will revisit this later in this post
      • The entity ID is passed during the SAML exchange
      • Azure AD requires this value to be unique for each application
      • When we add more AppStream 2.0 stacks, we can append a number to the string; for example, URN:AMAZON:WEBSERVICES1,URN:AMAZON:WEBSERVICES2
Basic SAML Configuration – Continued
  1. In the SAML Signing Certificate section, click Download next to the Federation Metadata XML and save the .xml file to your computer
Download Federation Metadata XML

Create the SAML identity provider

Now, we need to create the SAML provider in AWS IAM console.

  1. In AWS console, search and open IAM
  2. In the left navigation window, click Identity providers, and the Add provider
AWS IAM – Add provider
  1. On the Configure Provider page, for the Provider Type, select SAML
  2. For Provider name, I’ve named it AzureAD-SSO
  3. Click Choose File to upload the metadata document that previously downloaded from Azure AD, and click Add provider
Configure identity provider
  1. Click on the identity provider we just created
Identity provider added
  1. Copy the value for the Provider ARN
    • The ARN is in the following format: arn:aws:iam::AccountID:saml-provider/Provider Name
Copy Identity provider ARN

Configure an IAM policy

We need to create a policy with permissions to the AppStream 2.0 stack. This way we can ensure that users have only the permission to stream applications from a specific stack.

  1. In the IAM console, choose Policies, click Create Policy
  2. In Create policy page, choose the JSON tab
  3. Copy and paste the following JSON policy into the JSON window
    • Modify the resource by entering your AWS Region Code, account ID, and stack name
      • AWS Region Code = Determine AWS region code here
      • account ID = In AWS console, click on your user name in the top right of the window and your account ID is there
      • Stack name = AppStream stack name which we want to grant access to users to
{
  "Version": "2012-10-17",
  "Statement": [
    {
      "Effect": "Allow",
      "Action": "appstream:Stream",
      "Resource": "arn:aws:appstream:REGION-CODE:ACCOUNT-ID-WITHOUT-HYPHENS:stack/STACK-NAME",
      "Condition": {
          "StringEquals": {
              "appstream:userId": "${saml:sub}"           
          }
        }
    }
  ]
}
AWS IAM – Policy
  1. In the Review policy page, provide Name, Description and click Create policy
Review and create policy
  1. You should see the following notification once the policy is created,

Create an IAM Role

In this step, we will create a role that our Azure AD users will assume when federating to AppStream 2.0

  1. In the IAM console, choose Roles, click Create role
  2. For the Trusted entity type, select SAML 2.0 federation
  3. Under SAML 2.0-based provider, choose the SAML IdP that we created earlier
  4. For the Attribute, pick SAML:aud and type https://signin.aws.amazon.com/saml
  5. Do not add any conditions and click Next
AWS IAM – Role
  1. In Add permissions, select the IAM policy we created earlier and click Next
Add permissions
  1. Provide a Role Name and Description that identifies the role, and click Create Role
  2. Once created, locate and click on the role we just created
  3. Copy the Role ARN
    • The ARN is required to configure claims rules later
    • The ARN is in the following format: arn:aws:iam::AccountID:role/Role Name
Copy role ARN

Configure the Azure AD SSO Application

Now we are ready to finish configuring the Azure AD application we started working on earlier

  1. Login to Azure AD Admin Center (https://aad.portal.azure.com/)
  2. Click on the Enterprise applications tab
  3. Choose the application we created earlier, from the left navigation menu, Click on Single sign-on
  4. Click Edit in the Basic SAML Configuration, Provide Relay State URL and click Save
    • Relay State = The Relay State is unique to the account, AWS Region, and AppStream 2.0 stack
    • Format is,
      • https://relay-state-region-endpoint?stack=stackname&accountId=aws-account-id-without-hyphens
    • Below table has a list of AppStream 2.0 Relay State Region Endpoints
Region Relay state endpoint
US East (N. Virginia)https://appstream2.us-east-1.aws.amazon.com/saml
(FIPS) https://appstream2-fips.us-east-1.aws.amazon.com/saml
US West (Oregon)https://appstream2.us-west-2.aws.amazon.com/saml
(FIPS) https://appstream2-fips.us-west-2.aws.amazon.com/saml
Asia Pacific (Mumbai)https://appstream2.ap-south-1.aws.amazon.com/saml
Asia Pacific (Seoul)https://appstream2.ap-northeast-2.aws.amazon.com/saml
Asia Pacific (Singapore)https://appstream2.ap-southeast-1.aws.amazon.com/saml
Asia Pacific (Sydney)https://appstream2.ap-southeast-2.aws.amazon.com/saml
Asia Pacific (Tokyo)https://appstream2.ap-northeast-1.aws.amazon.com/saml
Canada (Central)https://appstream2.ca-central-1.aws.amazon.com/saml
Europe (Frankfurt)https://appstream2.eu-central-1.aws.amazon.com/saml
Europe (Ireland)https://appstream2.eu-west-1.aws.amazon.com/saml
Europe (London)https://appstream2.eu-west-2.aws.amazon.com/saml
AWS GovCloud (US-West)https://appstream2.us-gov-west-1.amazonaws-us-gov.com/saml
(FIPS) https://appstream2-fips.us-gov-west-1.amazonaws-us-gov.com/saml
AppStream 2.0 Relay State Region Endpoints
Azure AD – Add Relay State
  1. Click Edit in the Attributes & Claims section
Azure AD – Attributes & Claims
  1. In Required claim,
    • Unique User Identifier (Name ID) = Key used to identify users in the SAML assertion
    • I generally stick with user.userprincipalname
    • Usually user.mail or user.userprincipalname works
  2. Click + Add new claim and add the below claims
    • By default, Azure AD populates several SAML attributes for all new applications
    • These attributes are not needed for the federation to AppStream 2.0
    • We can remove them by choosing the three dots next to each, and choosing Delete
      • If you decide to leave them as is, it doesn’t do any harm

Name = Role
Namespace = https://aws.amazon.com/SAML/Attributes
Source = Attribute
Source Attribute = This is the Role ARN from earlier in this post, followed by a comma and then the Provider ARN

Role attribute

Name = RoleSessionName
Namespace = https://aws.amazon.com/SAML/Attributes
Source = Attribute
Source Attribute = We can provide any string value. I’m going with user.mail

RoleSessionName attribute

Name = SAML_SUBJECT
Namespace = https://aws.amazon.com/SAML/Attributes
Source = Attribute
Source Attribute = We can provide any string value. I’m going with user.displayname

SAML_SUBJECT attribute

If the user intend to use the AppStream 2.0 client, sessions will default to a 60 minute timeout. This setting will determine the duration.

Name = SessionDuration
Namespace = https://aws.amazon.com/SAML/Attributes
Source = Attribute
Source Attribute = Value in seconds between 900 (15 minutes) and 43200 (12 Hours). I’m going with 28800 (8 Hours)

SessionDuration attribute

Assign Azure AD groups in Application

  1. In the left navigation menu, click Users and groups, click + Add user/group
  2. In Add Assignment, click Users and groups
  3. In the Users and groups dialog box, select the Azure AD group to provide access the AppStream 2.0 stack
  4. Click Assign
Assign Group

Also click on the Properties tab in the left navigation menu to check the following,

  • Enabled for users to sign-in? = Yes
  • Assignment required? = Yes
  • Visible to users? = Yes

I also uploaded an icon file for the app to look nicer.😉

Test Application

With a Azure AD security group assigned to the application and the other setting configured, we’re ready to test this with a user account. I’ve already added the user account to the assigned Azure AD group. To test this,

  1. User logs into myapps portal (https://myapps.microsoft.com/) with their Azure AD credentials
  2. User is presented with the AppStream stack,
User’s myapps portal view
User redirected to AppStream 2.0 app catalog

I also created a second fleet and stack, associated the fleet to the stack to demonstrate how we can assign different users to stacks. IMO, the myapps portal is a really cool feature and we can it to present AppStream to our users.

As I mentioned earlier in this post, adding more stack will require adding additional Azure AD applications and assigning AD group(s) to it.

All Stacks
All Fleets

This below is a different user logging into the myapps portal (https://myapps.microsoft.com/) with their Azure AD credentials and I’ve assigned the ‘DeveloperUsers-Stack-0323’ stack to them.

User’s myapps portal view

The user gets redirected to the AppStream 2.0 portal

User redirected to AppStream 2.0 app catalog

Issues you may encounter and How to fix it

Error: RoleSessionName is required in AuthnResponse (service: AWSSecurityTokenService; status code: 400; error code: InvalidIdentityToken)

Fix: I encountered this error with the second stack I had created. When is saw this error, my obvious first step is to make sure I didn’t miss the RoleSessionName attribute in the Azure AD app I created. And it was there with the expected value.

I then decided to go back over the AWS IAM role and policy I created and realized that in the I had picked the wrong identity provider and once I picked the correct one, this issue was resolved.

RoleSessionName is required in AuthnResponse (service: AWSSecurityTokenService; status code: 400; error code: InvalidIdentityToken)

Error: Unable to authorize the session. (Error Code: INVALID_AUTH_POLICY);Status Code:401

Fix: This error message occurs when the IAM policy does not permit access to the AppStream 2.0 stack or when the stack name is not entered into the policy. Similar mess up on my part.

I had mistyped the stack’s name while creating/typing in the JSON window during the policy creation step.

Unable to authorize the session. (Error Code: INVALID_AUTH_POLICY);Status Code:401

In my experience, the SAML-tracer for Chrome and Firefox comes in handy to help identify SAML related issues. It has certainly helped me in several instances.

Hope this post helped you to setup Azure AD SSO for your AppStream 2.0 stacks.

Thank you for stopping by.✌
AWS – Enable IAM Users Billing Information access

AWS root account has access to the billing information by default and the root user can allow IAM users to access the billing information. In this post I will go through the steps on how to allow IAM users to be able to access billing information.

Below are the steps on the workflow to enable access,

When an IAM user tries to access the Billing Dashboard, this below error is displayed.

Activate access to billing data

  1. Sign in to the AWS Management Console using root account credentials
  2. On the top right of the window, choose account name, and then click Account
  3. In the IAM User and Role Access to Billing Information section, click Edit
  4. Select the Activate IAM Access check box to activate access to the Billing and Cost Management console pages
  5. Click Update

With these above steps, we have activated IAM user access.

Create IAM policies to grant permissions to billing data

  1. Open IAM console (https://console.aws.amazon.com/iam/)
  2. In the left navigation menu, choose Policies and click Create Policy
  3. In the Visual editor tab, click Choose a service to get started, Select Billing
  4. In this step, I’ll show steps to create two different policies,
    • Full Access Policy
      • In Actions, Under Specify the actions allowed in Billing select the check box next to All Billing actions (aws-portal:*)
      • No need to select a resource or condition for this policy
      • Click Next:Tags to add necessary tags, click Review policy
      • On the Review page, provide name as BillingFullAccess, and then click Create policy
  • Read-only access Policy
    • In Actions, Under Specify the actions allowed in Billing select the check box next to Read
    • No need to select a resource or condition for this policy
    • Click Next:Tags to add necessary tags, click Review policy
    • On the Review page, provide name as BillingViewAccess, and then click Create policy

Create groups and attach billing policies

It is possible to attach policies directly to users or roles but it is best practice to attach polices to groups. I will create two groups and attach the policies created in the previous step.

  1. Open IAM console (https://console.aws.amazon.com/iam/)
  2. In the left navigation menu, choose User groups and click Create group
  1. In this step, I’ll create the two groups and attach the policy,
    • BillingFullAccessGroup
      • In the User group name, provide name as BillingFullAccessGroup
      • Under Attach permissions policies, select BillingFullAccess policy which we created in earlier step
      • Click Create group
    • BillingViewAccessGroup
      • In the User group name, provide name as BillingViewAccessGroup
      • Under Attach permissions policies, select BillingViewAccess policy which we created in earlier step
      • Click Create group
  1. If you already have IAM users created, you can add them while creating the groups as you can see in the user group creation window. I didn’t have any users yet and I chose not to add any but that’s fairly easy step.

Test access

It is recommended to test the billing access with some test users to make sure the access works as intended.

IAM users can login to the AWS console, On the top right of the window, choose account name, and then click My Billing Dashboard to view the billing information.

Hope this post helped you set up billing access for your users.

Thank you for stopping by.✌
O365 – Create and Manage Public folders using PowerShell

Public folders are meant for shared access and to enable an easy way to collect and share information with other users in an organization. Public folders makes it easier to browse content and users will see the full hierarchy in Outlook using which they can find the content they are looking for.

Public folders can also be used to archive email sent to distribution groups. When a public folder is mail-enabled, and added as a member of the distribution group, email sent to this group is automatically added to the public folder to be referenced later.

Public folders use mailbox infrastructure for high availability and mailbox database storage technologies. This architecture uses specially designed mailboxes to store both public folder hierarchy and the content.

The main component of public folders are the public folder mailboxes. Before creating public folders, we must first create public folder mailboxes. There are two types of public folder mailboxes,

  • Primary hierarchy mailbox: This is the one writable copy of the public folder hierarch and is copied to all other public folder mailboxes. The first public folder mailbox created will be the primary hierarchy mailbox in the organization
  • Secondary hierarchy mailbox: Additional public folder mailboxes created are secondary hierarchy mailboxes and can also contain content. Is a read-only copy of the public folder hierarchy

Before proceeding further make sure you are connected to Exchange Online,

$o365cred = Get-Credential
Connect-ExchangeOnline -credential $o365cred

To create new public folder mailbox

To create first mailbox that will be the Primary hierarchy mailbox:

$Name = Read-Host "Enter a name for the Public Folder"
New-Mailbox -PublicFolder -Name $Name

To create additional public folder mailboxes that will be Secondary hierarchy mailboxes:

$Name = Read-Host "Enter a name for the Public Folder"
New-Mailbox -PublicFolder -Name $Name

To create public folders

To create a new public folder:

$Name = Read-Host "Enter a name for the Public Folder"
New-PublicFolder -Name $Name

To create a public folder under and existing folder:

$Name = Read-Host "Enter a name for the Public Folder"
$Path = Read-Host "Enter a existing folder name"
New-PublicFolder -Name $Name -Path $Path
example shows ‘Reports’ folder created under Sales
example shows ‘Monthly’ folder under ‘Reports’ folder created under Sales

To mail enable a public folder:

$Name = Read-Host "Enter Public Folder which you wish to mail enable"
Enable-MailPublicFolder $Name

To add permissions to a specific user on a public folder:

$Name = Read-Host "Enter name of public folder that you wish to add permissions"
$user = Read-Host "Enter email address of user"
$AccessRights = Read-Host "Enter permissions separated by comma"
$AccessRights = $AccessRights -split ' *, *'
Add-PublicFolderClientPermission -Identity $Name -User $user -AccessRights $AccessRights

To determine permissions on a specific folder:

$Name = Read-Host "Enter a name for the Public Folder to query permissions"
Get-PublicFolder -Identity $Name | Get-PublicFolderClientPermission | Select Identity, User, AccessRights

Hope this post helped you out.

Thank you for stopping by. ✌