A Self-Service user flow defines the steps an user will follow while signing-up for an application in your tenant. These applications can be the custom built or SaaS applications. This allows users to sign-up for an app and creates a guest account in the Azure AD tenant.
These user flows cannot be used for MS apps like Teams or SharePoint.
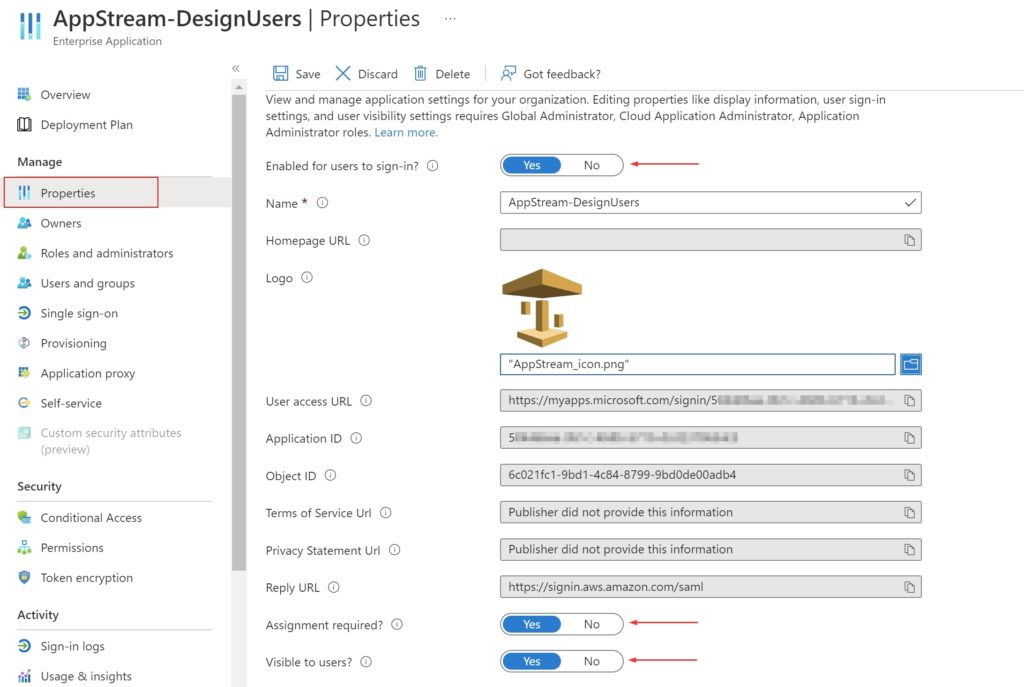
Enable self-service sign-up
Before creating and adding self-service sign-up user flow to your applications, the feature has to be enabled. Once enabled, the necessary options become available.
- Login to Azure AD admin portal (https://aad.portal.azure.com/)
- In the left menu, click External Identities and then External collaboration settings
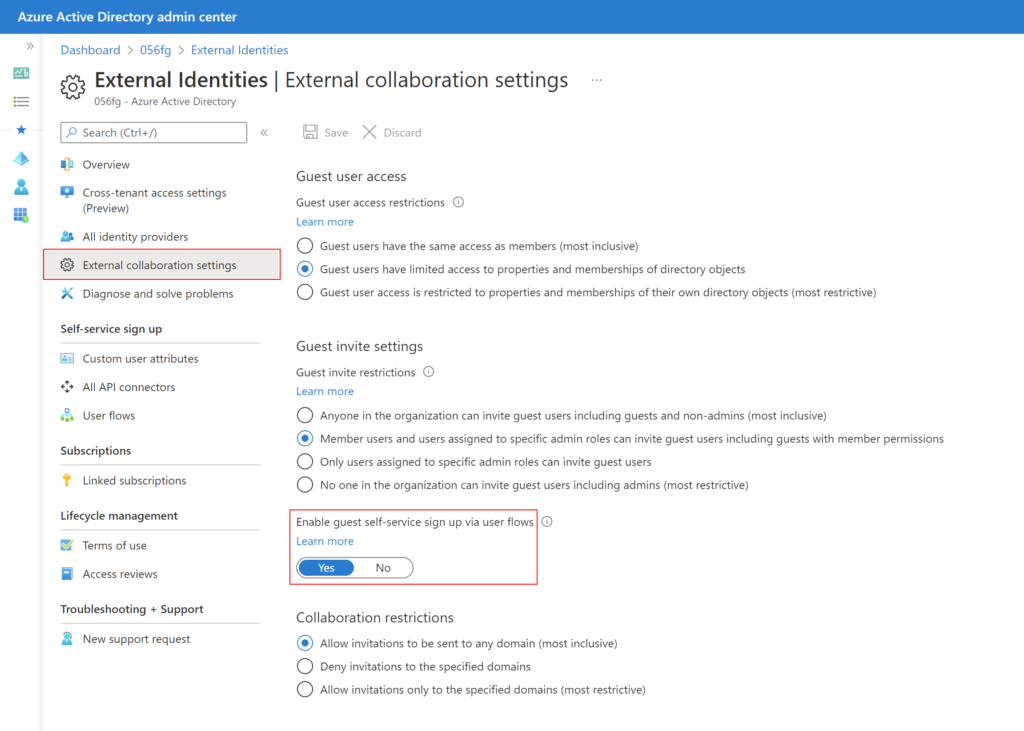
- Toggle Yes to Enable guest self-service sign up via user flows
- Click Save
Create user flow for self-service sign-up
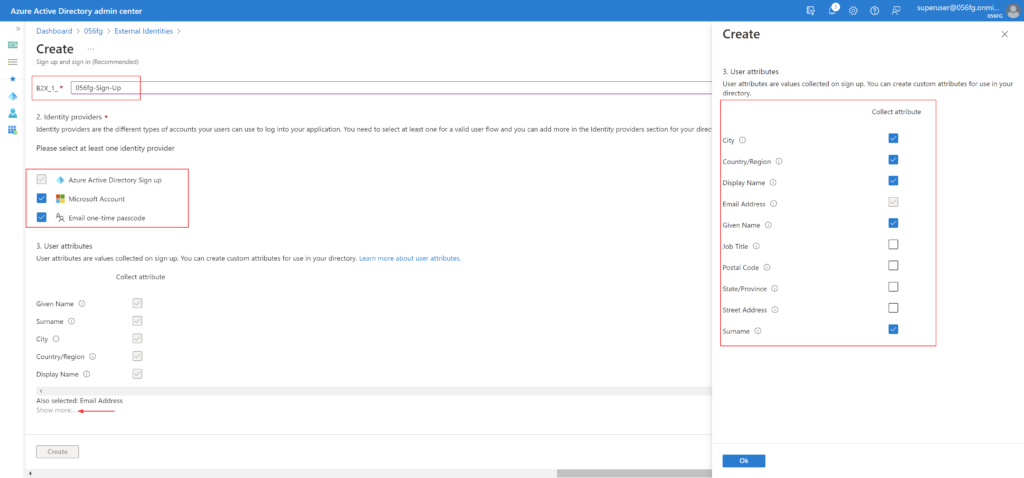
Now we’re ready to create user flow for self-service sign-up and add it to an application.
- Under the same External identities section in the above steps, click User flows in the left menu
- Select New user flow
- Enter a Name for the user flow. The name is automatically prefixed with B2X_1_
- Select the Identity providers
- Azure AD is the default identity provider, which means that users are able to sign up by default with an Azure AD account
- Google and Facebook, Microsoft Account, and Email OTP are also options
- Under User attributes, choose the attributes you want to collect from the user
- For additional attributes, click on Show more
- Click Create
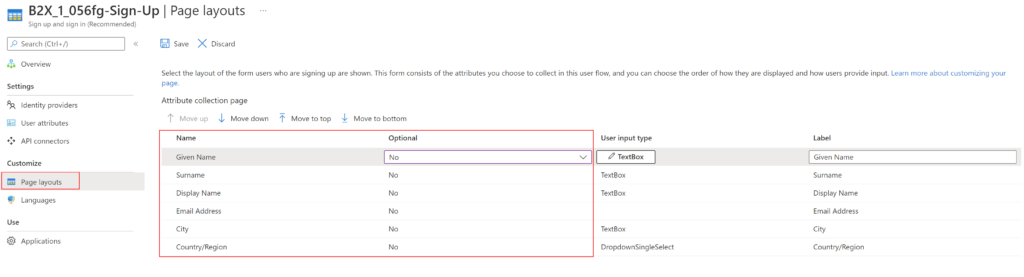
Select the Page Layout
We can customize the order in which the attributes are displayed on the sign-up page
- Click on the user flow created
- Click on Page Layouts under Customize in the left menu
- For my scenario, I’ve reordered the fields and selected optional as No for the fields I consider mandatory
- Click Save
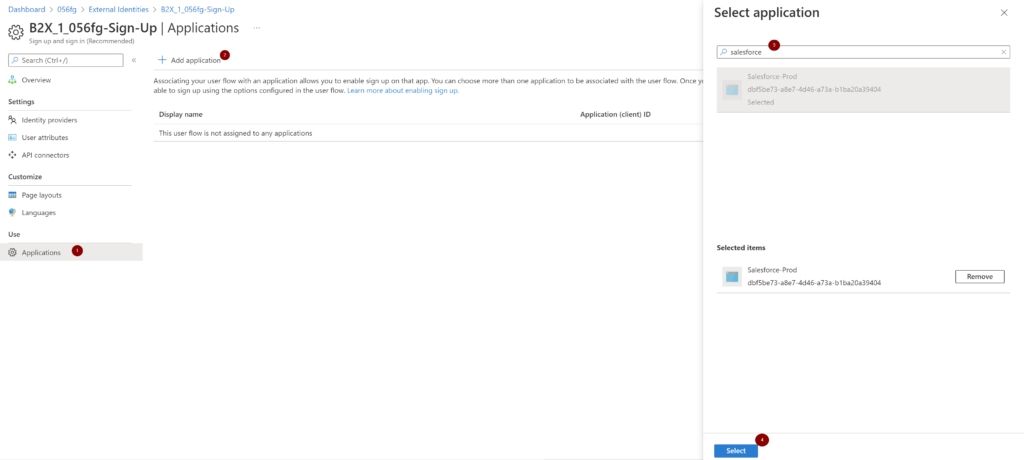
Add Application(s) to the user flow
Now, we are ready to associate an application to the user flow,
- In the left menu, under Use, select Applications
- Select Add application
- For my scenario, I’m adding the Salesforce application to enable users to do a self-signup
- Search for the application and click Select
This concludes the steps in the Azure AD admin portal
Guest User experience
We can simply provide the application URL to the guest user for them to sign-up.
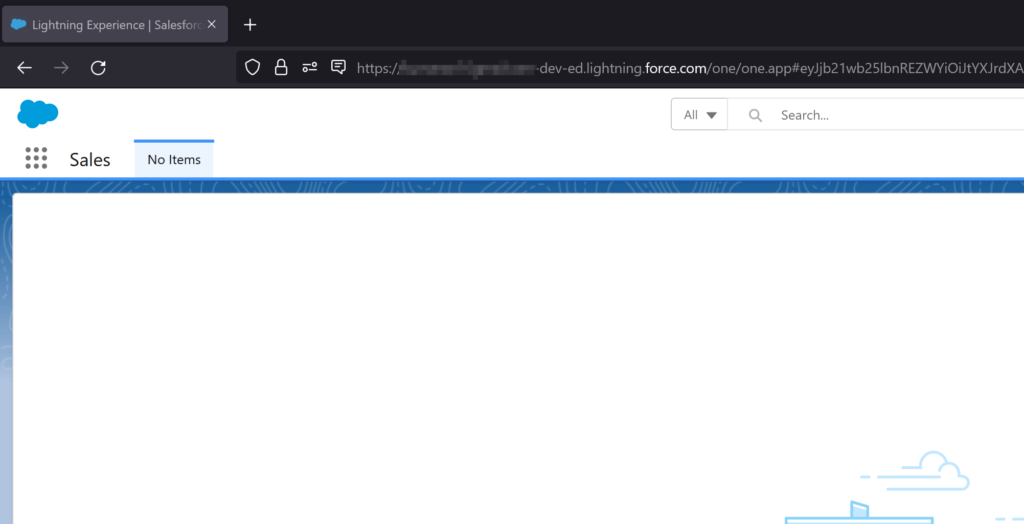
In my scenario, I’m using the Salesforce application in my environment,
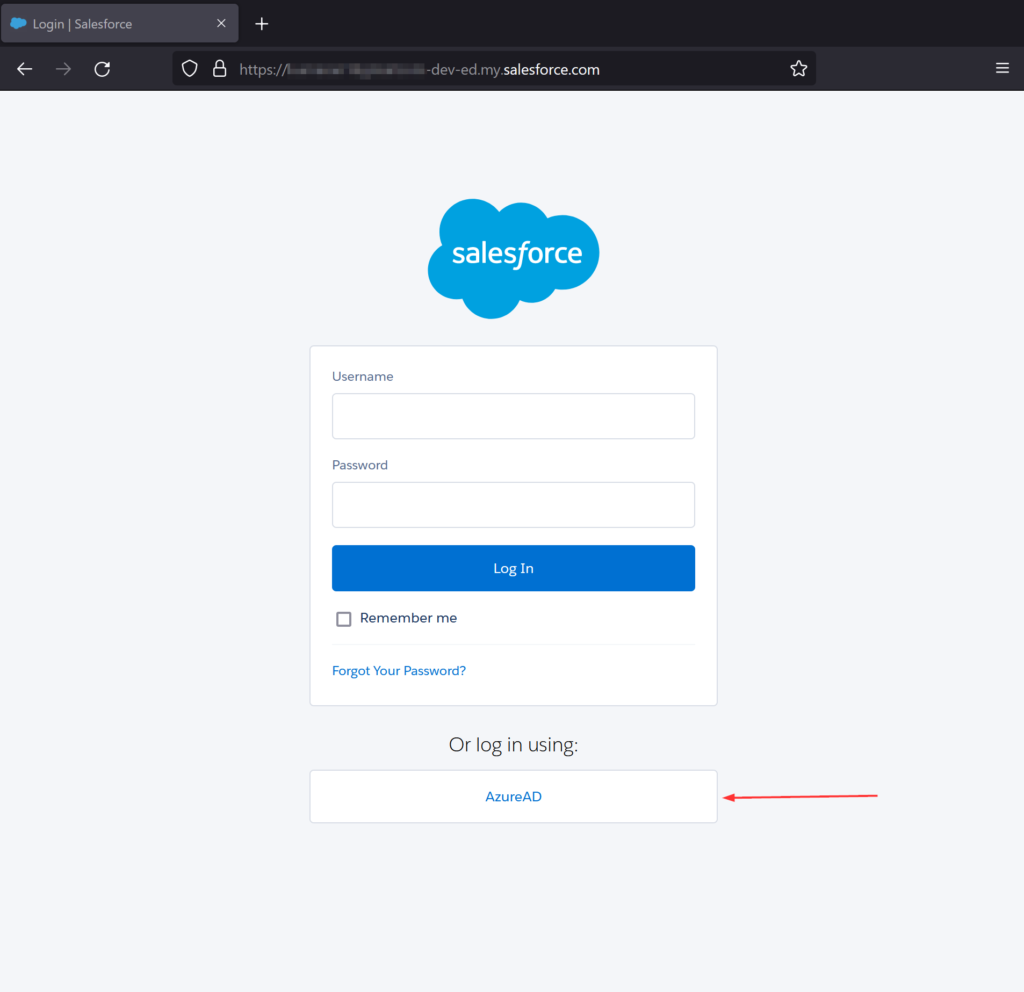
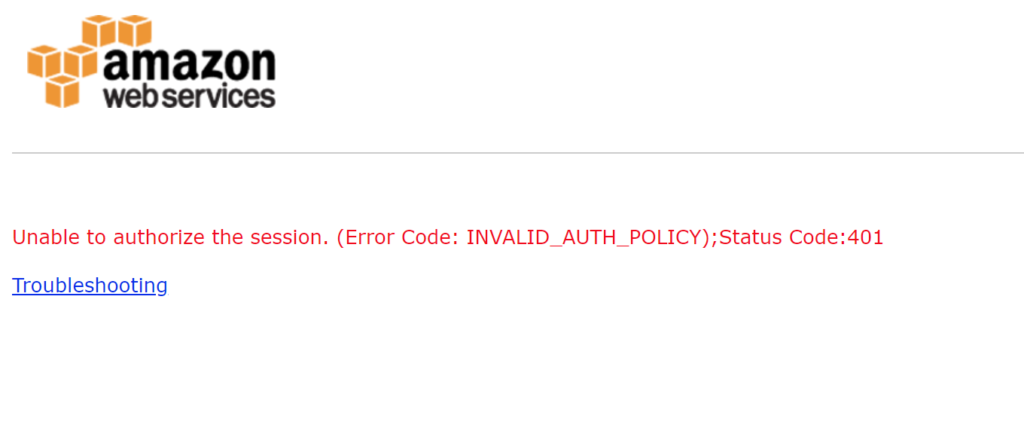
When user tries to login with their own credentials, they will get an error ‘This account does not exist in this organization..‘ This means that the user who is part of a different Azure AD tenant doesn’t exist in the home tenant which the Salesforce application is part of.
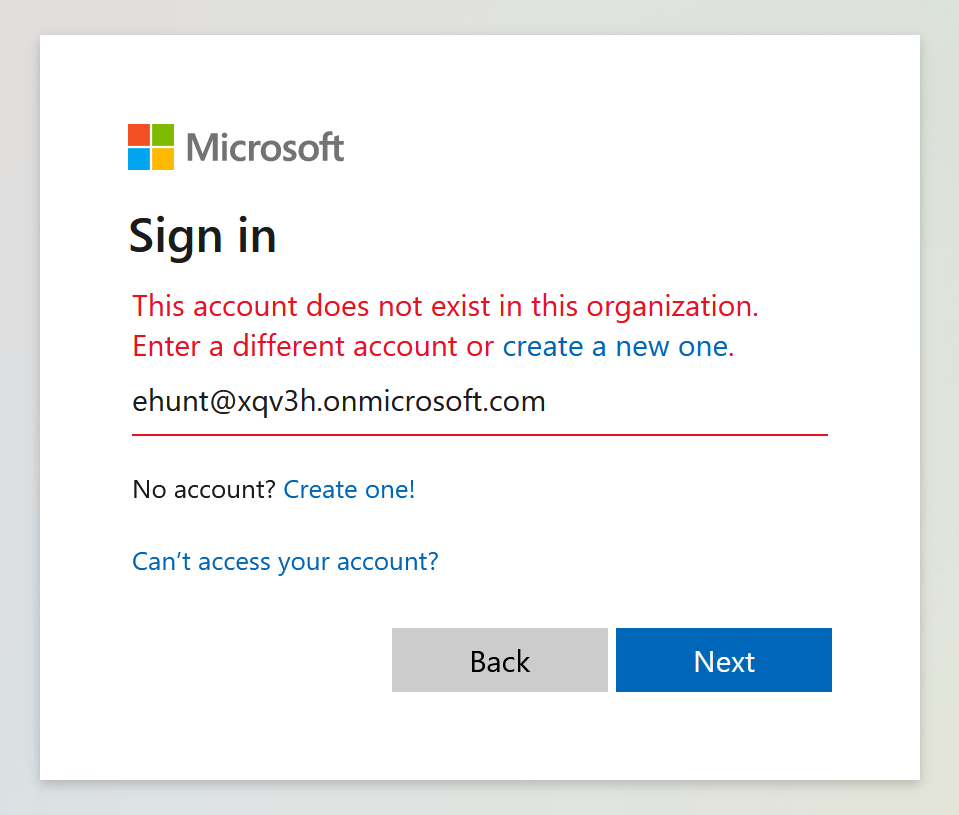
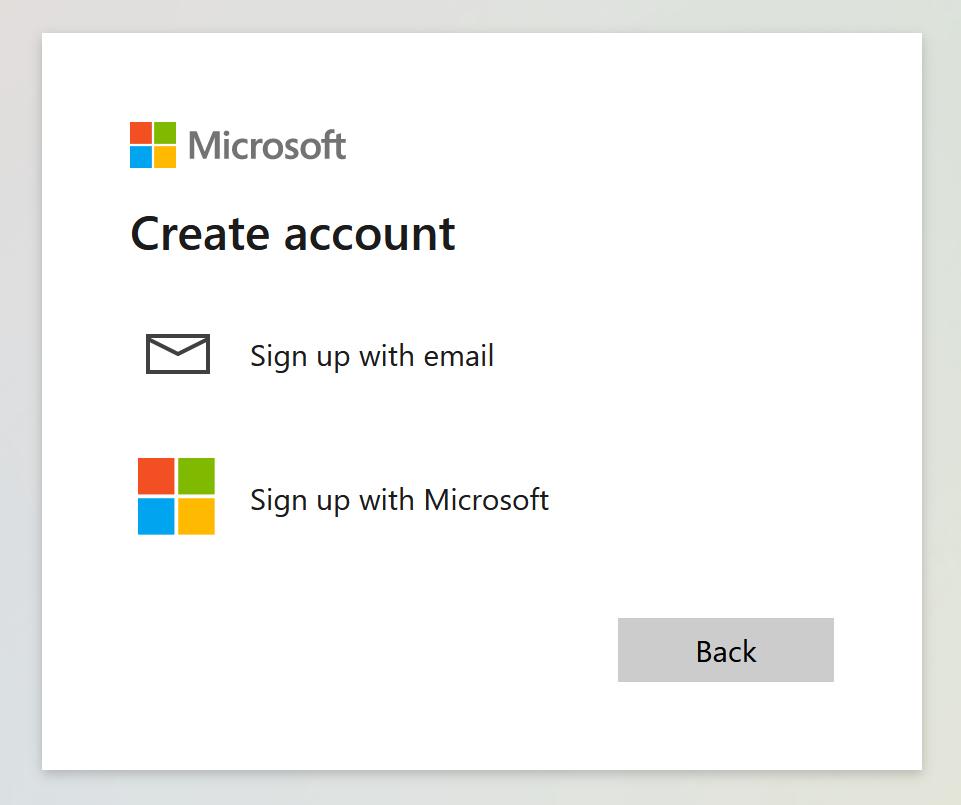
User clicks on Create a new one or Create one!
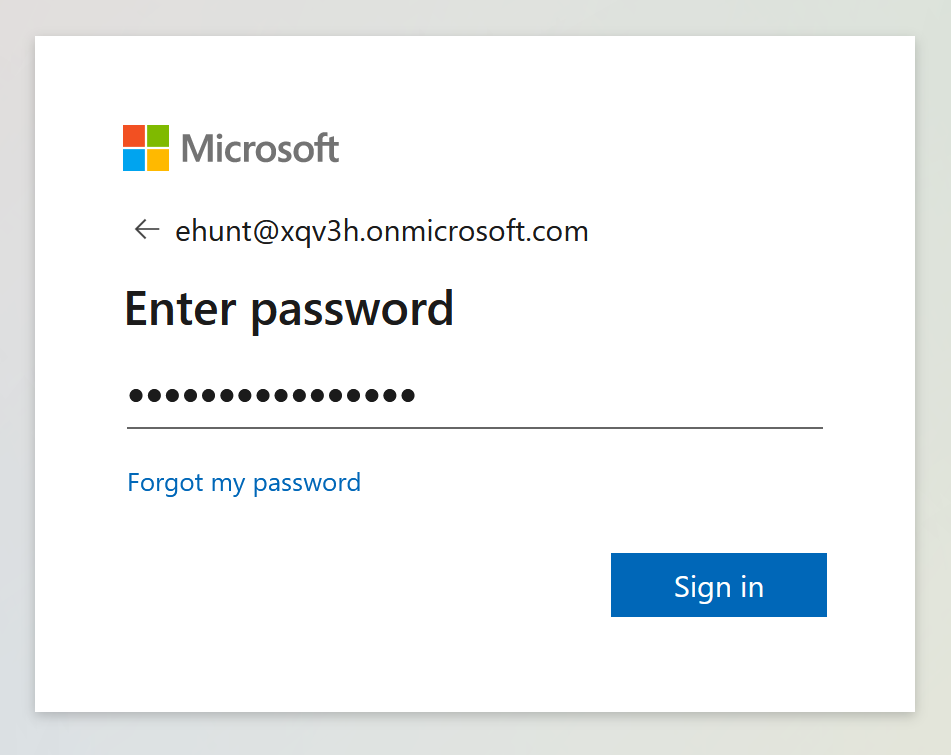
Select Sign up with email. Enter Email address and password
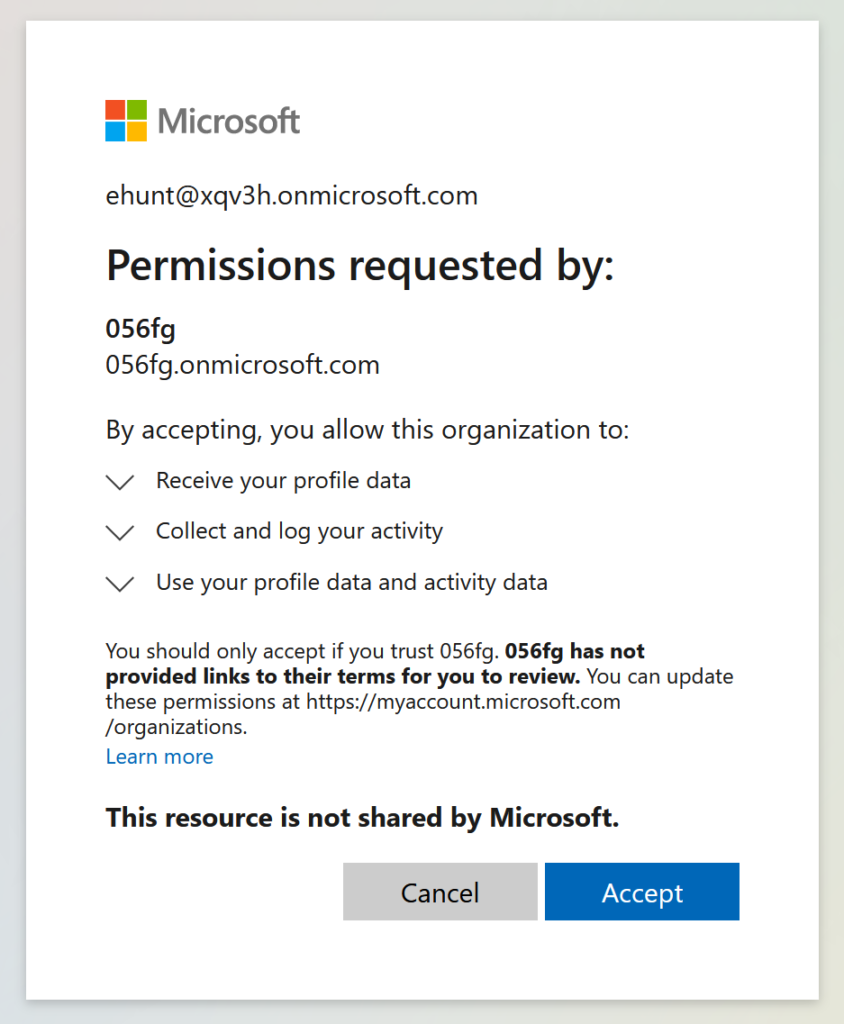
Review and click Accept in the Permissions requested by: screen
Note: See in screenshot below, Permissions requested by: is the tenant where the application lives
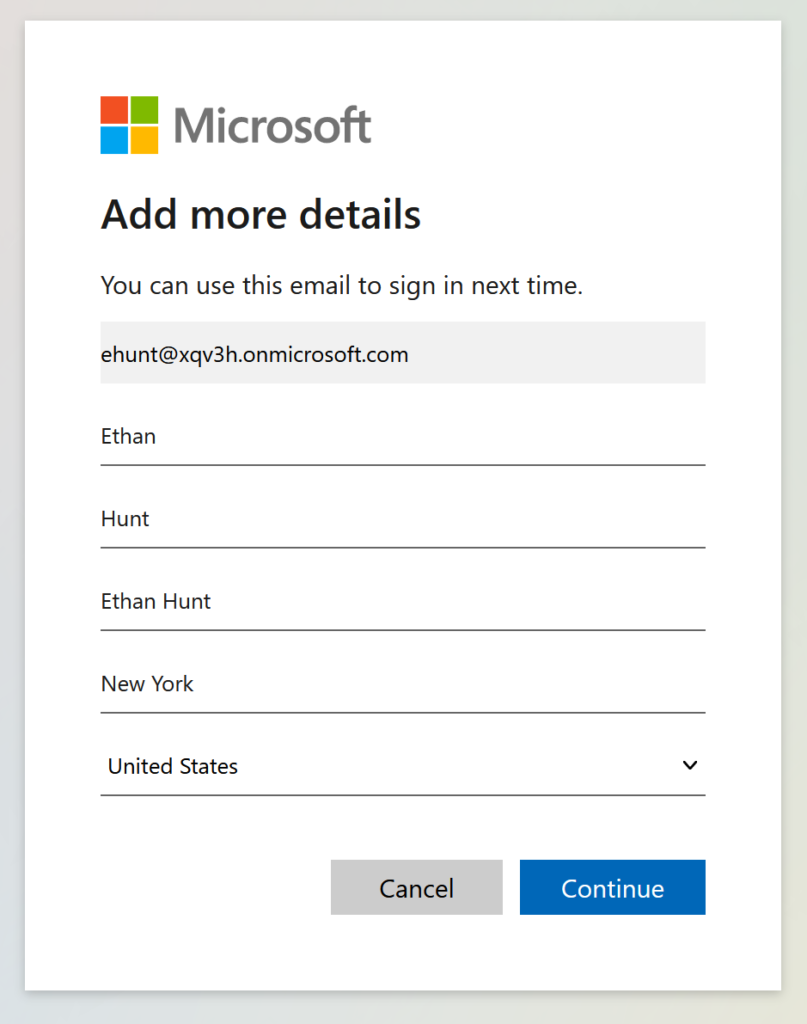
Fill the necessary information and click Continue
Note: This next screen is a result of how we configured the page layout earlier.
And it redirects the user to the Salesforce landing page. I don’t have anything configured within Salesforce for this specific user
So, there are few things to note here:
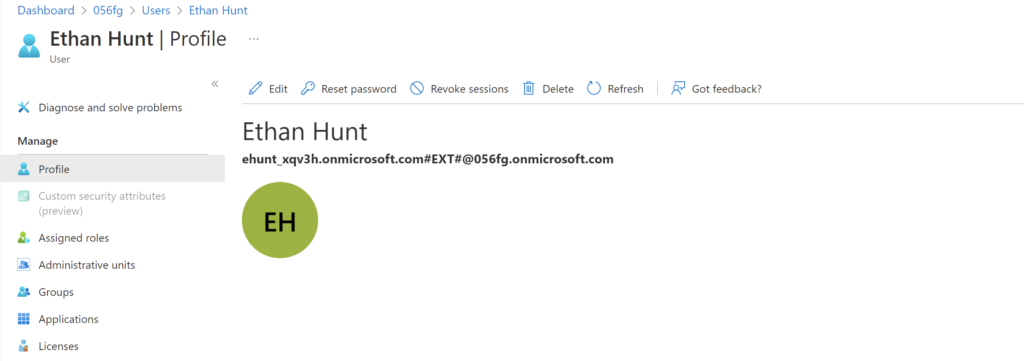
- When the user goes through a self-signup process, guest account is automatically created for the user in the home tenant
- Like in my example, as I don’t have user provisioning enabled with Salesforce, the user has to be created within Salesforce
- I’m only know the basics on Salesforce’s inner workings but I do have the authentication part configured with Azure AD
- If you are following this guide and also allowing guest users to login to Salesforce, have your Salesforce administrator setup this guest user with the user’s home tenant’s email account
Hope this post helped you in setting up the Azure AD self-service sign-up user flow to an app.
Thank you for stopping by.✌