We can enable users to sign in to AppStream 2.0 by using their existing Azure AD credentials, and start streaming applications. To accomplish this, we use an IAM role and a relay state URL to configure Azure AD and enable AWS to permit users to access an AppStream 2.0 stack. The IAM role grants users the permissions to access the stack. The relay state is the stack portal to which users are forwarded after successful authentication by AWS.
In this post, I’ll go over steps on how to configure federated user access for Amazon AppStream 2.0 using Azure AD SSO for Enterprise Apps.
The below diagram illustrates the authentication flow between AppStream 2.0 and Azure AD as identity provider (IdP).
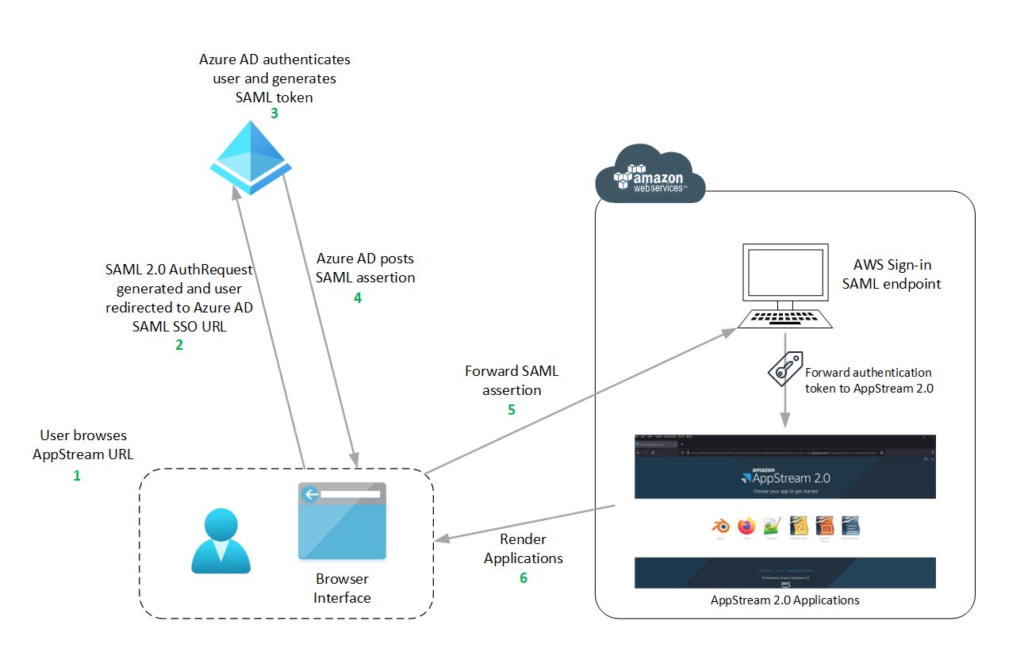
From a user’s perspective, this above process happens seamlessly. The user starts at myapps.microsoft.com and is automatically redirected to an AppStream 2.0 application portal without being required to enter AWS credentials.
The setup process goes like in this diagram below,

Table of Contents
Create an Azure AD SSO application
- Login to Azure AD Admin Center (https://aad.portal.azure.com/)
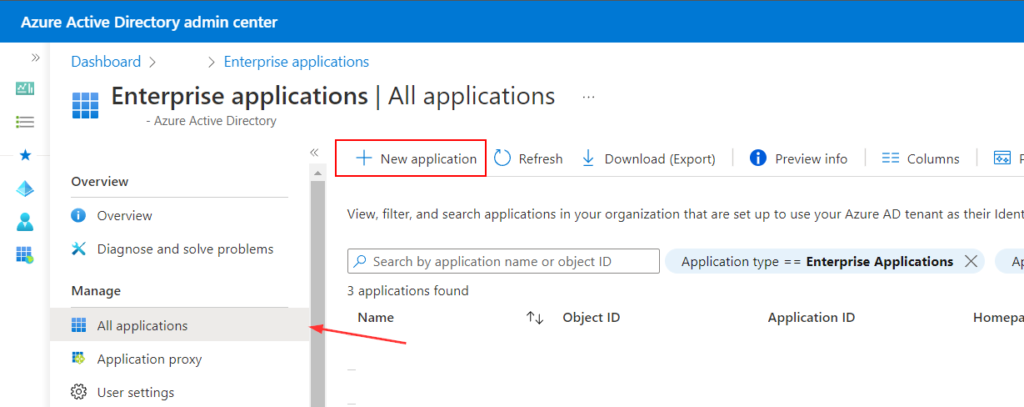
- Click on the Enterprise applications tab
- To add new application, Click New application
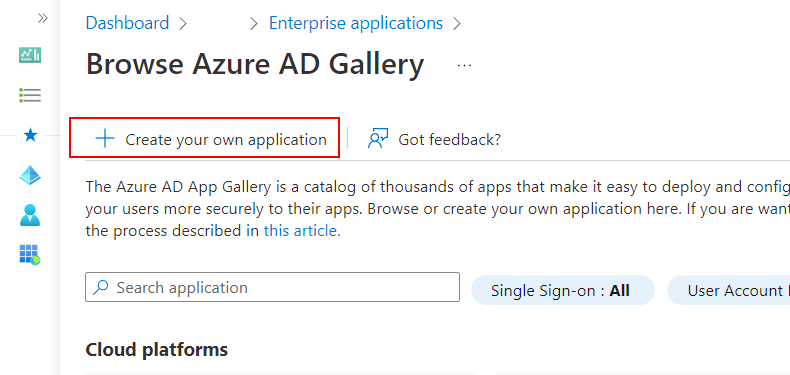
- Click Create your own application
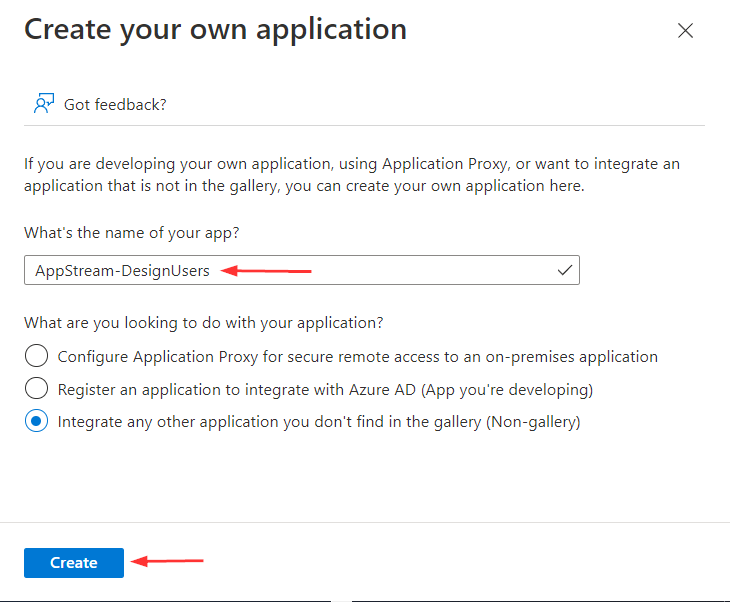
- Provide a name for your application
- I’ve named my application AppStream-DesignUsers
- Select Integrate any other application you don’t find in the gallery (Non-gallery) and click Create
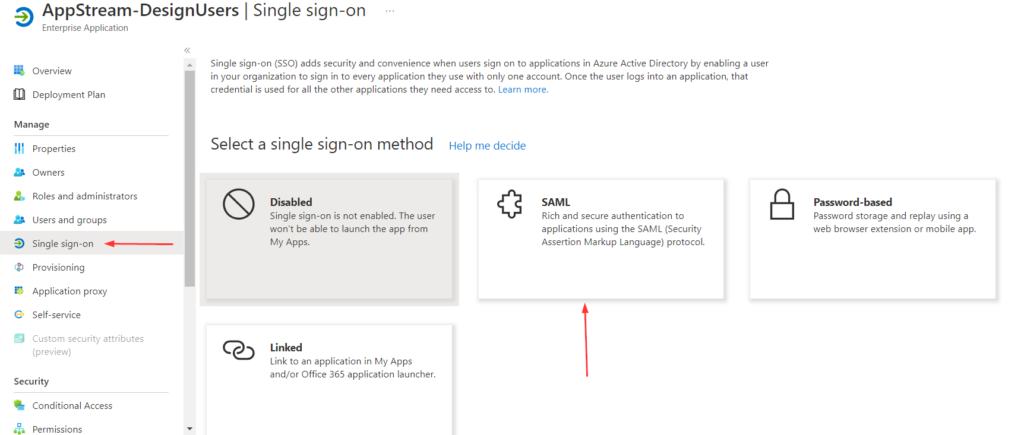
- Once the application is added, from the left navigation menu, Click on Single sign-on, and choose SAML
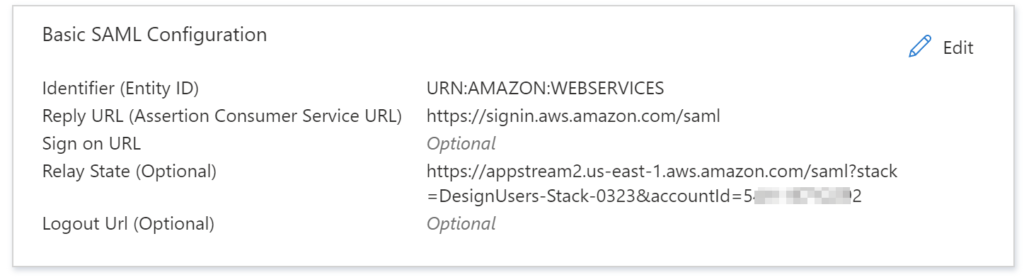
- Click Edit in the Basic SAML Configuration
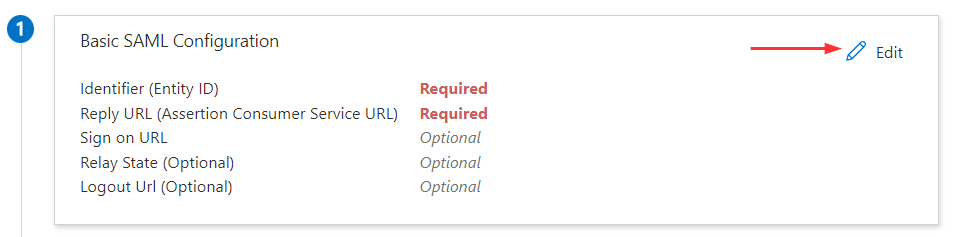
- Provide the Identifier (Entity ID) and Reply URL (Assertion Consumer Service URL), then click Save
- Identifier (Entity ID) = URN:AMAZON:WEBSERVICES
- Reply URL (Assertion Consumer Service URL) = https://signin.aws.amazon.com/saml
- Sign on URL (Optional) = <leave it blank>
- Relay State (Optional) = <leave it blank>, We will revisit this later in this post
- The entity ID is passed during the SAML exchange
- Azure AD requires this value to be unique for each application
- When we add more AppStream 2.0 stacks, we can append a number to the string; for example, URN:AMAZON:WEBSERVICES1,URN:AMAZON:WEBSERVICES2

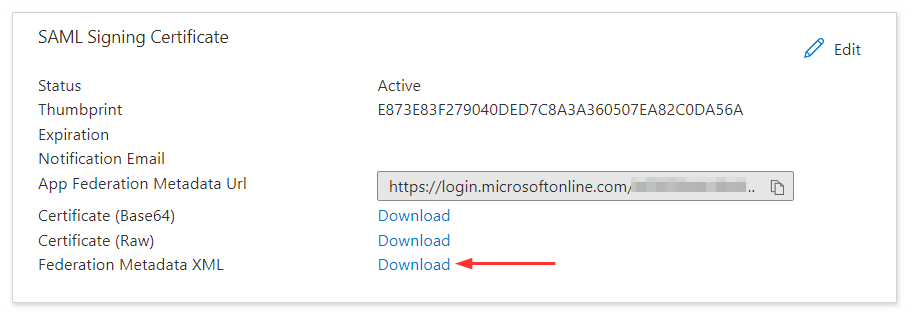
- In the SAML Signing Certificate section, click Download next to the Federation Metadata XML and save the .xml file to your computer
Create the SAML identity provider
Now, we need to create the SAML provider in AWS IAM console.
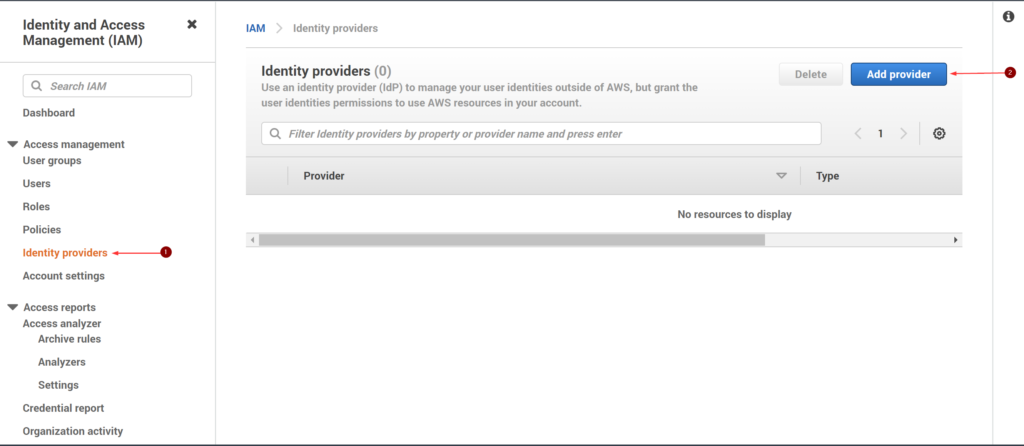
- In AWS console, search and open IAM
- In the left navigation window, click Identity providers, and the Add provider
- On the Configure Provider page, for the Provider Type, select SAML
- For Provider name, I’ve named it AzureAD-SSO
- Click Choose File to upload the metadata document that previously downloaded from Azure AD, and click Add provider

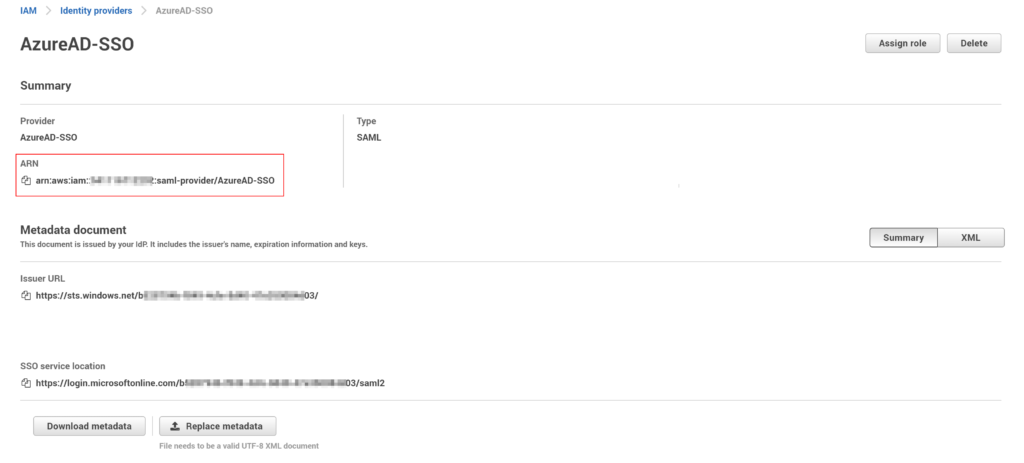
- Click on the identity provider we just created
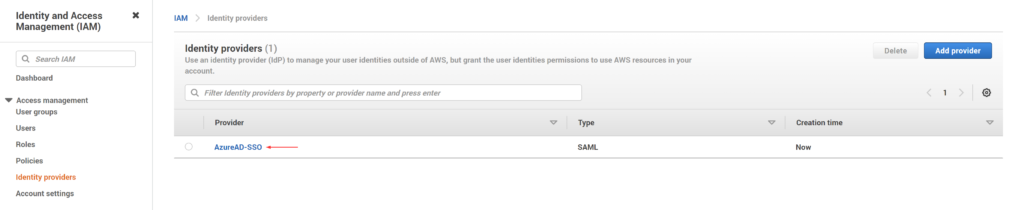
- Copy the value for the Provider ARN
- The ARN is in the following format: arn:aws:iam::AccountID:saml-provider/Provider Name
Configure an IAM policy
We need to create a policy with permissions to the AppStream 2.0 stack. This way we can ensure that users have only the permission to stream applications from a specific stack.
- In the IAM console, choose Policies, click Create Policy
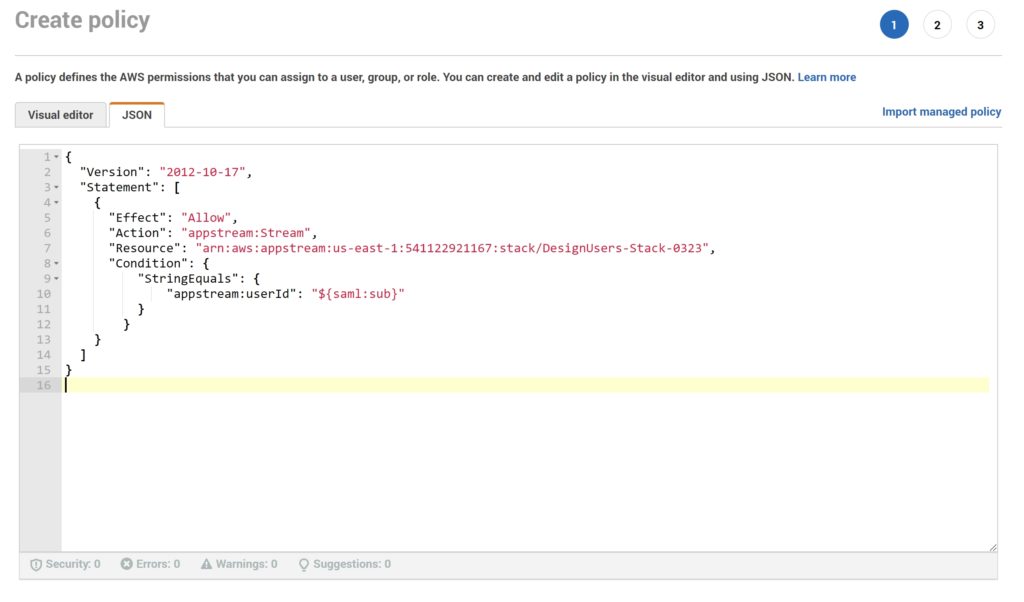
- In Create policy page, choose the JSON tab
- Copy and paste the following JSON policy into the JSON window
- Modify the resource by entering your AWS Region Code, account ID, and stack name
- AWS Region Code = Determine AWS region code here
- account ID = In AWS console, click on your user name in the top right of the window and your account ID is there
- Stack name = AppStream stack name which we want to grant access to users to
- Modify the resource by entering your AWS Region Code, account ID, and stack name
{
  "Version": "2012-10-17",
  "Statement": [
    {
      "Effect": "Allow",
      "Action": "appstream:Stream",
      "Resource": "arn:aws:appstream:REGION-CODE:ACCOUNT-ID-WITHOUT-HYPHENS:stack/STACK-NAME",
      "Condition": {
          "StringEquals": {
              "appstream:userId": "${saml:sub}"
          }
        }
    }
  ]
}
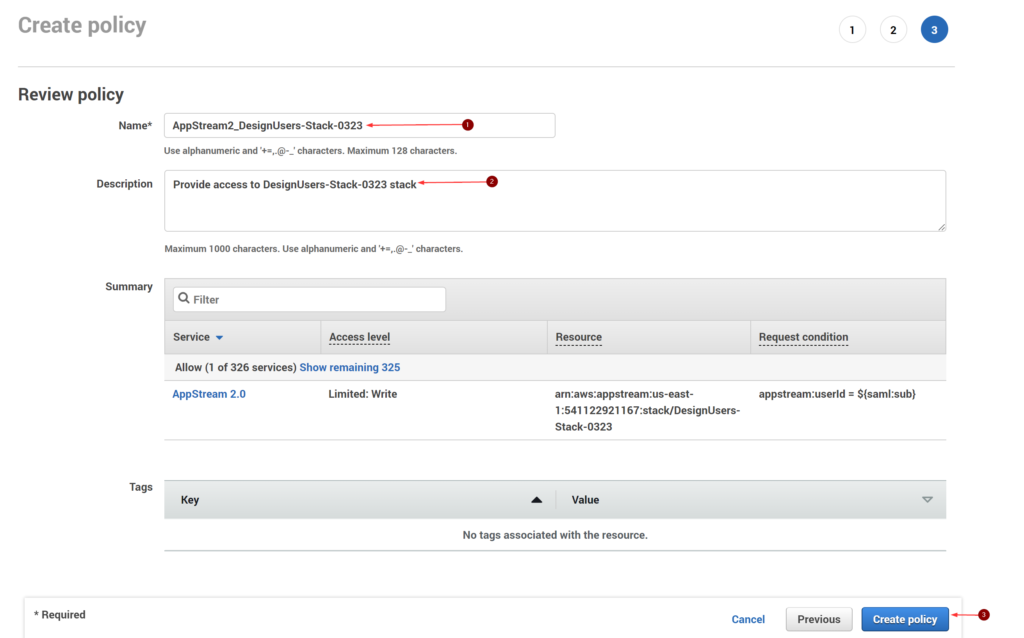
- In the Review policy page, provide Name, Description and click Create policy
- You should see the following notification once the policy is created,

Create an IAM Role
In this step, we will create a role that our Azure AD users will assume when federating to AppStream 2.0
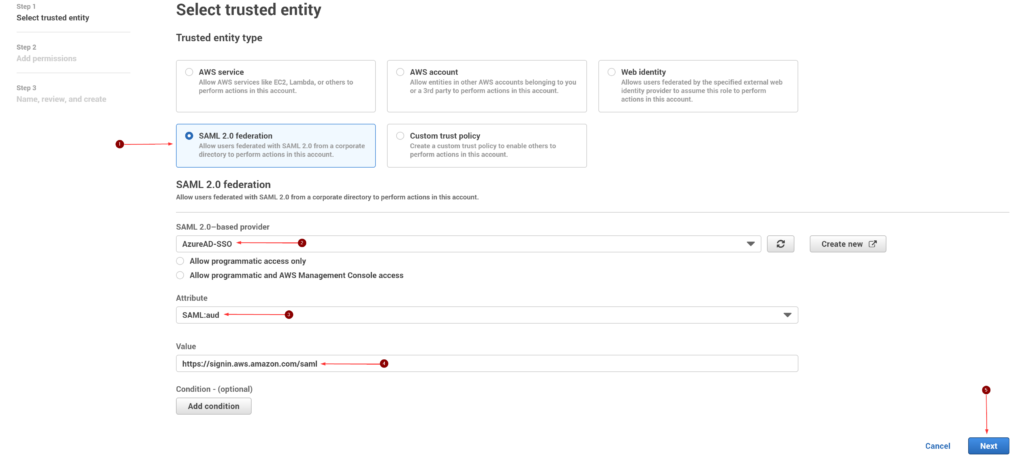
- In the IAM console, choose Roles, click Create role
- For the Trusted entity type, select SAML 2.0 federation
- Under SAML 2.0-based provider, choose the SAML IdP that we created earlier
- For the Attribute, pick SAML:aud and type https://signin.aws.amazon.com/saml
- Do not add any conditions and click Next
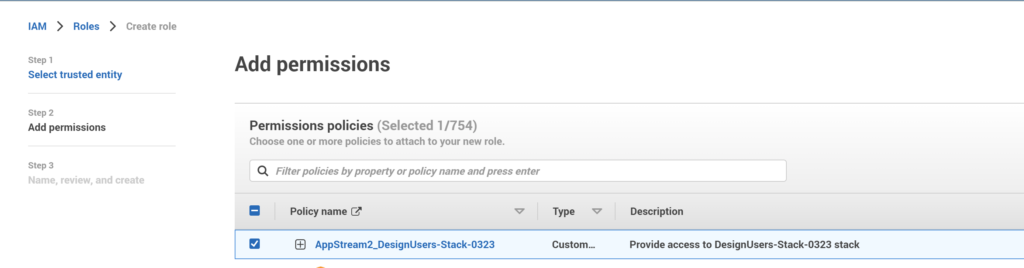
- In Add permissions, select the IAM policy we created earlier and click Next
- Provide a Role Name and Description that identifies the role, and click Create Role
- Once created, locate and click on the role we just created
- Copy the Role ARN
- The ARN is required to configure claims rules later
- The ARN is in the following format: arn:aws:iam::AccountID:role/Role Name

Configure the Azure AD SSO Application
Now we are ready to finish configuring the Azure AD application we started working on earlier
- Login to Azure AD Admin Center (https://aad.portal.azure.com/)
- Click on the Enterprise applications tab
- Choose the application we created earlier, from the left navigation menu, Click on Single sign-on
- Click Edit in the Basic SAML Configuration, Provide Relay State URL and click Save
- Relay State = The Relay State is unique to the account, AWS Region, and AppStream 2.0 stack
- Format is,
- https://relay-state-region-endpoint?stack=stackname&accountId=aws-account-id-without-hyphens
- Below table has a list of AppStream 2.0 Relay State Region Endpoints
| Region | Relay state endpoint |
| US East (N. Virginia) | https://appstream2.us-east-1.aws.amazon.com/saml (FIPS) https://appstream2-fips.us-east-1.aws.amazon.com/saml |
| US West (Oregon) | https://appstream2.us-west-2.aws.amazon.com/saml (FIPS) https://appstream2-fips.us-west-2.aws.amazon.com/saml |
| Asia Pacific (Mumbai) | https://appstream2.ap-south-1.aws.amazon.com/saml |
| Asia Pacific (Seoul) | https://appstream2.ap-northeast-2.aws.amazon.com/saml |
| Asia Pacific (Singapore) | https://appstream2.ap-southeast-1.aws.amazon.com/saml |
| Asia Pacific (Sydney) | https://appstream2.ap-southeast-2.aws.amazon.com/saml |
| Asia Pacific (Tokyo) | https://appstream2.ap-northeast-1.aws.amazon.com/saml |
| Canada (Central) | https://appstream2.ca-central-1.aws.amazon.com/saml |
| Europe (Frankfurt) | https://appstream2.eu-central-1.aws.amazon.com/saml |
| Europe (Ireland) | https://appstream2.eu-west-1.aws.amazon.com/saml |
| Europe (London) | https://appstream2.eu-west-2.aws.amazon.com/saml |
| AWS GovCloud (US-West) | https://appstream2.us-gov-west-1.amazonaws-us-gov.com/saml (FIPS) https://appstream2-fips.us-gov-west-1.amazonaws-us-gov.com/saml |
- Click Edit in the Attributes & Claims section
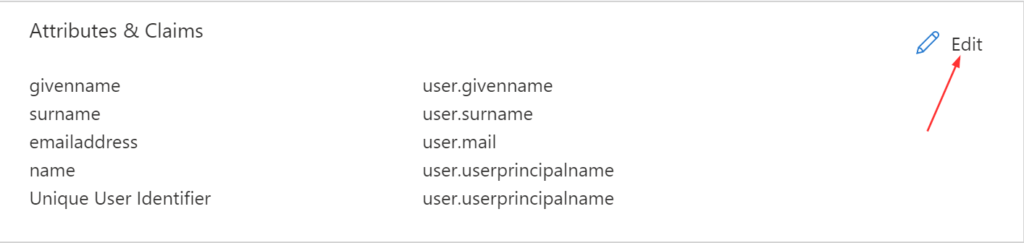
- In Required claim,
- Unique User Identifier (Name ID) = Key used to identify users in the SAML assertion
- I generally stick with user.userprincipalname
- Usually user.mail or user.userprincipalname works
- Click + Add new claim and add the below claims
- By default, Azure AD populates several SAML attributes for all new applications
- These attributes are not needed for the federation to AppStream 2.0
- We can remove them by choosing the three dots next to each, and choosing Delete
- If you decide to leave them as is, it doesn’t do any harm
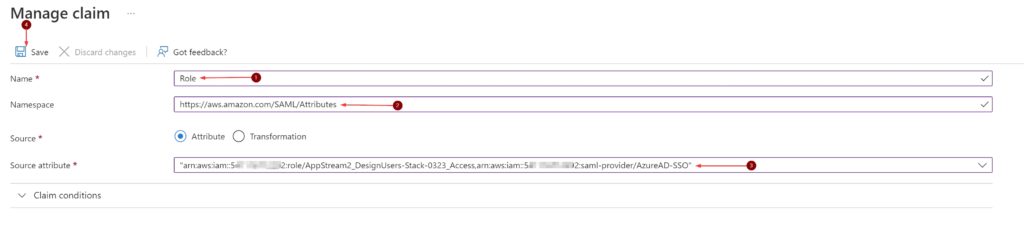
Name = Role
Namespace = https://aws.amazon.com/SAML/Attributes
Source = Attribute
Source Attribute = This is the Role ARN from earlier in this post, followed by a comma and then the Provider ARN
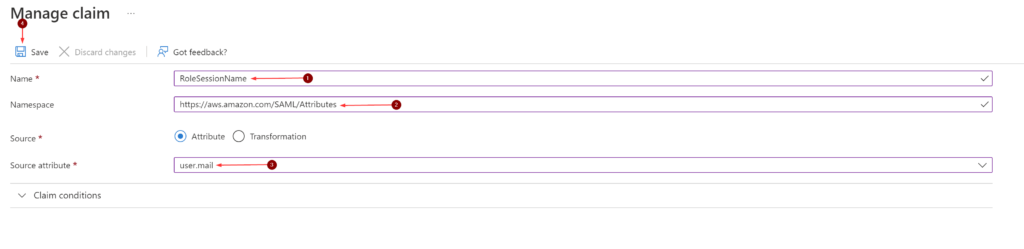
Name = RoleSessionName
Namespace = https://aws.amazon.com/SAML/Attributes
Source = Attribute
Source Attribute = We can provide any string value. I’m going with user.mail
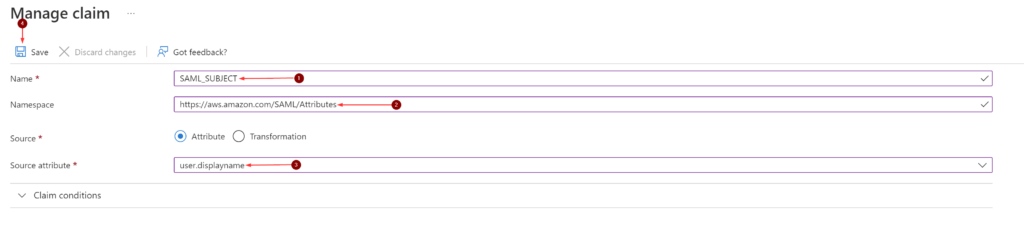
Name = SAML_SUBJECT
Namespace = https://aws.amazon.com/SAML/Attributes
Source = Attribute
Source Attribute = We can provide any string value. I’m going with user.displayname
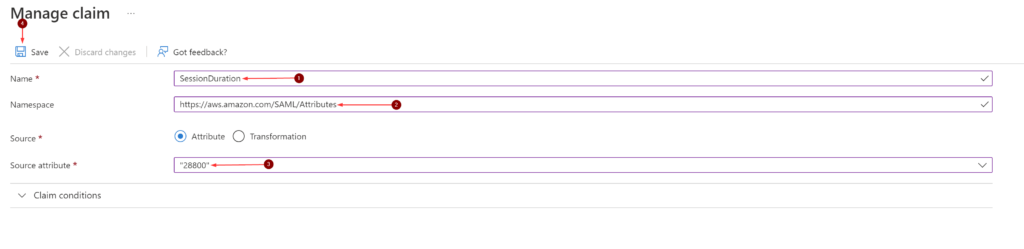
If the user intend to use the AppStream 2.0 client, sessions will default to a 60 minute timeout. This setting will determine the duration.
Name = SessionDuration
Namespace = https://aws.amazon.com/SAML/Attributes
Source = Attribute
Source Attribute = Value in seconds between 900 (15 minutes) and 43200 (12 Hours). I’m going with 28800 (8 Hours)
Assign Azure AD groups in Application
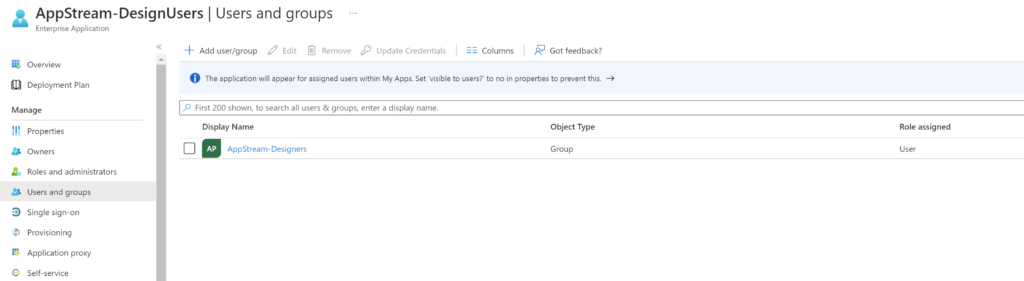
- In the left navigation menu, click Users and groups, click + Add user/group
- In Add Assignment, click Users and groups
- In the Users and groups dialog box, select the Azure AD group to provide access the AppStream 2.0 stack
- Click Assign
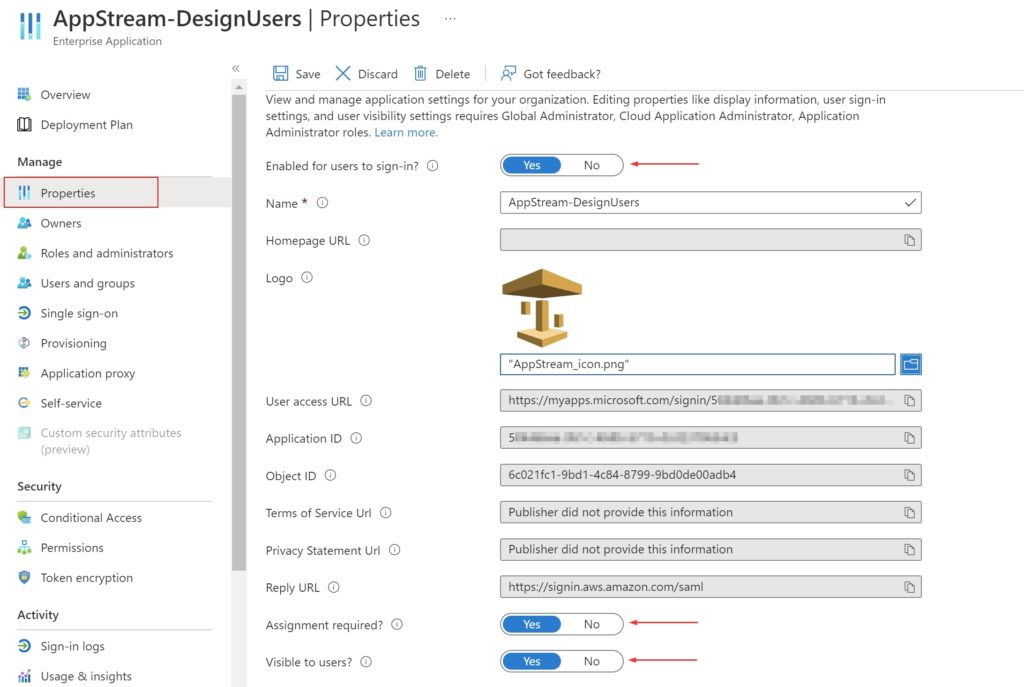
Also click on the Properties tab in the left navigation menu to check the following,
- Enabled for users to sign-in? = Yes
- Assignment required? = Yes
- Visible to users? = Yes
I also uploaded an icon file for the app to look nicer.😉
Test Application
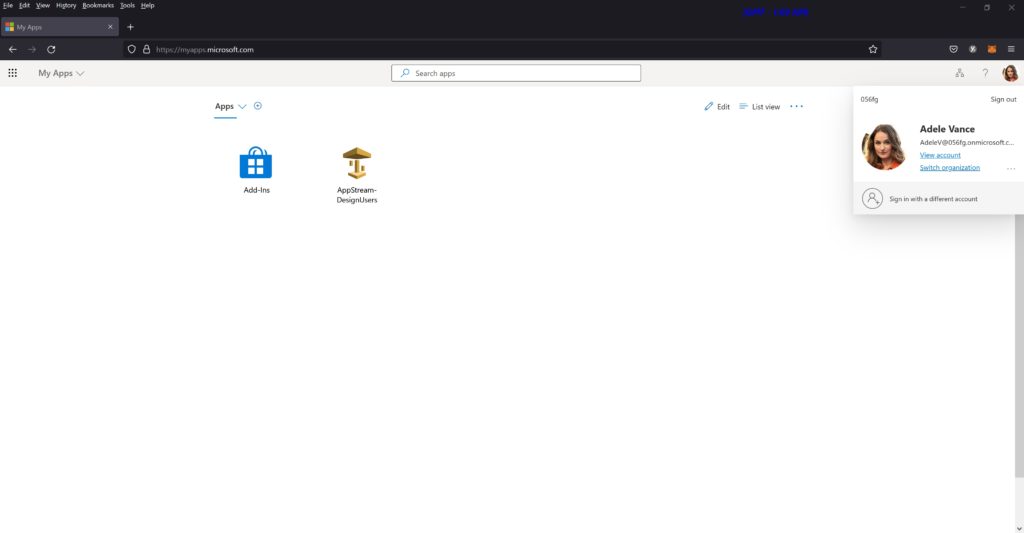
With a Azure AD security group assigned to the application and the other setting configured, we’re ready to test this with a user account. I’ve already added the user account to the assigned Azure AD group. To test this,
- User logs into myapps portal (https://myapps.microsoft.com/) with their Azure AD credentials
- User is presented with the AppStream stack,
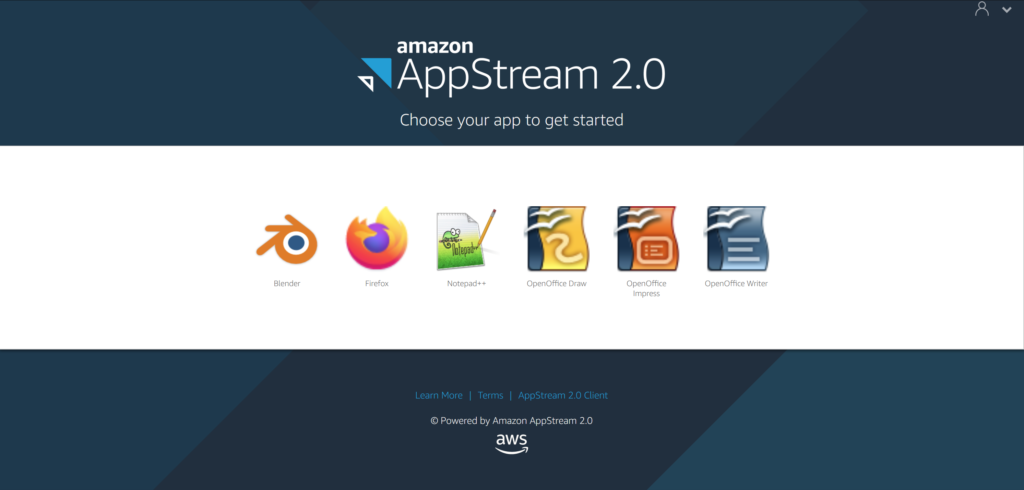
I also created a second fleet and stack, associated the fleet to the stack to demonstrate how we can assign different users to stacks. IMO, the myapps portal is a really cool feature and we can it to present AppStream to our users.
As I mentioned earlier in this post, adding more stack will require adding additional Azure AD applications and assigning AD group(s) to it.


This below is a different user logging into the myapps portal (https://myapps.microsoft.com/) with their Azure AD credentials and I’ve assigned the ‘DeveloperUsers-Stack-0323’ stack to them.
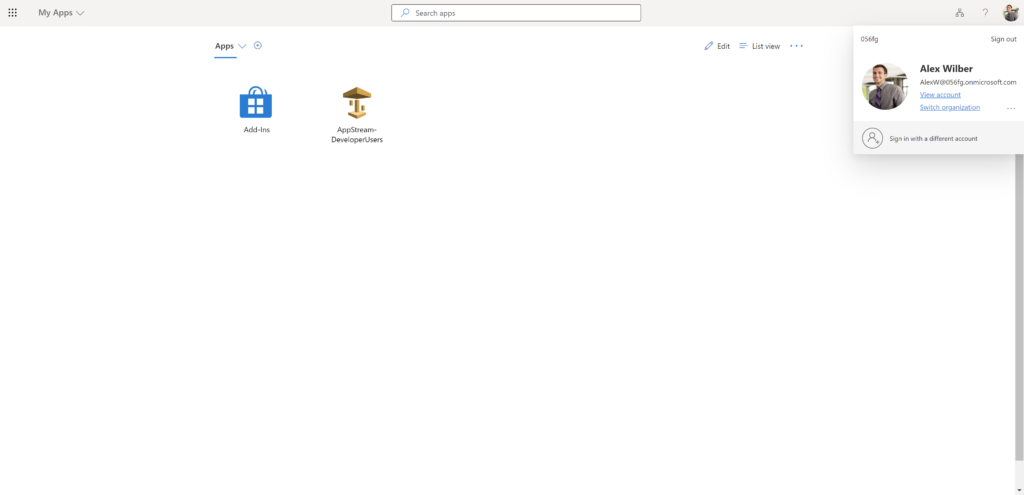
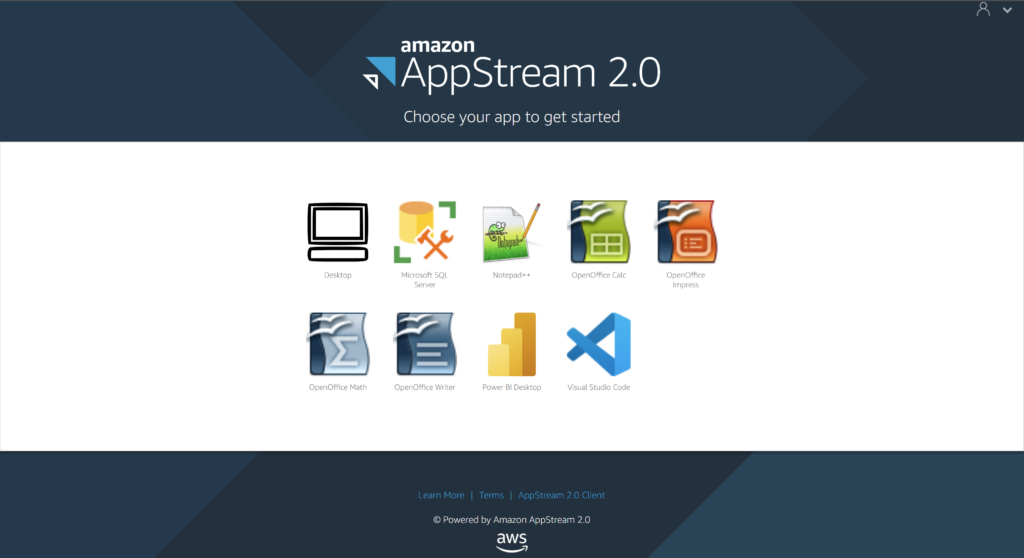
The user gets redirected to the AppStream 2.0 portal
Issues you may encounter and How to fix it
Error: RoleSessionName is required in AuthnResponse (service: AWSSecurityTokenService; status code: 400; error code: InvalidIdentityToken)
Fix: I encountered this error with the second stack I had created. When is saw this error, my obvious first step is to make sure I didn’t miss the RoleSessionName attribute in the Azure AD app I created. And it was there with the expected value.
I then decided to go back over the AWS IAM role and policy I created and realized that in the I had picked the wrong identity provider and once I picked the correct one, this issue was resolved.

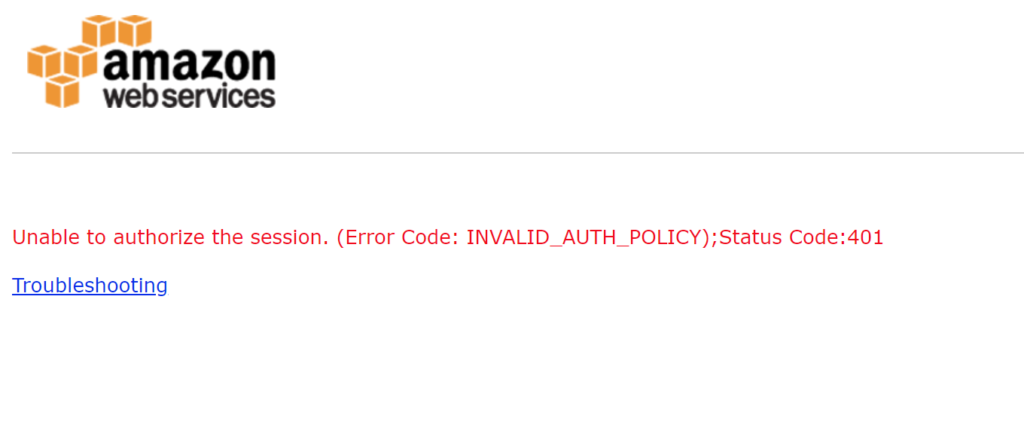
Error: Unable to authorize the session. (Error Code: INVALID_AUTH_POLICY);Status Code:401
Fix: This error message occurs when the IAM policy does not permit access to the AppStream 2.0 stack or when the stack name is not entered into the policy. Similar mess up on my part.
I had mistyped the stack’s name while creating/typing in the JSON window during the policy creation step.
In my experience, the SAML-tracer for Chrome and Firefox comes in handy to help identify SAML related issues. It has certainly helped me in several instances.
Hope this post helped you to setup Azure AD SSO for your AppStream 2.0 stacks.
Thank you for stopping by.✌