This one took me a while to understand what is happening and how to resolve it. The Teams audio and calling functions are not something I deal with on a daily basis but it was good learning experience.
One of the Teams tenant I manage kept running out of pooled minutes really quickly. I wasn’t actively monitoring the usage but I did notice the emails from Microsoft that were warning us that the minutes are almost used up and users won’t be able to use the PSTN conferencing services for the rest of the calendar month unless more communication credits were added.
What is the deal here exactly?
Each user assigned an ‘Audio Conferencing’ license which provides a dial-in phone number when they schedule a meeting, is given 60 minutes per month of pooled minutes that can be used for inbound or outbound PSTN dialing for meetings. This ‘Audio Conferencing’ license is only needed for users scheduling the meetings. Meeting attendees who dial in don’t need this license. Depending on how you have deployed Teams in your organization, whether as a full blown phone system or used specifically for meetings, this pooling minutes is only for meetings and is separate from other dial plans(domestic or international) that you may have.
Users with ‘Audio Conferencing’ license are given a default invite number in the same country as what their O365 account’s usage location is set to.
In a example scenario where an organization has 100 users that have ‘Audio Conferencing’ license, 100 X 60 minutes and you get 6000 pooled minutes for your tenant to PSTN dial-in and dial-out of meetings. One the 6000 minutes are consumed users will no longer be able to dial-in or dial-out of the meetings using the number provided in the meetings.
Note: Users can still participate using the Teams meeting clients(Desktop or phone app).
Latest Update: Microsoft is extending the audio conferencing capabilities by removing the cost involved to the SKU.
Why users use the PSTN dial-in numbers for Teams online meetings
Personally I love the Teams app, both on the desktop and the phone. And I can tell Microsoft is adding new functionalities over time. I also like it how I can use the phone app for voice and also launch Teams on my desktop and I get an option to ‘add the device’ to the ongoing call on the phone. This way, I can present using the desktop.
Using this VOIP features via the Teams app(phone or desktop) doesn’t incur additional cost to the organization but there are some scenarios where including a dial-in number to meetings makes sense,
- Poor or limited internet connectivity
- Users moving in and out of limited data coverage where voice quality may be better
- Users having issues with VOIP on their PC and phone app
- Users are used to the old ways
- Users lack training in Teams clients(Desktop or phone app)
Determine pooled minutes and usage
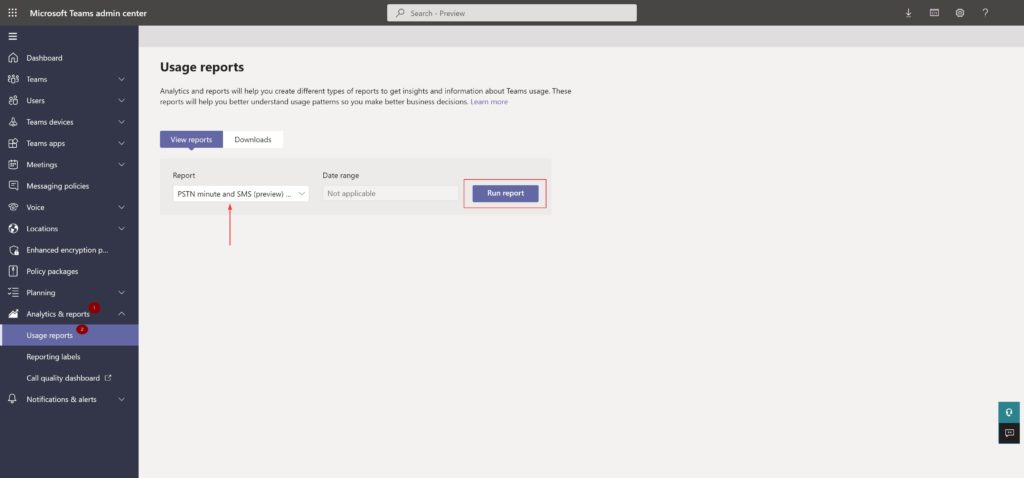
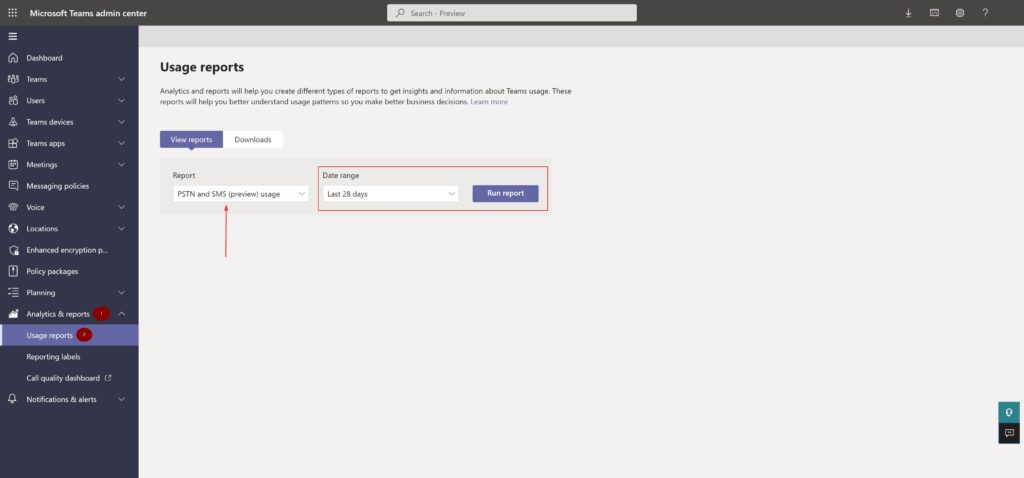
To check your PSTN pooled minutes, you can run usage reports in the Teams admin center,
Teams Admin Center –> Analytics & reports –> Usage reports
- PSTN minute and SMS(preview) pools
- PSTN and SMS(preview) usage
What is burning precious PSTN minutes
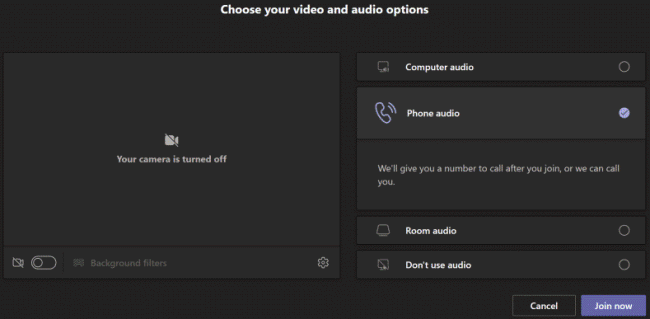
Based on the reports and further reading I realized the ‘Call me‘ feature in Teams is apparently a well known and heavily used user loved feature which seems to be a behavior that followed users from using other conferencing tools.
Users can join a meeting and have the meeting call and join them or dial in manually to the meeting.
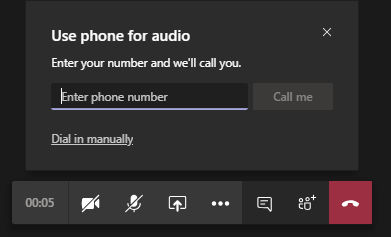
As I mentioned earlier, the users using this feature didn’t realize they can use their computer audio or the Teams app on their phone. There were others who thought this was a handy feature and more convenient. Well, what they didn’t know or didn’t care is, the outbound calls were eating those pooled PSTN minutes and affecting the entire organization for users who would really need it.
What is the fix?
This can be fixed by educating the users about the VOIP options, using the computer or phone Teams app. And yes, obviously by putting policies in the tenant.
In the Teams admin center, the dial-out from meeting can be controlled on a per-user basis
- In the left navigation, select Users, and then select the display name of the user from the list of available users
- Under Audio Conferencing, select Edit
- Under Dial-out from meetings, select the dial-out restriction option you desire
- Select Save
This may resolve the issue by assigning ‘Don’t allow’ policy for the users who are the heavy hitters of the ‘Call me’ feature but more users might start using this feature and you’ll have to constantly monitor the usage.
To prevent this, you can set a tenant level policy based on your requirements and organizational needs. Once the global policy is in place, you can assign a policy on a per-user level.
The following table provides an overview of each policy.
| PowerShell cmdlet | Description |
| DialoutCPCandPSTNInternational | User in the conference can dial out to international and domestic numbers, and this user can also make outbound calls to international and domestic numbers. |
| DialoutCPCDomesticPSTNInternational | User in the conference can only dial out to domestic numbers, and this user can make outbound calls to international and domestic numbers. |
| DialoutCPCDisabledPSTNInternational | User in the conference can’t dial out. This user can make outbound calls to international and domestic numbers. |
| DialoutCPCInternationalPSTNDomestic | User in the conference can dial out to international and domestic numbers, and this user can only make outbound calls to domestic PSTN number. |
| DialoutCPCInternationalPSTNDisabled | User in the conference can dial out to international and domestic numbers, and this user cannot make any outbound calls to PSTN number besides emergency numbers. |
| DialoutCPCandPSTNDomestic | User in the conference can only dial out to domestic numbers, and this user can only make outbound call to domestic PSTN numbers. |
| DialoutCPCDomesticPSTNDisabled | User in the conference can only dial out to domestic numbers, and this user cannot make any outbound calls to PSTN number besides emergency numbers. |
| DialoutCPCDisabledPSTNDomestic | User in the conference can’t dial out, and this user can only make outbound call to domestic PSTN numbers. |
| DialoutCPCandPSTNDisabled | User in the conference can’t dial out, and this user can’t make any outbound calls to PSTN number besides emergency numbers. |
| DialoutCPCZoneAPSTNInternational | User in the conference can only dial out to Zone A countries and regions, and this user can make outbound calls to international and domestic numbers. |
| DialoutCPCZoneAPSTNDomestic | User in the conference can only dial out to Zone A countries and regions, and this user can only make outbound calls to domestic PSTN number. |
| DialoutCPCZoneAPSTNDisabled | User in the conference can only dial out to Zone A countries and regions, and this user can’t make any outbound calls to PSTN number besides emergency numbers. |
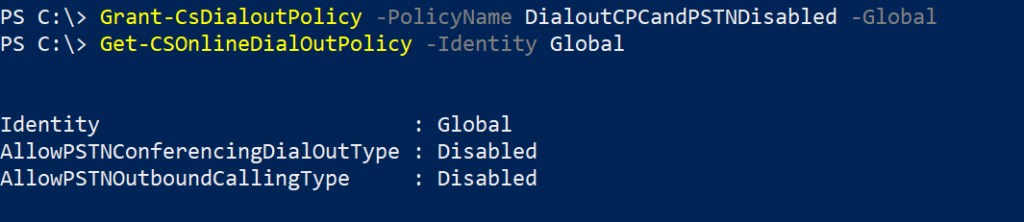
To set the policy on the tenant level, use following cmdlet. Use the pre-defined policy from the table above for the ‘policy name’
Grant-CsDialoutPolicy -PolicyName <policy name> -GlobalTo check the current policy at the tenant level,
Get-CSOnlineDialOutPolicy -Identity GlobalIn my scenario, my plan is to set the global dial-out from meetings policy to DialoutCPCandPSTNDisabled. And assign per-user policy based on their needs.
Note: All users of the tenant who don’t have any dial-out policy assigned will get the global policy.
To set the policy on a per-user level,
Grant-CsDialoutPolicy -Identity <username> -PolicyName <policy name>You can set what is allowed per-user using the Teams admin center as covered earlier or you can use PowerShell to assign a policy to a list of users using this below script.
#Connect-MicrosoftTeams
$list=import-csv "c:\tmp\user.csv"

Foreach($user in $list){

Grant-CsDialoutPolicy -identity $user.UserId -PolicyName "DialoutCPCandPSTNDomestic" #Setting 'DialoutCPCandPSTNDomestic' policy to the users
}
You can also export a report of users and their Dial-Out policy assigned to them,
Get-CsOnlineUser | Select-Object UserPrincipalName,OnlineDialOutPolicy | Export-CSV "C:\tmp\userCallingPolicyReport.csv" -NoTypeInformationTeams and its audio services are a much more detailed topic and I covered what applied to the issue I faced. Hope you’d be able to as well if you encounter this.
Thank you for stopping by.✌