Azure Key Vault is used to safely manage Secrets, Certificates and Crytographic Keys used by cloud and on-premise applications. After the secrets are stored in Azure Key Vault, we can assign access policies to user accounts or SPNs to retrieve and use them.
In this post, I will cover,
- How to create Azure Key Vault
- Create and update secrets in Azure Key Vault
- Create a new Azure AD application and SPN
- Create a client Secret
- Assign a policy in Azure Key Vault to allow access to the SPN we create
- Store the Azure AD application ID and client secret in the SecretStore vault
- Retrieve Secret from Azure Key vault using credentials stored in SecretStore vault
I’ll go through the steps in both the portal and via PowerShell.
Before proceeding further, make sure you are connected to Azure AD and Azure via PowerShell. You may or may not use the same global admin account to connect to both Azure AD and Azure, either way you can use the below cmdlets and adjust it accordingly where necessary.
$AzureADcred = Get-Credential
Connect-AzureAD -credential $AzureADcred
$Azcred = Get-Credential
$SubsName = Read-Host "Enter Azure Subscription Name"
Connect-AzAccount -Credential $Azcred -Subscription $SubsName
Table of Contents
Azure Key Vault
Register Resource Provider
Using PowerShell
Use below cmdlet to register ‘Microsoft.KeyVault‘ as a resource provider in the subscription,
Register-AzResourceProvider -ProviderNamespace "Microsoft.KeyVault"To confirm the registration is successful,
Get-AzResourceProvider | Where-Object {$_.ProviderNamespace -contains "Microsoft.KeyVault"} | select ProviderNamespace, RegistrationState
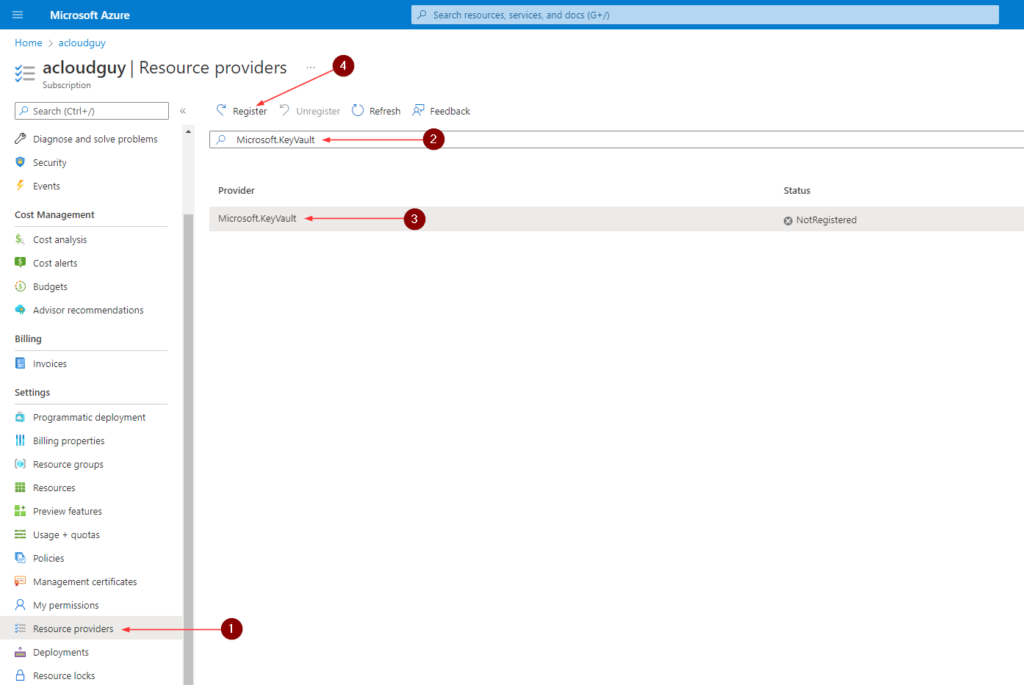
Using Azure Portal
- Login to Azure Portal (https://portal.azure.com/)
- Navigate to Subscriptions
- Click to select the desired Subscription
- In the left navigation menu, click on Resource providers
- Search for Microsoft.KeyVault
- Click on Microsoft.KeyVault
- Click Register
- Once complete, Status column for Microsoft.KeyVault will show Registered
Create Azure Key Vault
Using PowerShell
To proceed further, launch PowerShell as admin and install the Az.KeyVault PowerShell Module
Install-Module -Name Az.KeyVaultThe New-AzKeyVault can be used to create a new Key Vault in Azure. To determine the locations where Key Vault is offered, use the below cmdlet,
Get-AzLocation | Where-Object {$_.Providers -contains "Microsoft.KeyVault"} | ftUse the below cmdlets to create a new Key Vault,
$kvName = Read-Host "Enter a name for Key Vault"
$rg = Read-Host "Enter Resource Group Name"
$loc = Read-Host "Enter Azure location"
New-AzKeyVault -VaultName $kvName -ResourceGroupName $rg -Location $loc
To confirm Key Vault creation,
Get-AzKeyVaultUsing Azure Portal
To cerate a new Key Vault from the Azure portal,
- Login to Azure Portal (https://portal.azure.com/)
- Search for key vault
- Click Create or Create key vault
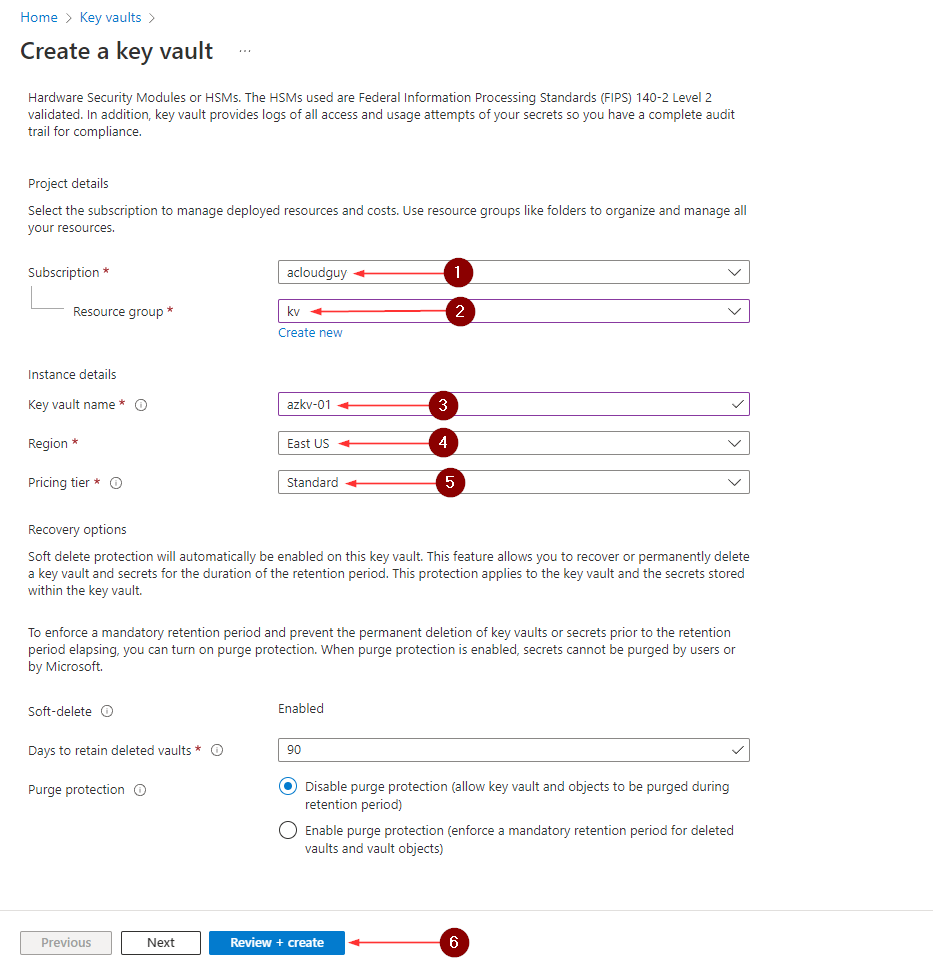
- Provide below information,
- Subscription
- Resource group
- Key vault name
- Region
- Pricing tier
- Leave the other options default and click Review + create
- The other options in the creation steps,
- Access policy = I’ll go through it later in this post
- Networking = All networks to make it publicly accessible
- Tags = As necessary
- The other options in the creation steps,
Below are my settings,
Create SPN in Azure AD
In this step, we’re creating a service principal in Azure AD. We will assign permissions for this SP to retrieve secrets from the Azure Key vault in later step.
In Azure AD, the application registration is the template used to create the SP. Also, the SP is what can be authenticated and authorized. Application and SP are associated by Application ID and they differ in it Object ID.
To create a new Azure AD application,
$appname = Read-Host "Enter a name for the Azure AD application"
New-AzureADApplication -DisplayName $appname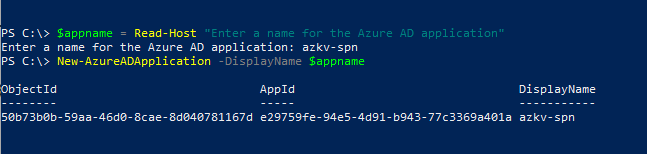
To create a service principal,
$appname = Read-Host "Enter name of Azure AD application"
$AppId = (Get-AzureADApplication -Filter "DisplayName eq '$appname'").AppId
New-AzureADServicePrincipal -AccountEnabled $true -AppId $AppId -DisplayName $appname
Create Client Secret
Next, we create a new client secret using the Get-AzureADApplicationPasswordCredential cmdlet,
$appname = Read-Host "Enter Azure AD application name to determine Object ID"
$appObjID = (Get-AzureADApplication -Filter "DisplayName eq '$appname'").Objectid
$KeyId = Read-Host "Enter value for secret identifier"
New-AzureADApplicationPasswordCredential -ObjectId $appObjID -CustomKeyIdentifier $KeyId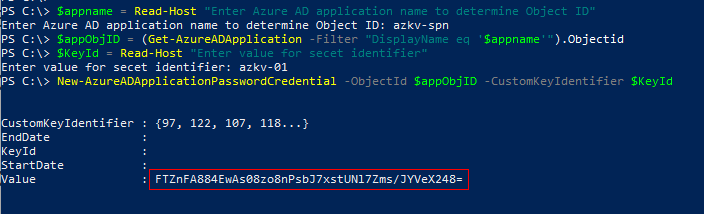
Copy the value in the output to a notepad as I have highlighted above. This value will not be available to copy later.
Assign Permissions
Using PowerShell
We can assign necessary permissions to the Azure AD application we created in above step, using the Set-AzKeyVaultAccessPolicy cmdlet,
$appname = Read-Host "Enter Azure AD application name to determine Object ID"
$Appid = (Get-AzureADApplication -Filter "DisplayName eq '$appname'").AppId
$kvName = Read-Host "Enter a name for Key Vault"
Set-AzKeyVaultAccessPolicy -VaultName $kvName -ServicePrincipalName $Appid -PermissionsToSecrets list,get
Using Azure Portal
- Login to Azure Portal (https://portal.azure.com/)
- Search for Key vault
- Click on the Key Vault we created earlier
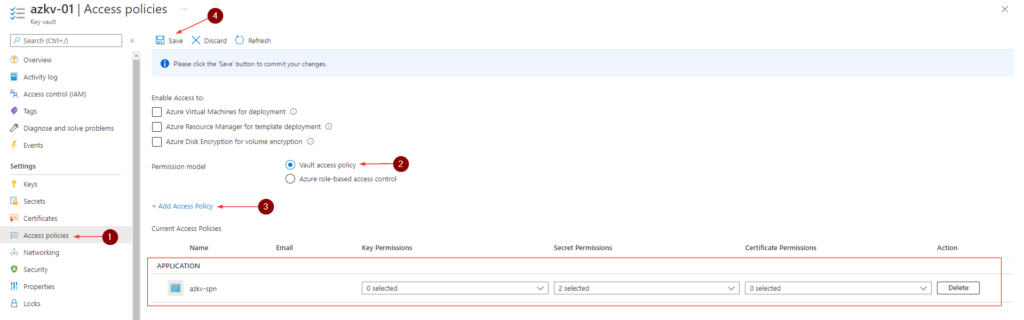
- In the left navigation menu, click on Access policies
- Select Permission model as Vault access policy
- Click +Add Access Policy
- In the Add access policy window
- For Secret permissions, select Get and List
- For Select principal, select the SPN we created earlier
- Click Add
- Click Save to save policy
Manage Secrets in Key Vault
Applications, scripts or users can create, update, delete and retrieve secrets if they have the necessary policy assigned to them
Creating/Updating Secrets
To create a new secret, we can use the Set-AzureKeyVaultSecret cmdlet,
$Secret = ConvertTo-SecureString -String 'Password' -AsPlainText -Force
$kvName = Read-Host "Enter a name for Key Vault"
$SecName = Read-Host "Enter a name for secret"
Set-AzKeyVaultSecret -VaultName $kvName -Name $SecName -SecretValue $Secret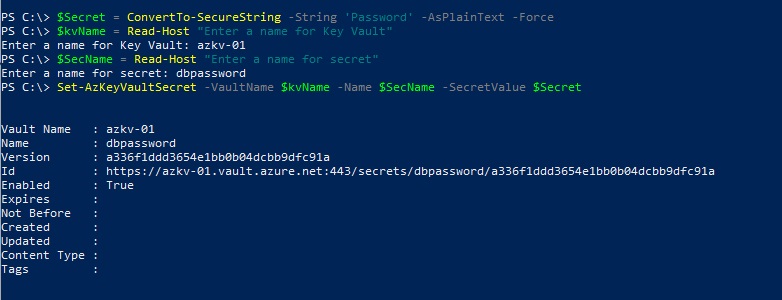
The secret can be updated to a new value using the same Set-AzureKeyVaultSecret cmdlet,
$Secret = ConvertTo-SecureString -String 'Password' -AsPlainText -Force
$kvName = Read-Host "Enter a name for Key Vault"
$SecName = Read-Host "Enter a name for secret"
$Expires = (Get-Date).AddYears(2).ToUniversalTime()
$NBF =(Get-Date).ToUniversalTime()
$Tags = @{ 'Department' = 'IT'; 'Environment' = 'Production'}
Set-AzKeyVaultSecret -VaultName $kvName -Name $SecName -SecretValue $Secret -Expires $Expires -NotBefore $NBF -Tags $Tags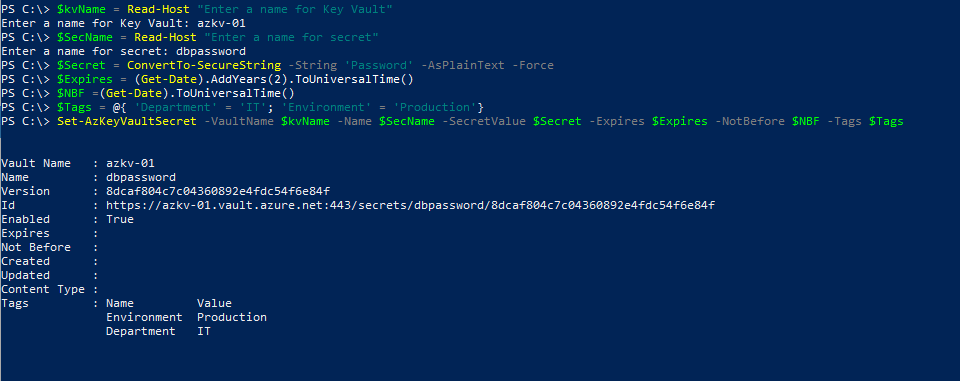
Retrieving Secrets
To retrieve the current version of a secret, we use the Get-AzureKeyVaultSecret cmdlet,
$kvName = Read-Host "Enter a name for Key Vault"
$SecName = Read-Host "Enter a name for secret"
$secruretext = (Get-AzKeyVaultSecret -VaultName $kvName -Name $SecName).SecretValue
This will assign the stored secret to the $secruretext variable as a SecureString. We can now pass this to any other cmdlets that require a SecureString.

As I’ve already covered the Microsoft.PowerShell.SecretManagement and Microsoft.PowerShell.SecretStore PS modules in an earlier post, I’ll follow on the premise and store the client secret we created in the local vault. This way, I don’t have to save the client secret in the code as plaintext. To do this, we can store the Application ID and Client secret in a PSCredential object to the store,
$credential = Get-Credential
Set-Secret -Name azkv-01 -Secret $credential
In the Windows PowerShell Credential request window, for User Name input the Application (client) ID of the Azure AD application and for password input the Client Secret value we copied into a notepad earlier.
I’ve also created another secret as string in the local vault with my tenant ID value.
Putting this all together, we can use these below lines in PowerShell automation scripts,
$vpwd = (Import-CliXml "C:\Scripts\vpd.xml").Password
Unlock-SecretStore -Password $vpwd
$TenantId = Get-Secret -Vault CredsDB -Name TenantId -AsPlainText
$credential = Get-Secret -Vault CredsDB -Name azkv-01
Connect-AzAccount -ServicePrincipal -Credential $credential -Tenant $TenantId
To retrieve the secure string stored in the Azure Key vault, I’m using these lines below. Also for demo purposes, I’m including the -AsPlainText to the Get-AzKeyVaultSecret cmdlet but as I mentioned earlier, we can store this secure string to a variable and pass it on to other cmdlets.
$kvName = Read-Host "Enter a name for Key Vault"
$SecName = Read-Host "Enter a name for secret"
Get-AzKeyVaultSecret -VaultName $kvName -Name $SecName -AsPlainText
#or
$secruretext = (Get-AzKeyVaultSecret -VaultName $kvName -Name $SecName).SecretValue
I know this was a lengthy post and it may have gotten a little confusing right at the end with too many things named vault🤷♂️
Hope this helped you out in figuring out in including Azure Key Vault in your PowerShell automations.
Thank you for stopping by ✌