Managed Service Accounts (MSA) introduced in Server 2008 R2 helps reduce risk of system accounts running services being compromised.
Managed Service Accounts and its benefits
Standalone managed service accounts (sMSAs) are managed domain accounts that we use to help secure one or more services that run on a server. They can’t be reused across multiple servers. sMSAs provide automatic password management, simplified service principal name (SPN) management, and the ability to delegate management to other administrators.
Windows Server 2012 introduced Group Managed Service Accounts (gMSAs) to over the limitation in sMSA as it can only be used on one server and not in cluster and NLB services.
Group managed service accounts (gMSAs) can run on a single server or on a server farm, such as systems behind a network load balancing or Internet Information Services (IIS) server. The Group in Group Managed Service Account stands for the ability to assign one gMSA to a group of computers.
Both sMSAs and gMSAs,
- Set strong passwords – Use 240-byte, randomly generated complex passwords
- Minimizing the likelihood of a service getting compromised by brute force or dictionary attacks
- Cycle password regularly – Windows automatically changes the password every 30 days
- Eliminating the need of scheduling password changes and minimizing downtime
- Support simplified service principal name (SPN) management
Setup and Configure MSAs
Below I’ll go through steps on how to setup sMSAs and gMSAs in an AD environment.
Create the Key Distribution Services Root Key
Domain Controllers (DC) require a root key before we can start creating sMSA or gMSA accounts. A one-time operation has to be performed to create a KDS root key.
The DCs will wait up to 10 hours from time of creation to allow all DCs to converge their AD replication before allowing the creation of a sMSA or gMSA. The 10 hours is a safety measure to prevent password generation from occurring before all DCs in the environment are capable of answering sMSA/gMSA requests.
Run the following PowerShell command on the domain controller:
Add-KdsRootKey –EffectiveImmediatelyFor test environments with only one DC, to use the key immediately in the test environment, you can run this command:
Add-KdsRootKey -EffectiveTime ((get-date).addhours(-10))
To make sure the KDS root key was successfully created and to successfully test it, use the following cmdlets,
Get-KdsRootKey
Test-KdsRootKey -KeyId (Get-KdsRootKey).KeyId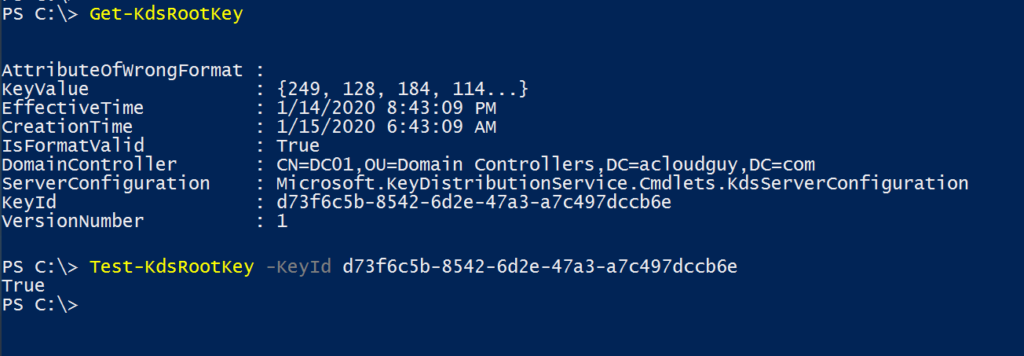
Can also be validated with a 4004 event has been logged in the KdsSvc (Applications and Services Logs –> Microsoft-Windows-KdsSvc/Operational) event log,

objectClass difference between a sMSA and gMSA in AD,
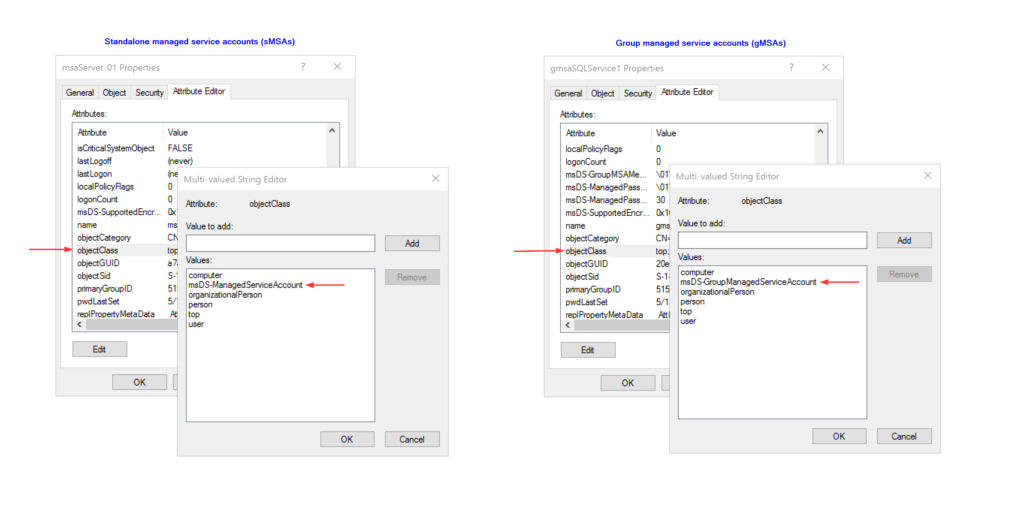
Create and Install a standalone Managed Service Account (sMSA)
To create a new enabled sMSA account in AD, use the below cmdlet,
$msaName = Read-Host "Enter name of desired MSA name"
New-ADServiceAccount -Name "$msaName" -Enabled $True -RestrictToSingleComputer
To link the newly created sMSA to a computer/server.
Note: In my case I’m using the same PS session and I have cleared variables. Hence I’m reusing the ‘$msaName’ variable. The server/computer name in my scenario is SERVER-01. You’ll have to modify it accordingly.
$Server = Get-ADComputer -identity SERVER-01
Add-ADComputerServiceAccount -Identity $Server -ServiceAccount $msaName
sMSA and gMSA are created in the container CN=Managed Service Accounts by default
Use below cmdlet to get properties to the sMSA
Get-ADServiceAccount msaServer-01
To use MSA / gMSA on target servers or workstations, you first need to install the AD PS module. Run the below cmdlet in PS run as administrator:
Add-WindowsFeature RSAT-AD-PowerShellOn the target server where the service account needs to be installed and use the below cmdlets to install the account and test it,
$Account = Get-ADServiceAccount -Filter "Name -eq 'msaServer-01'"
Install-ADServiceAccount $Account

Test-AdServiceAccount msaServer-01
Create and Install a group Managed Service Account (gMSA)
As mentioned earlier in this post, gMSAs are only available to Windows Server 2012 or later versions.
Before getting started:
- Ensure your forest schema is updated to Windows Server 2012
- Make sure you have deployed a master root key for AD
Before creating the gMSA account, create a domain security group and add servers that will be allowed to use the password for this gMSA. I used the console to create a group but PS is another way to go.

To create a gMSA, use the command:
Note: The service account samAccountName attribute must not be longer than 15 characters.
New-ADServiceAccount -name gmsaSQLService1 -Enabled:$true -DNSHostName gmsaSQLService1.acloudguy.com -PrincipalsAllowedToRetrieveManagedPassword SQLServers –verboseOn the target server where the gMSA needs to be installed and use the below cmdlets to install the account and test it,
$Account = Get-ADServiceAccount -Filter "Name -eq 'gmsaSQLService1'"
Install-ADServiceAccount $Account

Test-AdServiceAccount gmsaSQLService1
To change a gMSA’s allowed servers, use the below cmdlet:
Set-ADServiceAccount -Identity gmsaSQLService1 -PrincipalsAllowedToRetrieveManagedPassword 'New-SQLServers' –verboseAssociate gMSA in application/service
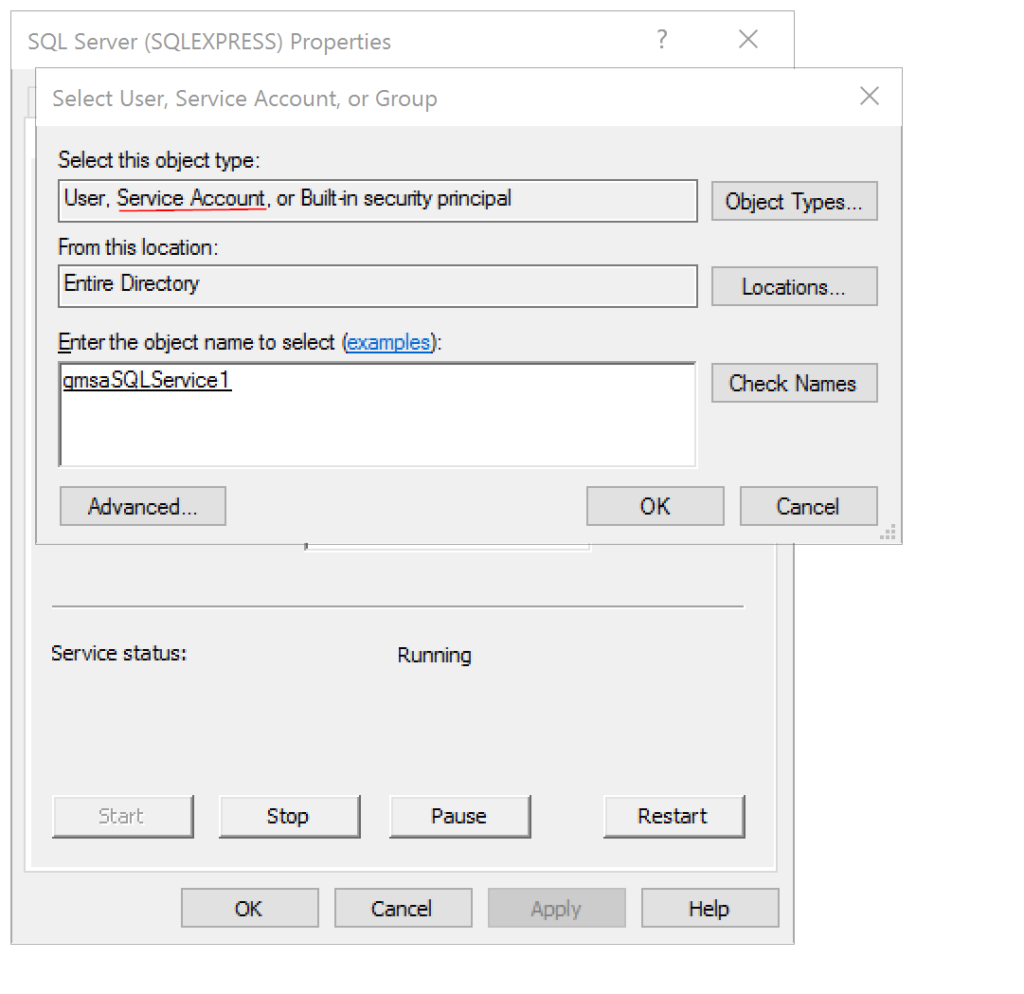
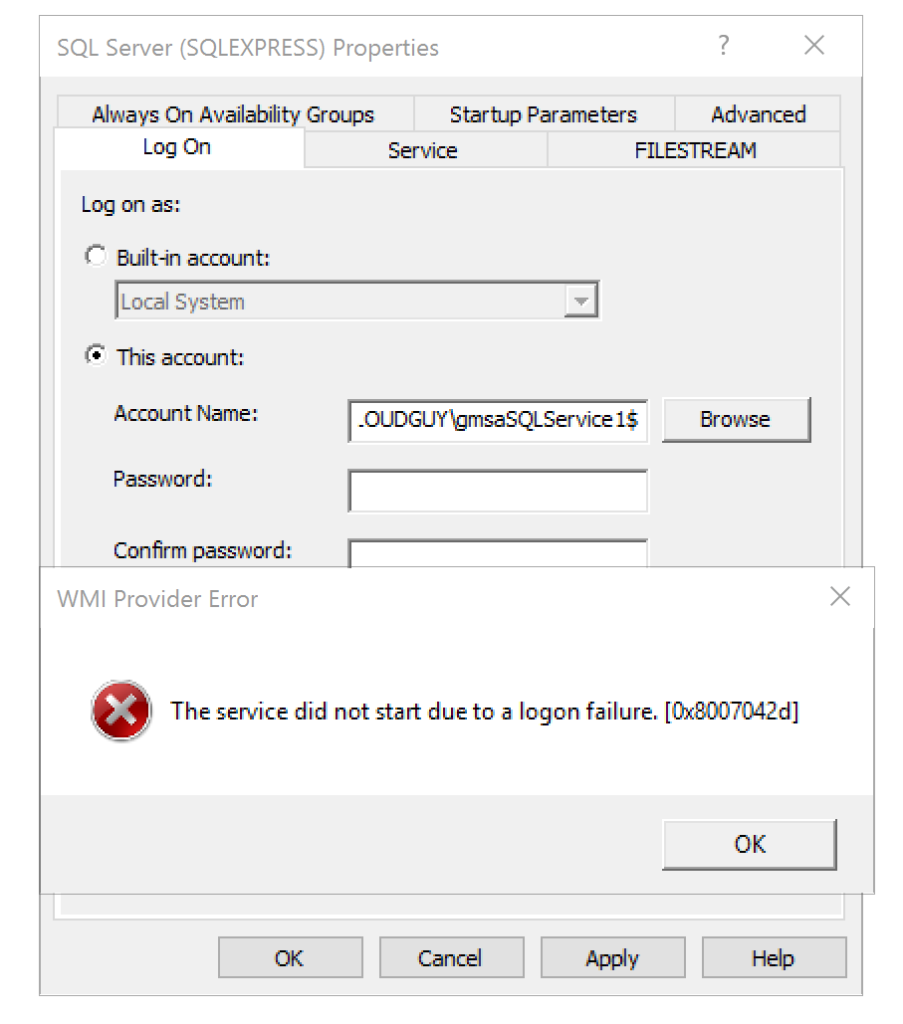
In my scenario, I’m using the newly created gMSA in an SQL server configuration. Add a $ at end of the account which specifies the account is a ‘Service Account’. Don’t specify any password. Make sure to select the ‘Service Account’ object type.
- Open SQL Server Configuration Manager
- Select SQL Server Services, right-click the service and select Properties
- Select the Log On tab
- Click Yes when prompted to restart the service

When to use
Use sMSAs when there are one or more services deployed to a single server and gMSA can’t be used. Check with the application vendor to determine if sMSA is supported. If they can’t, you must test the application in a test environment. Although one sMSAs can be used for more than one service, it is recommended that each service have its own identity when it comes to auditing.
gMSAs should be the preferred type for on-premises services, as you can add servers to the AD group and makes it easier.
To run applications and services with gMSA, check vendor’s documentation to see if it is supported. Currently gMSA is supported in IIS, SQL Server, AD LDS, Exchange Server.
Issues you may encounter
- sMSA can only be used on one computer/server. When you try to install it on a second server, you’ll get a warning prompt like in screenshot below,

- ‘Cannot install service account. Error Message: ‘{Access Denied}’ error when you install a gMSA to a server.

In my scenario, the server was not setup as ‘PrincipalsAllowedToRetrieveManagedPassword’. To determine which group is allowed to use the gMSA, use the below cmdlet:
Get-ADServiceAccount gmsaSQLService1 -properties * | Select Name, PrincipalsAllowedToRetrieveManagedPassword | fl
I added the SQL server to the ‘New-SQLServers’ AD group and run the cmdlets again to install the gMSA. I had to reboot the server for the membership to be updated.
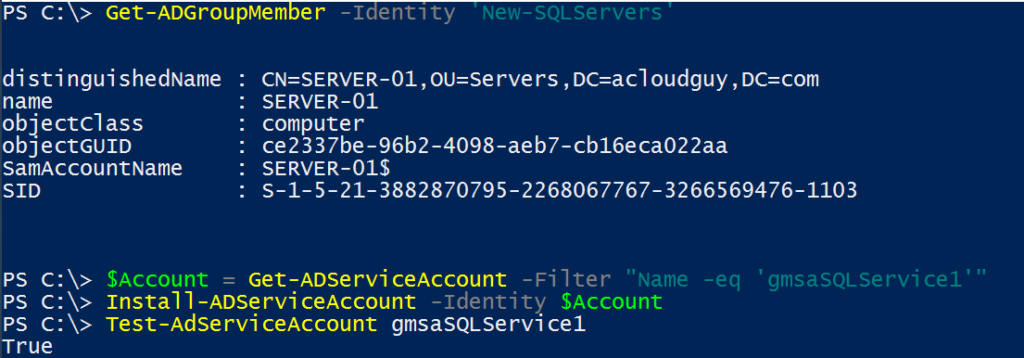
- Another similar issue you may face is the ‘The Service did not start due to a logon failure’. This is pretty much a follow-up of the previous error. Make sure the server object is in the group which can use the gMSA. And be sure to reboot the server.
Hope this post helped you get up and running with sMSA and gMSA in your environment.
Thank you for stopping by.✌