In Azure AD, Seamless Single Sign-on can be configured when Password Hash Sync or Pass through authentication is configured. Azure AD Seamless SSO automatically signs in users when they are in their corporate owned devices and one the corporate network. This helps save a lot of time without repeatedly typing credentials in to Azure AD and other Azure AD integrated applications.
When we enable Azure AD Seamless SSO, a computer account named AZUREADSSOACC is created in on-premises AD in each AD forest. This computer account represent Azure AD in the on-premises AD. Considering how important this computer object is, it is better to take the following steps to protect it,
- Move it into a OU,
- Where they are safe from accidental deletions
- Where only domain admins have access
- Ensure that Kerberos delegation on the computer account is disabled
- No other accounts in AD have delegation permissions
- This can be easy to miss if you have permissions sprawl
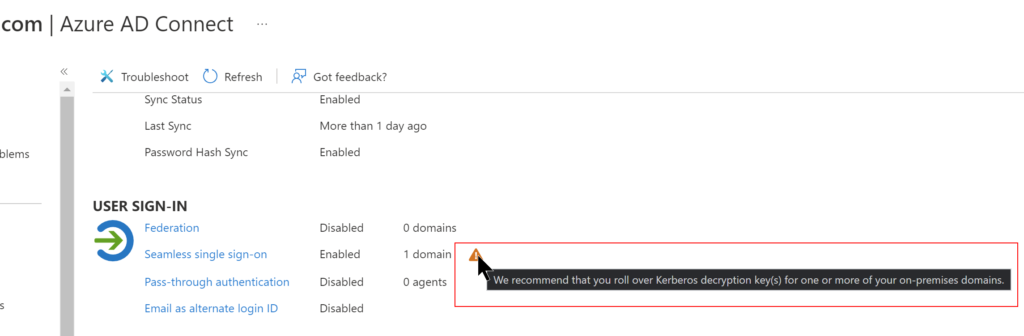
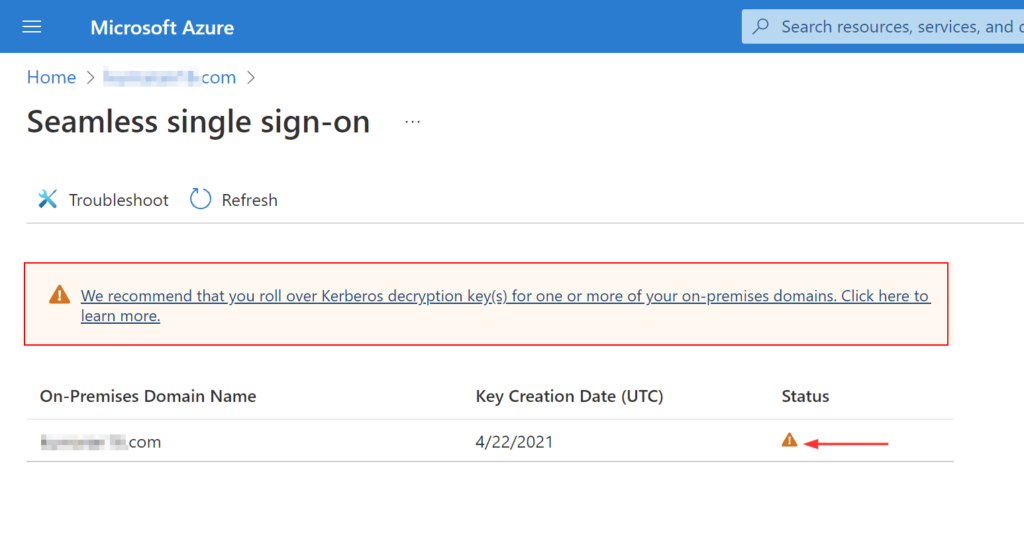
The Kerberos decryption key for this computer account is securely shared with Azure AD. Microsoft recommends to roll over the Kerberos decryption Key at least every30 days. You will notice a warning when the key has not been updated in the past 30 days.
As I mentioned earlier, Microsoft recommends to roll over the keys at least every 30 days. Obviously, I can remember it promptly or even put a meeting invite in Outlook to recur 30 days, keep snoozing it to eventually dismiss the alert because I’m stuck doing something else on that day. I’m sure this feels very familiar to most of you reading this. 😂
This is a great scenario where automation can come in handy and I’ll go through the steps on how I implemented this.
Prerequisites
Below are the requirements for implementing this solution.
- Global admin account
- With MFA exception (preferably by origin IP)
- Administrator account on AD Connect server with logon as a batch job
- On-Premises AD domain admin account
- Domain account that has permissions to ‘login as batch service’ on the Azure AD connect server
I covered in later half of another post about securely storing credentials using PowerShell into a file. Run these below lines to store encrypted credentials into a text file. This is far better than storing the password in plain text.
Remember, this method is secure but not 100% safe.
$ADCred = Get-Credential
$ADCred.Password | ConvertFrom-SecureString | Out-File "C:\temp\ADCred_sec.txt"
$AzureAD = Get-Credential
$AzureAD.Password | ConvertFrom-SecureString | Out-File "C:\temp\AzureAD_sec.txt"
Enter the domain user and Azure AD user which has necessary permissions in this below script and save it.
$ADUser = 'domain.com\user' #Must be entered in the SAM account name format contoso.com\jdoe
$ADUserEncrypted = Get-Content "C:\temp\ADCred_sec.txt" | ConvertTo-SecureString
$OnPremADCred = New-Object System.Management.Automation.PsCredential($ADUser,$OnPremADCred)
$AzureADUser = 'admin@tenant.onmicrosoft.com'
$AzureADUserEncrypted = Get-Content "C:\temp\AzureAD_sec.txt" | ConvertTo-SecureString
$AzureADCred = New-Object System.Management.Automation.PsCredential($AzureADUser,$AzureADUserEncrypted)
Import-Module 'C:\Program Files\Microsoft Azure Active Directory Connect\AzureADSSO.psd1'
New-AzureADSSOAuthenticationContext -CloudCredentials $AzureADCred
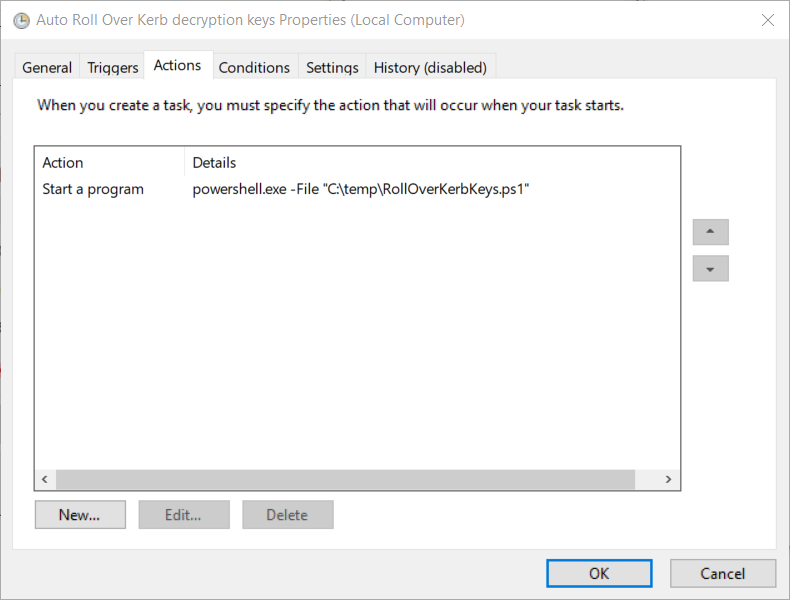
Update-AzureADSSOForest -OnPremCredentials $OnPremADCredSchedule to automate
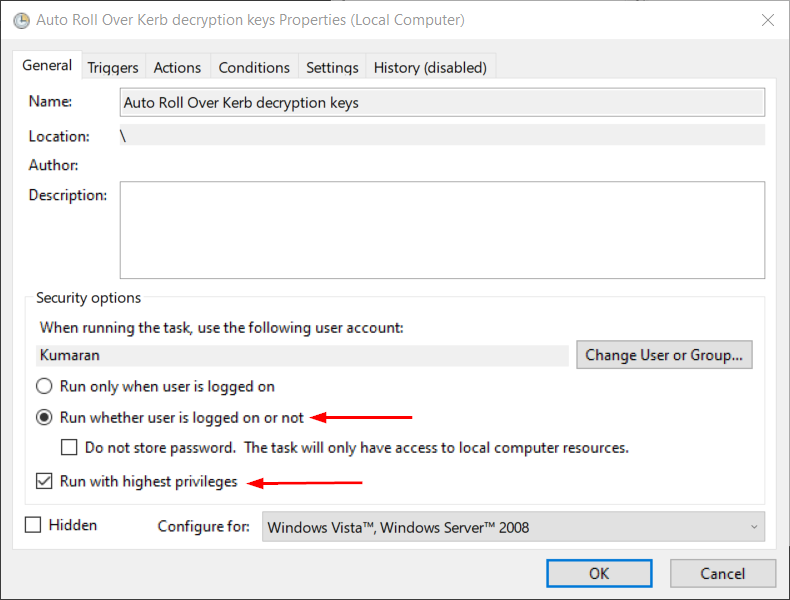
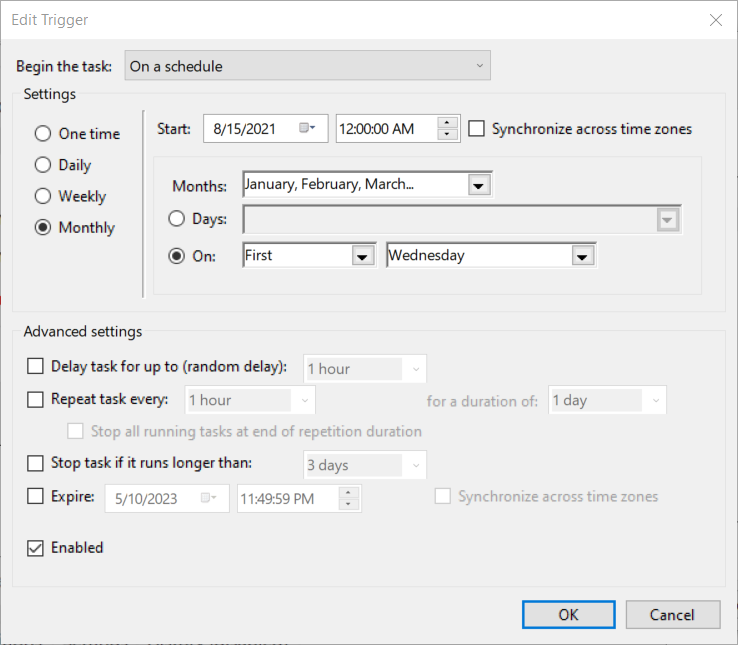
Once the script is stored, create a basic scheduled task to run it every month. Below are my settings,
After making sure all the setting, Click OK and you will be prompted for credentials. If you receive the below error,
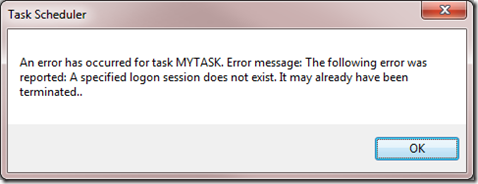
- Run gpedit.msc
- Look in Computer Configuration | Windows Settings | Security Settings | Local Policies | Security Options
- Double-click Network access: Do not allow storage of passwords and credentials for network authentication
- Set the policy to Disabled
- Go back to scheduled task to enter your credentials and click OK
Hope this helped you out in automating the Kerberos decrypting key roll over for the AZUREADSSOACC computer account.
Thank you for stopping by. ✌