I will go over steps on how to export the list of users with their UPN, Object ID, primary SMTP address and Alias email address.
The Get-AzureADUser cmdlet comes in handy to pull all the user details in this scenario. The Mail attribute contains the Primary SMTP address of the user and the Primary SMTP address and Alias email address are stored in the ProxyAddresses attribute in Azure AD. The ProxyAddresses attribute is a multi-value property. The Primary SMTP address can be easily identified as it is in this format, SMTP:user@emaple.com The upper-case SMTP denotes that it the primary email address.
When an object is synced from on-premise Active Directory to Azure AD, the values in the proxyAddresses attribute in AD are compared with Azure AD rules and then populated in Azure AD. So, the values of the proxyAddresses attribute in AD may not match the ProxyAddresses attribute in AzureAD.
Export all users to csv file
The below script will pull all Azure AD users,
Connect-AzureAD

$Output = @() #create an empty array

$AzureADUsers = Get-AzureADUser -All $true | Select DisplayName,UserprincipalName,ObjectId,Mail,ProxyAddresses #Get all Azure AD users

ForEach ($User in $AzureADUsers)
{
	$Output += New-Object PSObject -property $([ordered]@{ #fetch user detail and add to $output
		UserName = $User.DisplayName
		UserprincipalName = $User.UserprincipalName
		UserId = $User.objectId
		SMTPAddress = $User.Mail
		AliasSMTPAddresses = ($User.ProxyAddresses | Where-object {$_ -clike 'smtp:*'} | ForEach-Object {$_ -replace 'smtp:',''}) -join ','

	})
}
$Output | Export-csv "C:\tmp\O365Users_$((Get-Date).ToString("MMddyyyy_HHmmss")).csv" -NoTypeInformation -Encoding UTF8 #Export users to csv file
Microsoft recently announced they will disable basic authentication for all M365 tenants. This deadline has been pushed postponed due to the impact of COVID-19 across the globe.
Latest update: The latest from Microsoft is, effective October 1, 2022 Basic authentication will be disabled in all tenants.
The following components of Exchange Online will be affected,
Exchange Web Services(EWS)
POP
IMAP
Exchange ActiveSync
Remote PowerShell
Why is this a big deal?
Basic authentication uses username and password for client access requests. This used to be the industry standard during the time which organizations didn’t understand the cost of security breaches. It poses a significant security risk as Business Email Compromise (BEC) scams have exposed organizations to billions of dollars in potential losses. Check out this 2019 report from ProofPoint that goes into details.
Disabling Basic Authentication will help protect Exchange Online from brute force or password spray attacks. As the above mentioned report goes into, IMAP-based password-spraying campaigns are very effective in particular.
Beyond all this, Basic Authentication doesn’t enforce MFA and this should be the biggest driver for organizations to move away from it.
Is Basic Authentication enabled in your tenant?
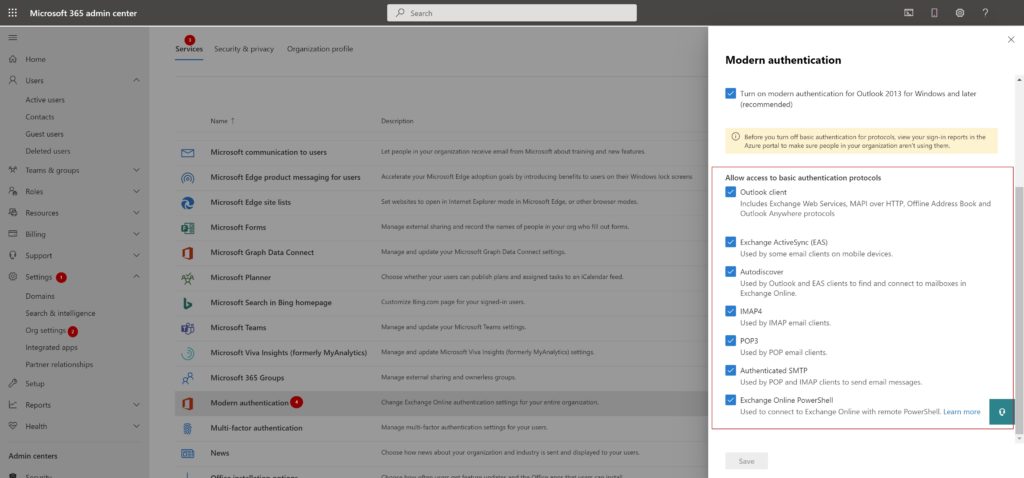
Here is how to check if Basic Authentication is enabled in your tenant,
Settings –> Org Settings –> Services –> Modern Authentication
Screenshot above shows how to check if ‘Basic Auth’ is enabled in tenant
Determine who is using Basic Authentication in your tenant
Before you turn off basic authentication for protocols, view your sign-in reports in the Azure AD portal to determine who is using it in your organization.
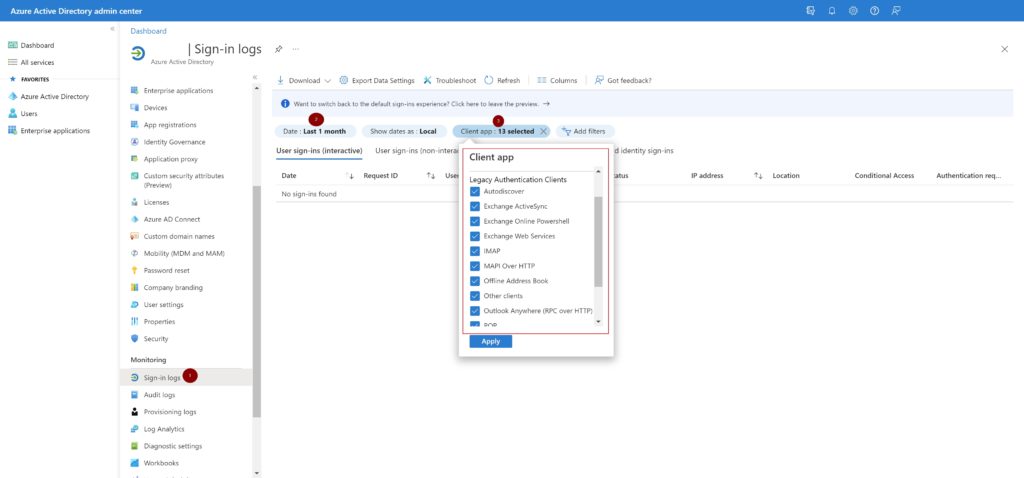
This can be determined using sign-in logs in Azure AD.
In your Azure AD admin center, Click the ‘Sign-in logs’ blade.,
Select ‘Last 1 month‘ in the Date
Add a ‘Client app‘ as a second filter, choose all options under the ‘Legacy Authentication Clients‘ and click ‘Apply‘
Azure AD sign-ins | Basic Auth filter
With this report information, you can contact the application and account owners to determine why Basic Authentication is still in use. This information will also come in handy later if you are planning to allow exceptions to these accounts/applications. I’ve covered it later in this post.
Disable Basic Authentication
Before you begin,
Verify Modern Authentication is enabled
Verify your email clients are Modern Authentication capable
In this post, I’ve elaborated how to block Basic Authentication using Azure AD conditional access.
IMO, the easiest method to disable Basic Authentication is to use authentication policies.
With Authentication policies you can,
Apply a default organization level policy that blocks Basic Authentication
Apply a per user policy to allow certain protocols. Example: ActiveSync
Create Authentication Policy
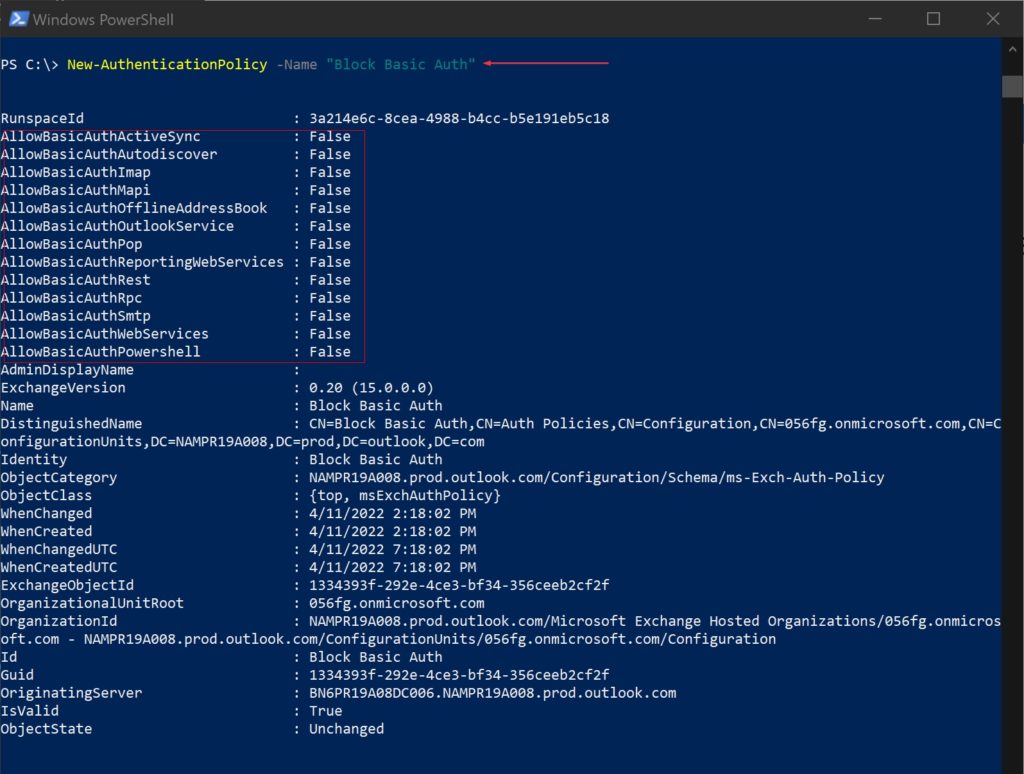
This creates an authentication policy named ‘Block Basic Auth’
New-AuthenticationPolicy -Name "Block Basic Auth"
When you create a new authentication policy without specifying any protocols, Basic Authentication is blocked for all client protocols in Exchange Online.
The default value of the AllowBasicAuth* parameters (switches) is False for all protocols.
Set Default Authentication Policy
The default policy is assigned to all users in the tenant who don’t have a specific policy assigned to them. To configure the default authentication policy for the organization, use this:
Authentication policies assigned to users take precedence over the default organization policy.
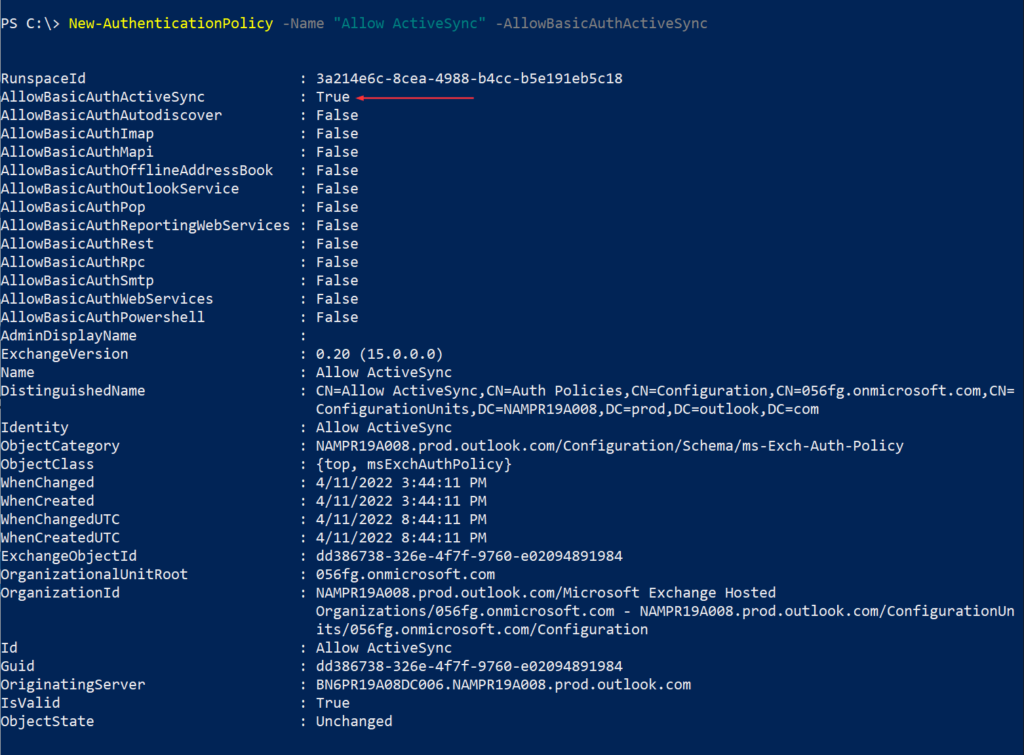
To enable Basic authentication for a specific protocol that’s disabled, specify the switch without a value
To disable Basic authentication for a specific protocol that’s enabled, use the value :$false
In this scenario, I’m creating an authentication policy to allow ActiveSync. This is sometimes typical in organizations where users will have Intune managed devices but would like to add second O365 email from a different tenant. The Outlook app prevents this but the built-in mail app can be used with ActiveSync to fetch email.
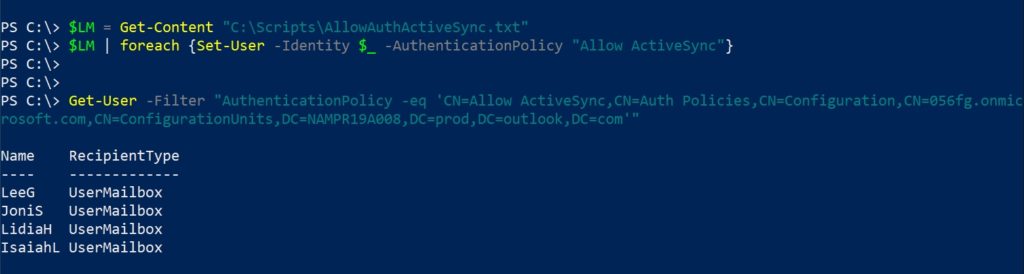
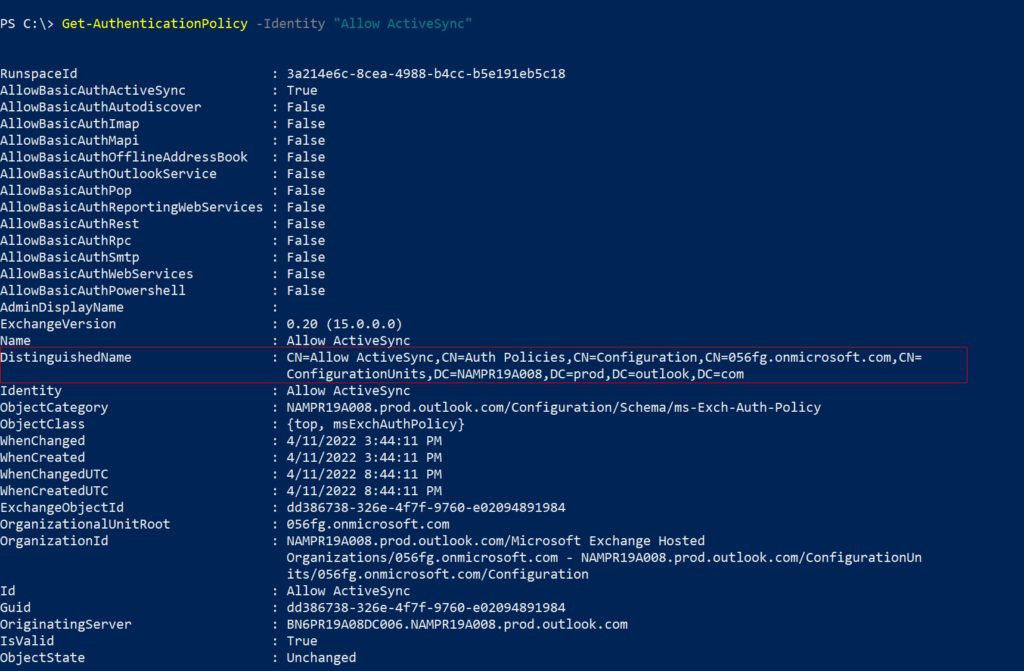
To get all users assigned to a policy you need to get the policy’s DN using the cmdlet Get-AuthenticationPolicy,
$PolicyId = Read-Host "Enter policy ID in distinguished name format"
Get-User -Filter "AuthenticationPolicy -eq '$PolicyId'"
Assign policy to user, confirm and get all users assigned to a policy
Determine policy DN using ‘Get-AuthenticationPolicy’
By default, when you create or change the authentication policy assignment on users or update the policy, the changes take effect within 24 hours. If you want the policy to take effect within 30 minutes, use the following syntax:
This example below immediately applies the authentication policy to multiple users. As I’m in the same PowerShell session and haven’t changed the variables you used to identify the users,
Please checkout Part I if you landed directly on this page.
This post is a continuation how to Forms and Power Automate can be used to create an approval workflow to automatically provision a Team. We will see the user’s experience here.
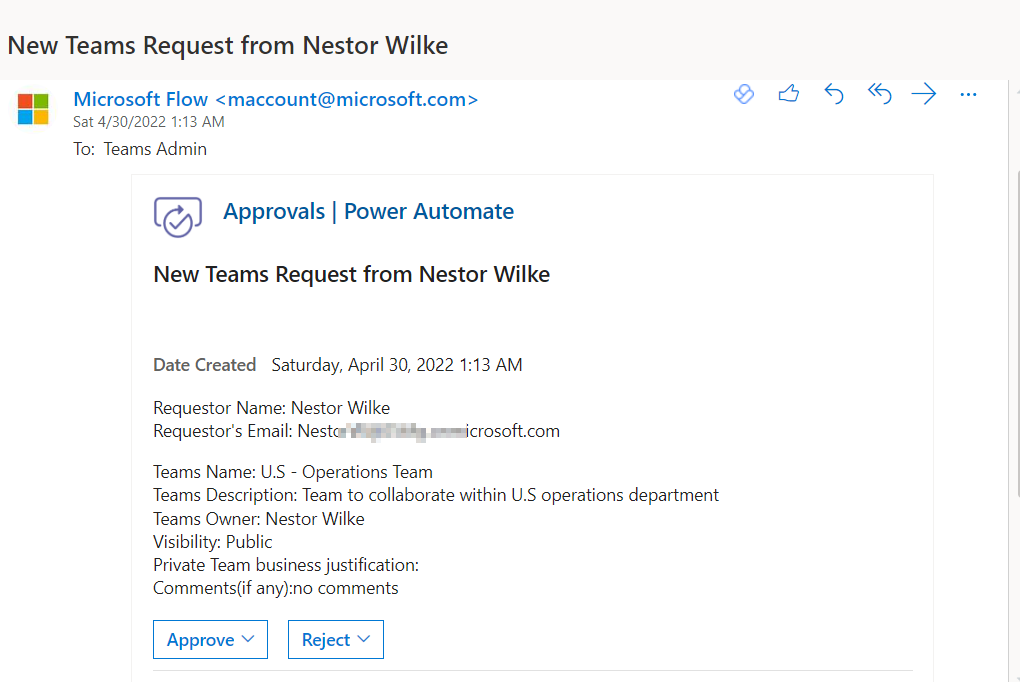
When user submits the Microsoft Form, the approver gets an email.
User’s responses
In my scenario, I’m using a service account called ‘Teams admin’ and I can see the email as below,
Email received by approver
In the Outlook.office.com, the approver can directly click on ‘Approve’ or ‘Reject’ and also add comments if they wish to.
Approver submitting approval in email
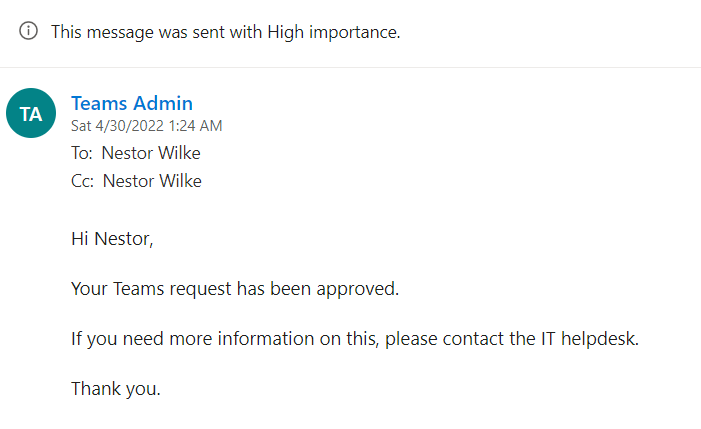
Once approved, the rest of the flow runs and at the end the user gets an email confirming the Team creation.
User receiving confirmation email
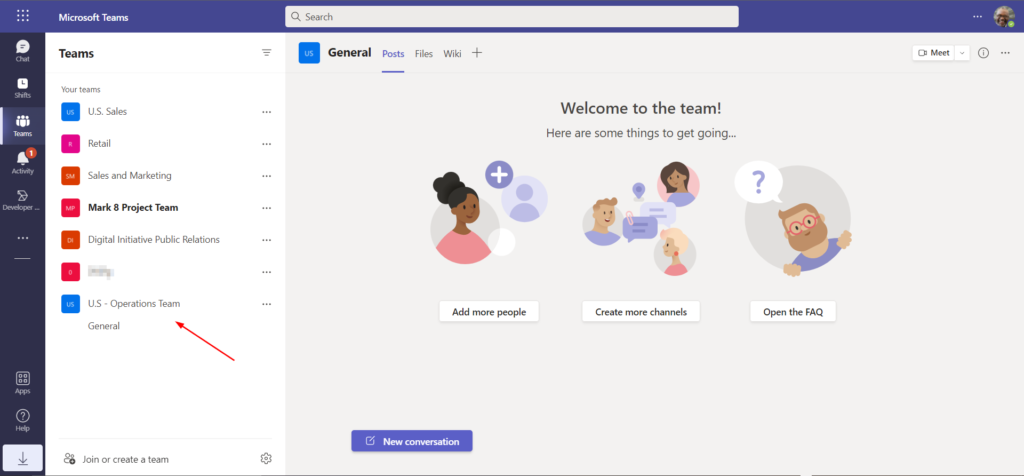
User can also launch Teams and check that he is part of the new Team that was created.
Created Team shows up in user’s Teams
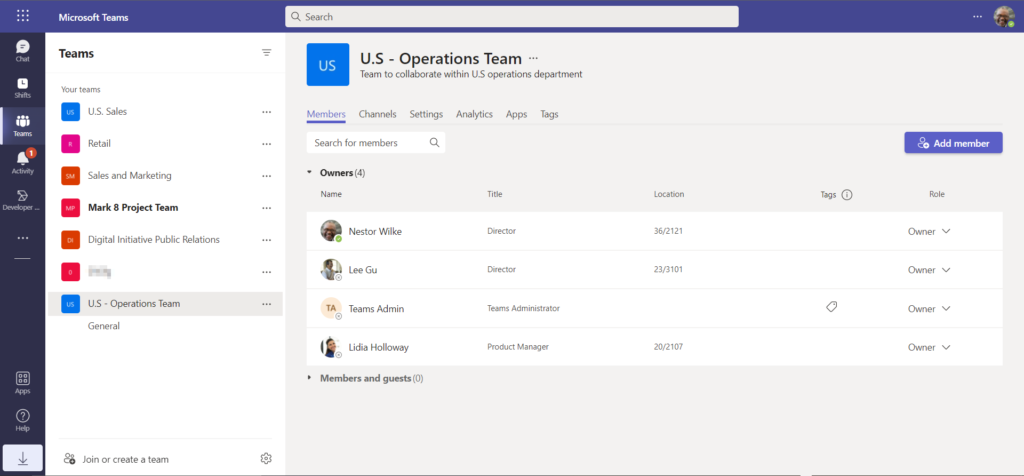
Requested owners
As you can see the ‘Teams admin’ service account is also a owner in the Team it created. This might become an issue during compliance audits and this can be fixed by adding a step in Power Automate with a HTTP request.
The HTTP request option is a premium feature and hence no screenshot here.
In a O365 tenant I manage, I had rolled out the Azure Information Protection labels from earlier. The recent requirement was to make sure the sensitivity labels will apply to group across services like Outlook, Microsoft Teams and SharePoint online.
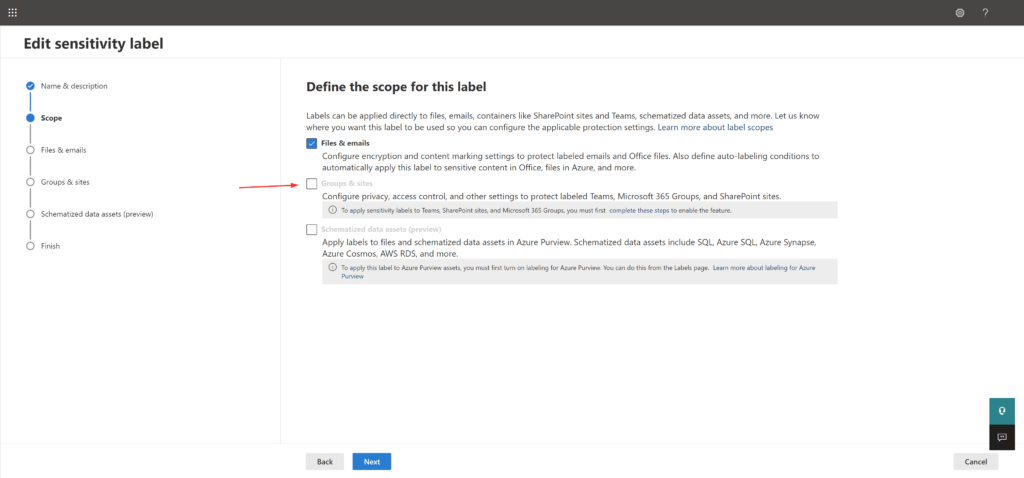
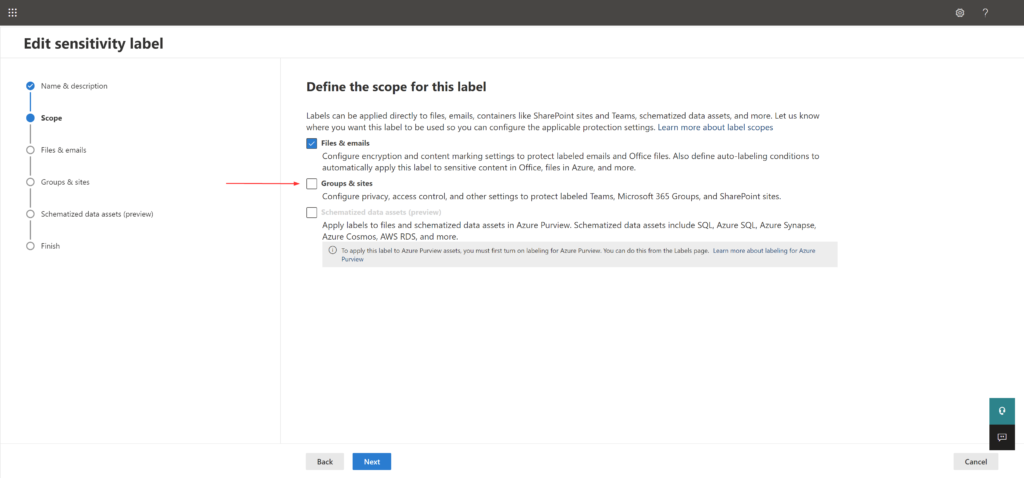
When I checked the sensitivity label, I noticed the ‘Groups and sites’ option greyed out and which lead me to research a bit into this and write my findings below,
Groups & sites greyed out
Enable sensitivity labels for containers in Azure AD
Sensitivity labeling for containers i.e., groups and sites, should enabled before we can configure the settings in the sensitivity labeling wizard. Else, it will be greyed out as in screenshot above.
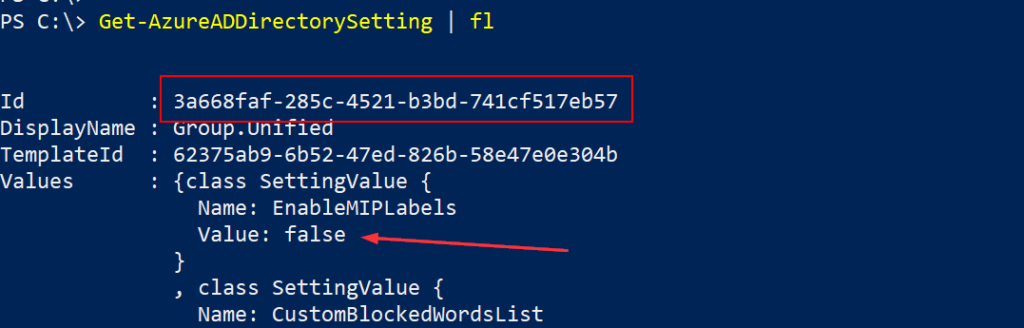
To determine current group settings for your Azure AD organization, use the below cmdlet. If no group settings are defined, this cmdlet won’t return any output value.
Get-AzureADDirectorySetting | fl
In my scenario, I have only one setting and it was easier to see it. But your organization might have more than one setting and in that case, you can use this below cmdlet to search and determine the setting.
Get-AzureADDirectorySetting -Id (Get-AzureADDirectorySetting | where -Property DisplayName -Value "Group.Unified" -EQ).id
EnableMIPLabels = false
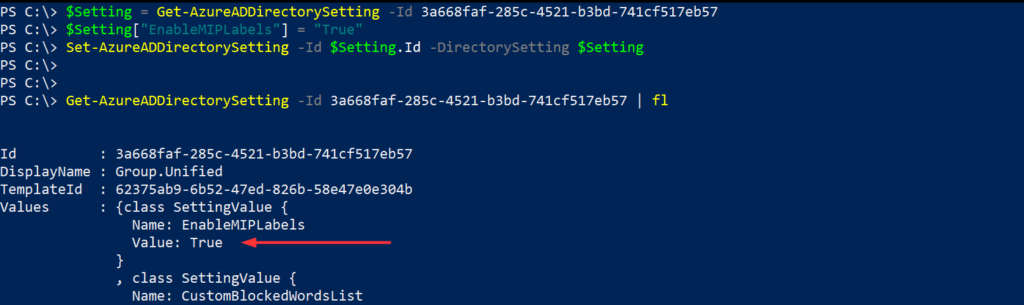
Below, I’m storing the value of the cmdlet’s output into the $Setting variable. And once stored, I’m setting ‘True’ as the value for ‘EnableMIPLabels’. I’m listing out both methods, what I used and what you can potentially use. The second method is much easier.
$Setting = Get-AzureADDirectorySetting -Id <Group.Unified policy's Id from your tenant>
$Setting["EnableMIPLabels"] = "True"
Set-AzureADDirectorySetting -Id $Setting.Id -DirectorySetting $Setting
Plus addressing or subaddressing is available in Exchange Online. Plus addressing is using a unique, dynamically created receive-only email addresses for mailboxes.
Basic syntax of an SMTP email address: @. Example, JohnD@domain.com
Plus addressing syntax: +@. Example, JohnD+statements@domain.com
The original email address must be valid one. The +tag value is arbitrary, although regular character restrictions for SMTP email addresses apply.
Here is a scenario, Let’s say the users’ email address is JohnD@domain.com. User can use plus addresses as unique addresses for services that you sign up for, right after the local part (JohnD) and add (string) of choice. So for instance, to receive all bank statement, the user can end up with something like this: JohnD+statements@domain.com
Plus addressing Limitations
When using plus addressing, there are a few things to keep in mind:
Plus addresses aren’t aliases in Exchange Online
Hence, it can be used only to receive messages and not send them
It does not resolve to a user’s name in Outlook clients, so it is easily identifiable in the To and CC fields
In a Hybrid environment, plus addressing won’t work for on-premises mailboxes that do not resolve in Exchange Online
Web Developers are aware of plus addresses and some online forms/services won’t accept a plus sign in the email field
Some subscription services require the user use the original email address that they subscribed with
Select Turn on plus addressing for your organization, and then select Save
Note: After the plus addressing is turned on by default in April 2022, you will see the option Turn off plus addressing for your organization if you are following the above steps. Which will be unchecked meaning it is turned on. So placing a checkmark will turn off plus addressing. See screenshot below.
Enable using Exchange Online PowerShell
Before proceeding further make sure you are connected to Exchange Online,
This setting will be effective only after plus addressing is turned on by default in all organizations starting in late April 2022. Before that happens, plus addressing can be disabled in the O365 tenant by using the AllowPlusAddressInRecipients parameter I described earlier with the value $false value. This can also be proactively set, you don’t have to wait for it to be turned on by default.